Torei
Project Constraints
The main constraint of this project was to design a smart user interactive product that was centered around the users inputs. For this to happen an Arduino must be incorporated and programed to work as the brain of these interactions.
project duration
5 weeks
SKILLS USED
Sketching
Iteration
Prototyping
Arduino
CAD
3D Printing

The user


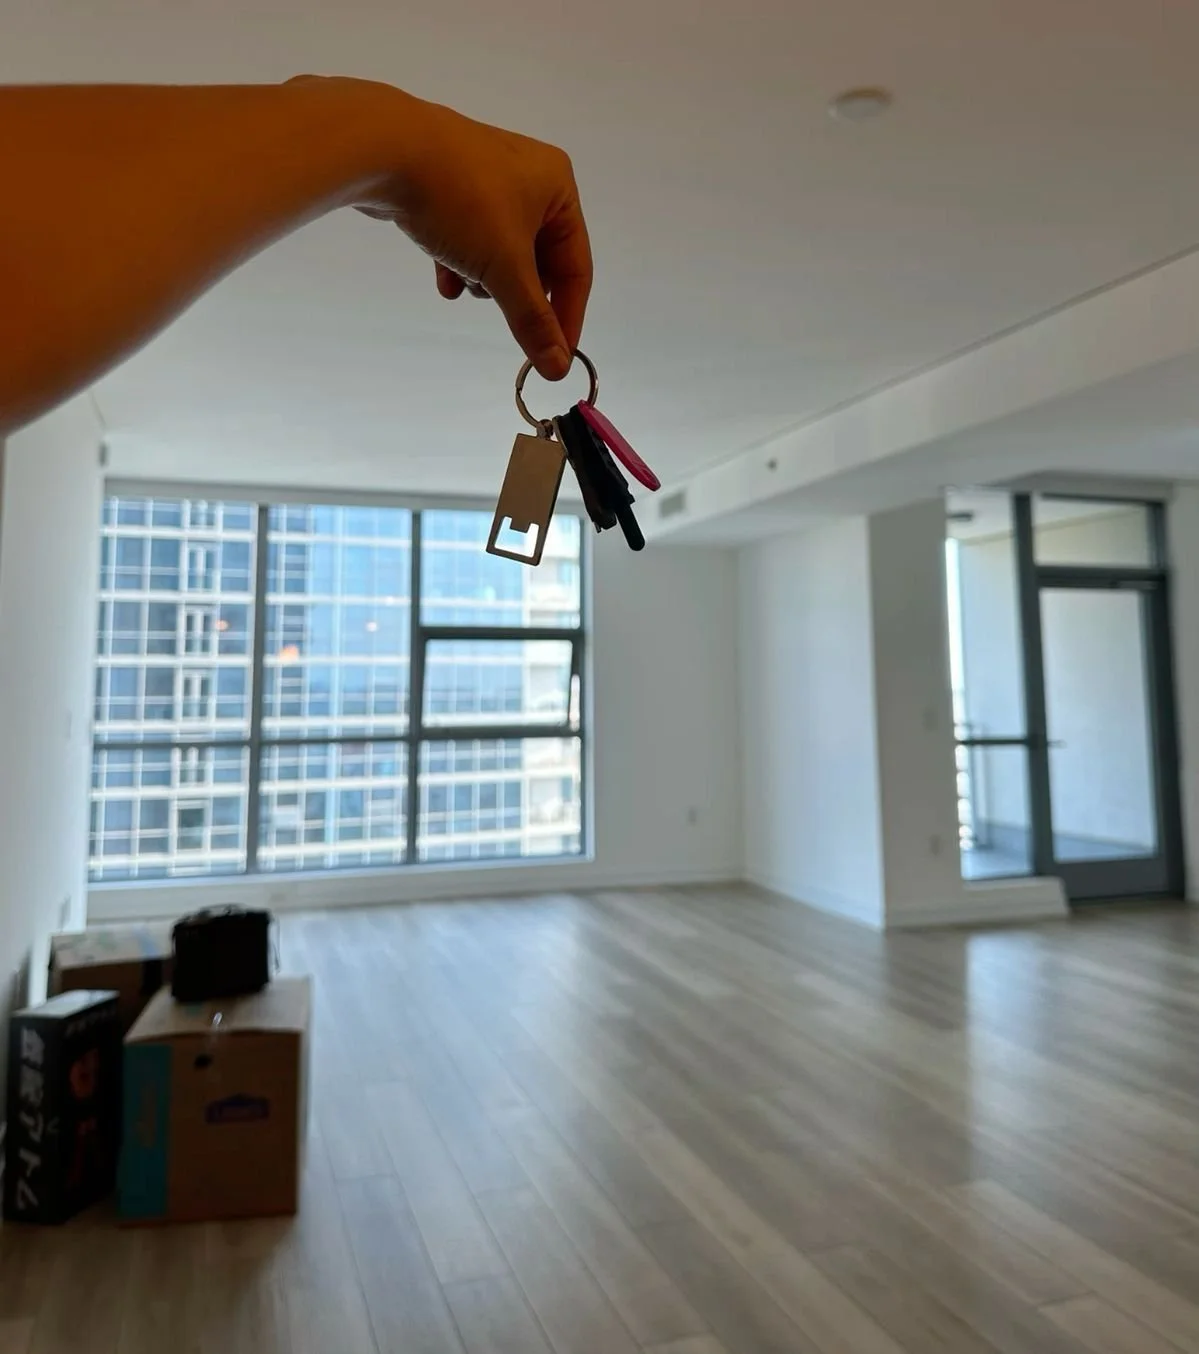
My intended user for this product is first time renters who aren’t used to having to carry keys and other items with them at all times. This product is intended to help them to always remember their most important items.
The problem
Dissecting the process helped me to understand where the pain points are. This aided the design greatly because it helped me to know what exactly I wanted to solve with my final product.
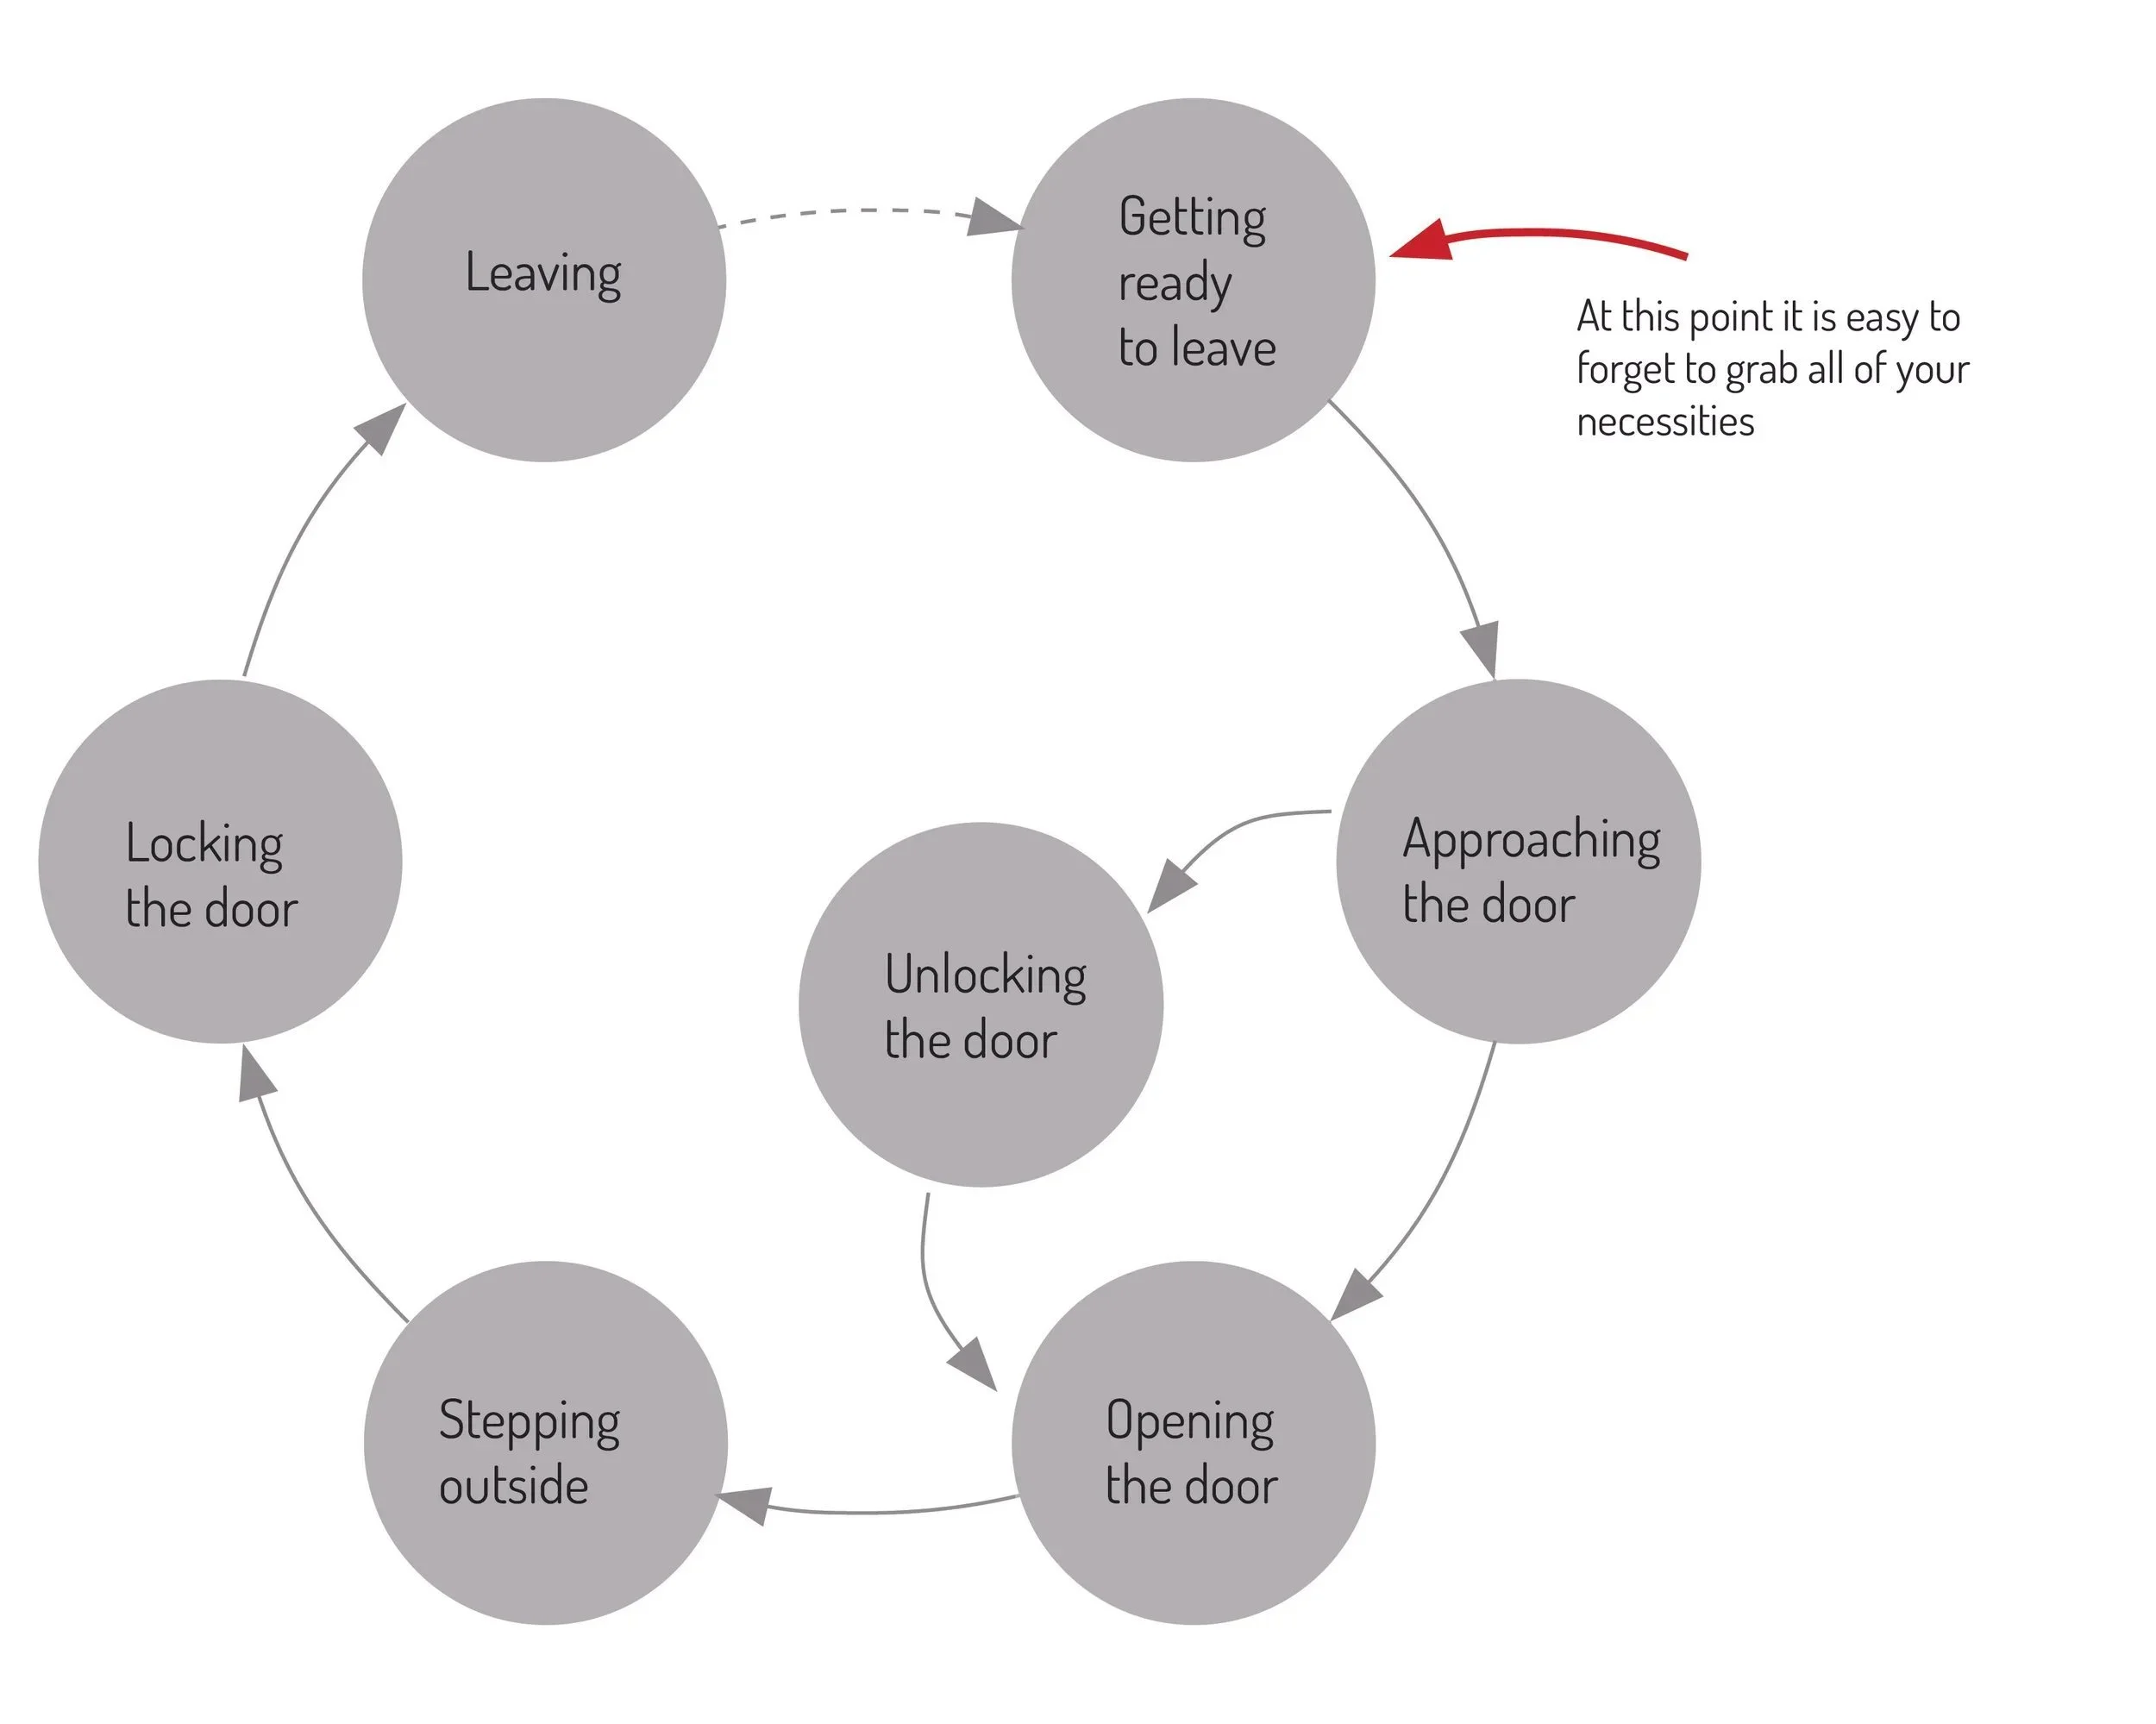
Task Analysis
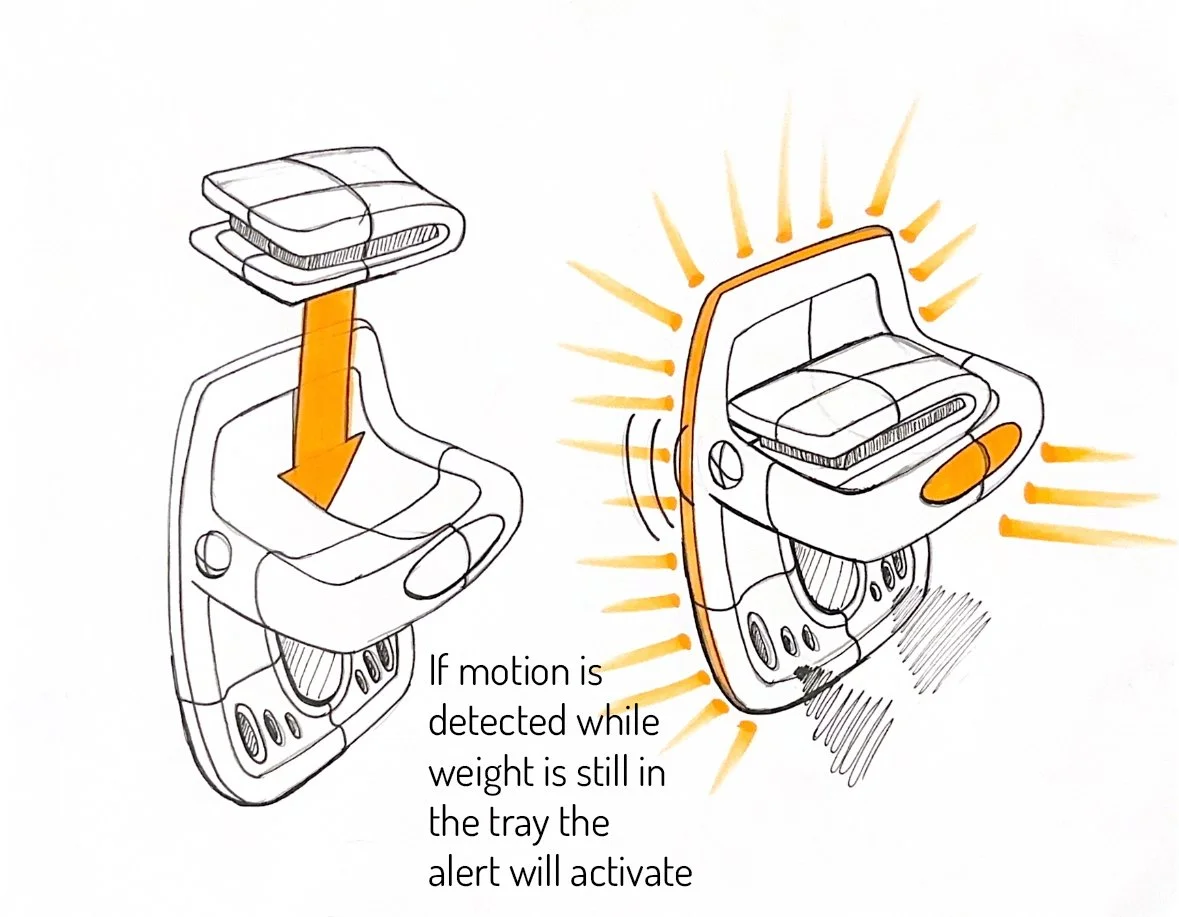
In order to help the user remember their important items this system both gives them a consistent spot to place their items while also helping to always remember to take these items along when they leave.
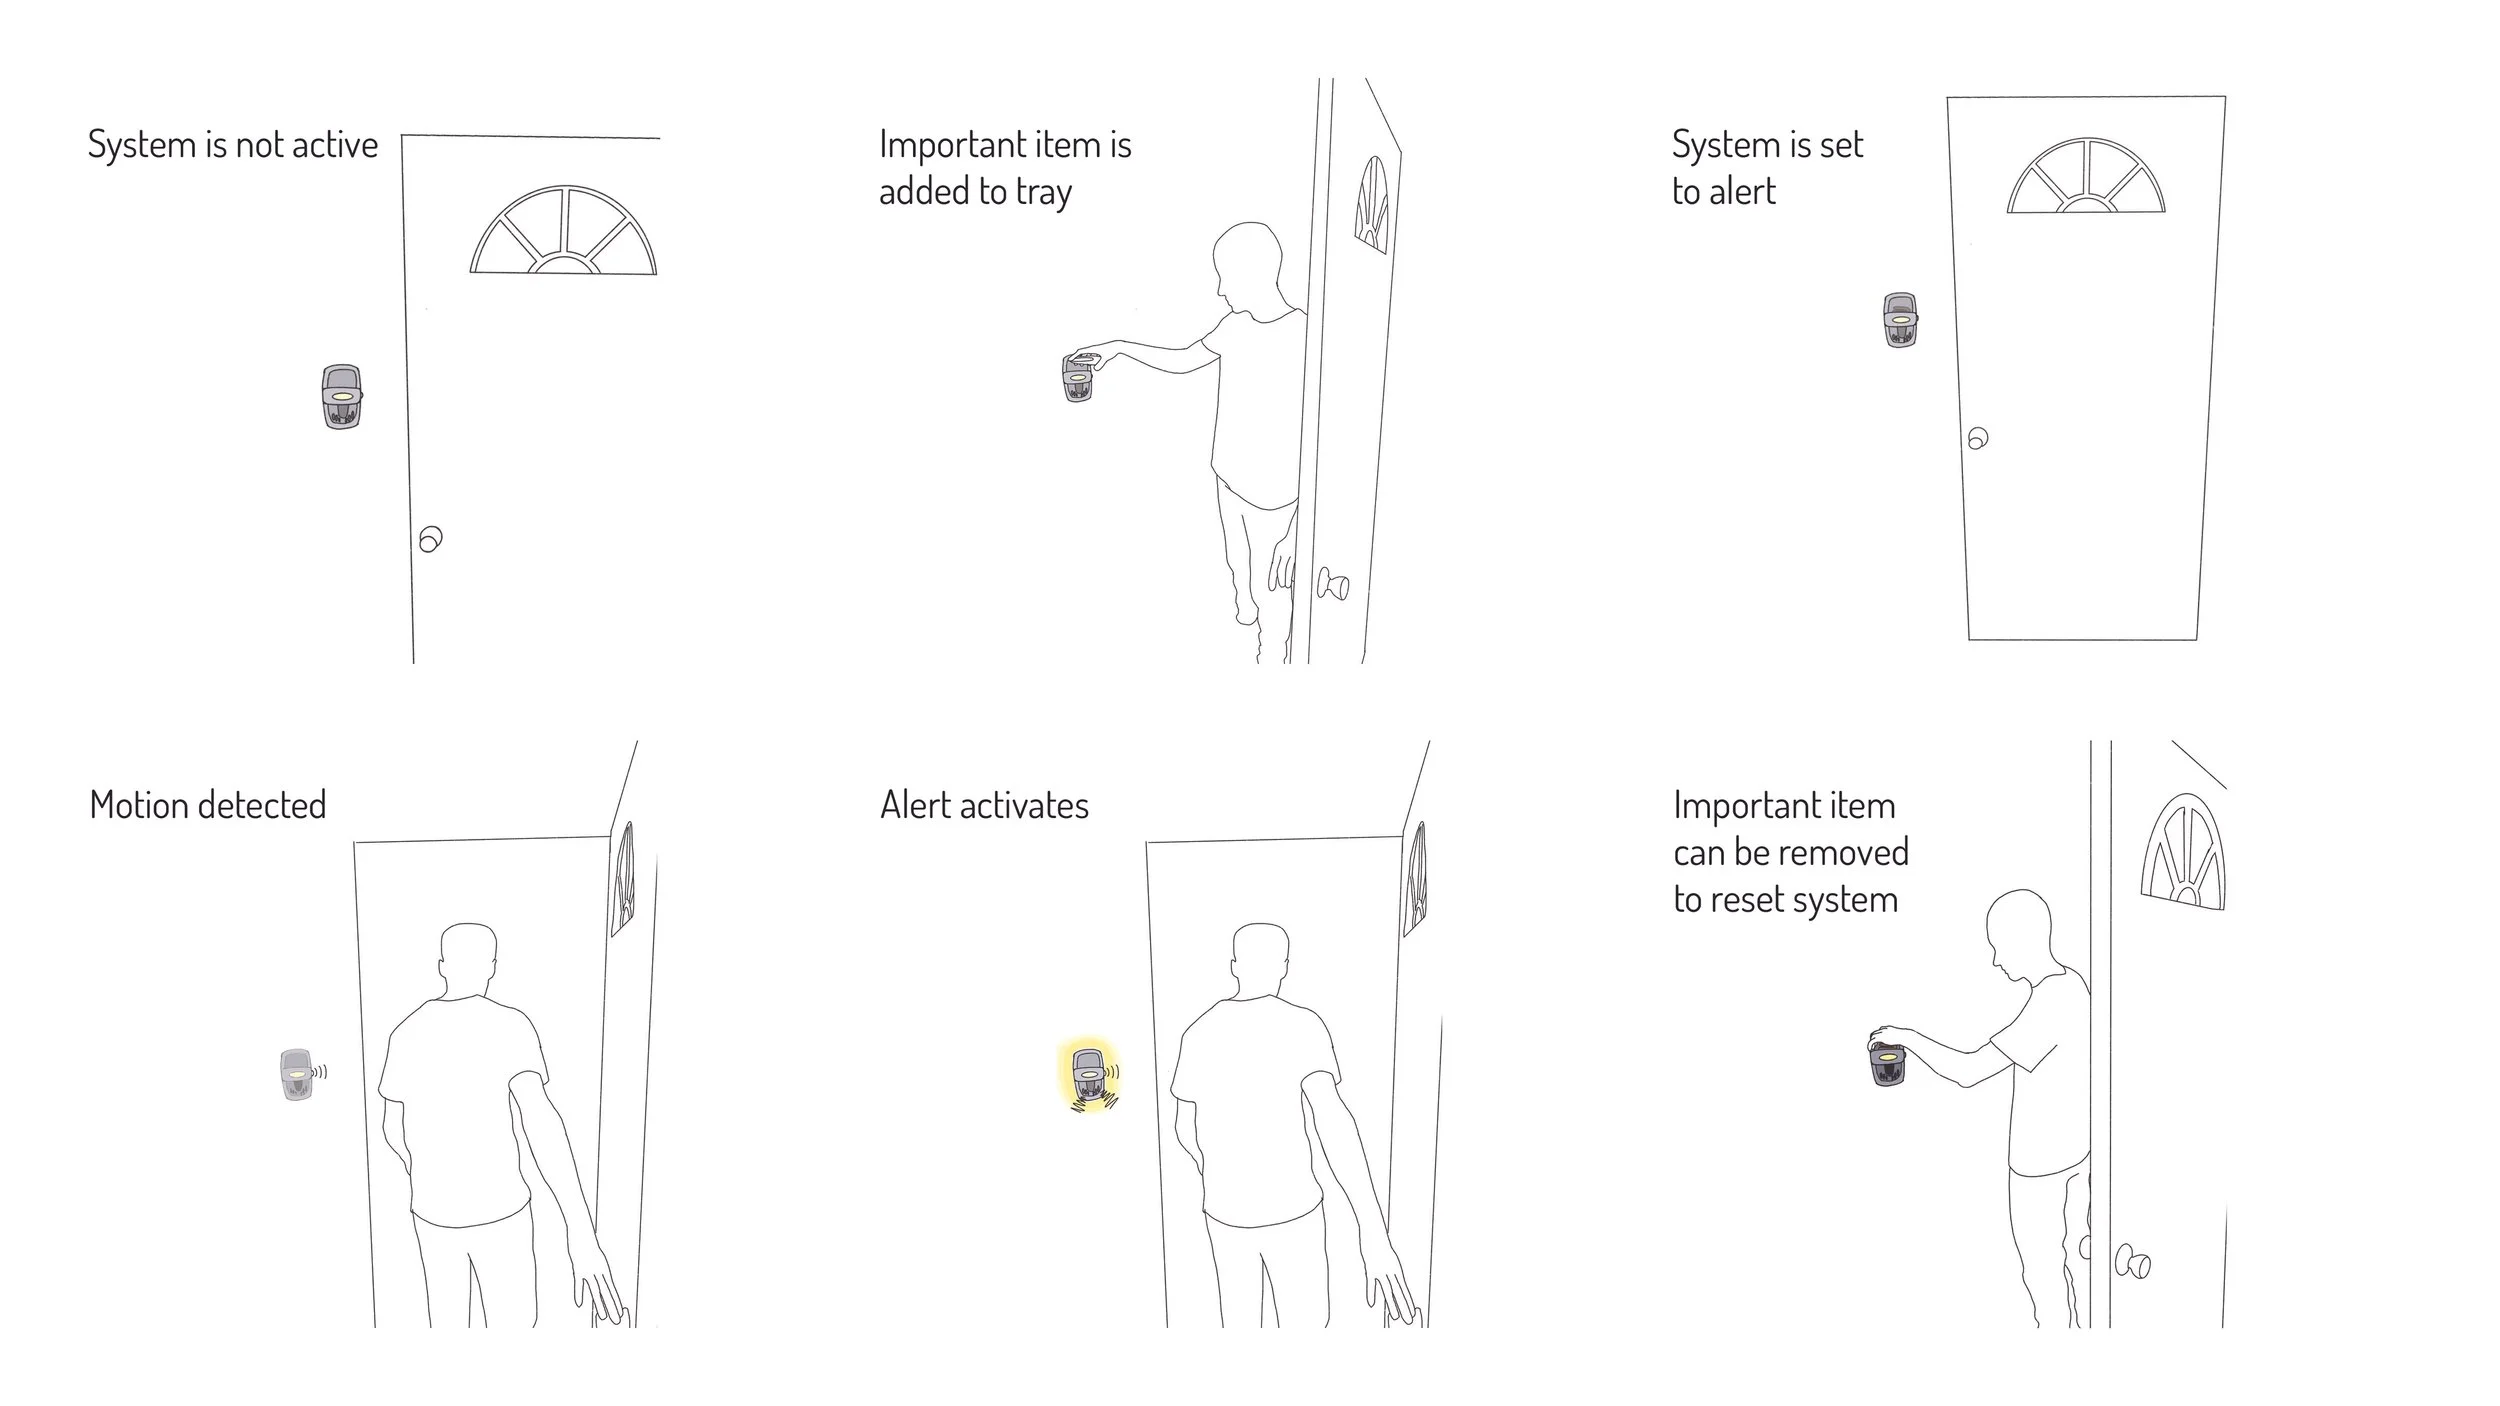
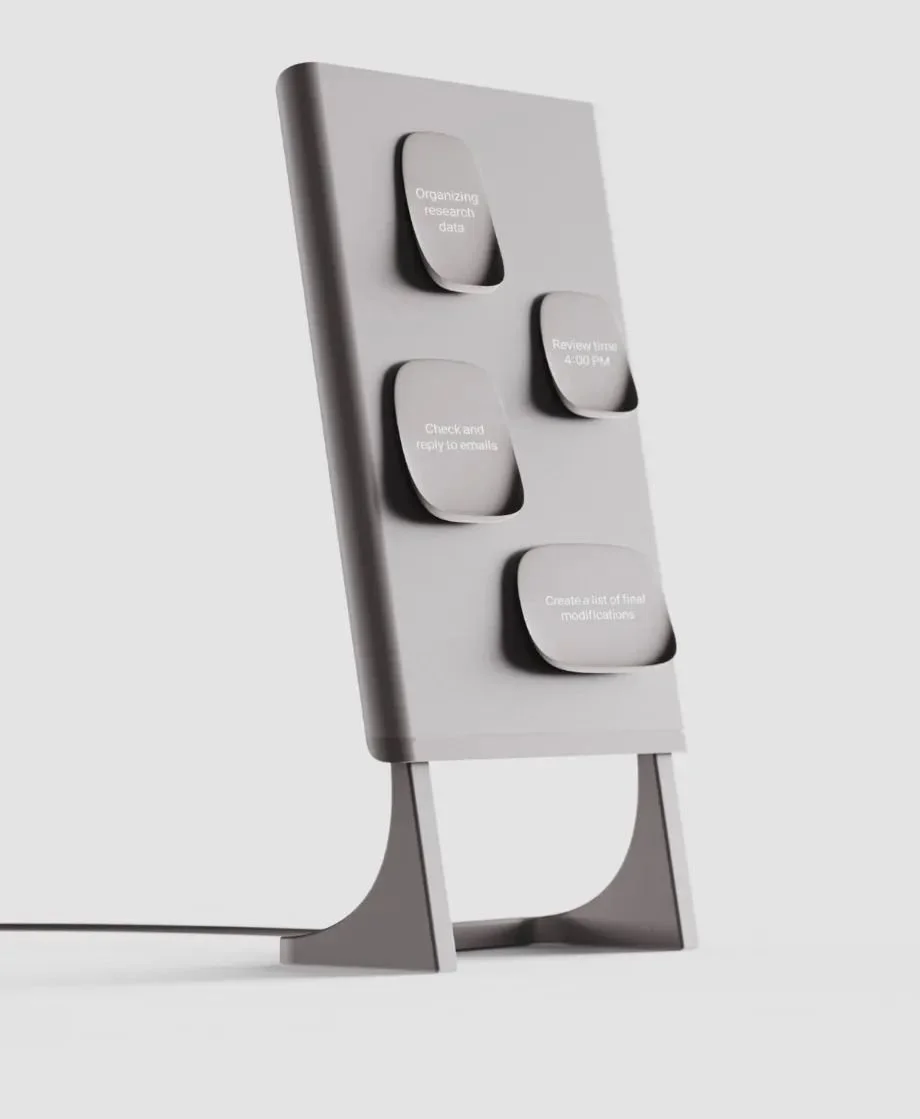
HMI Diagrams
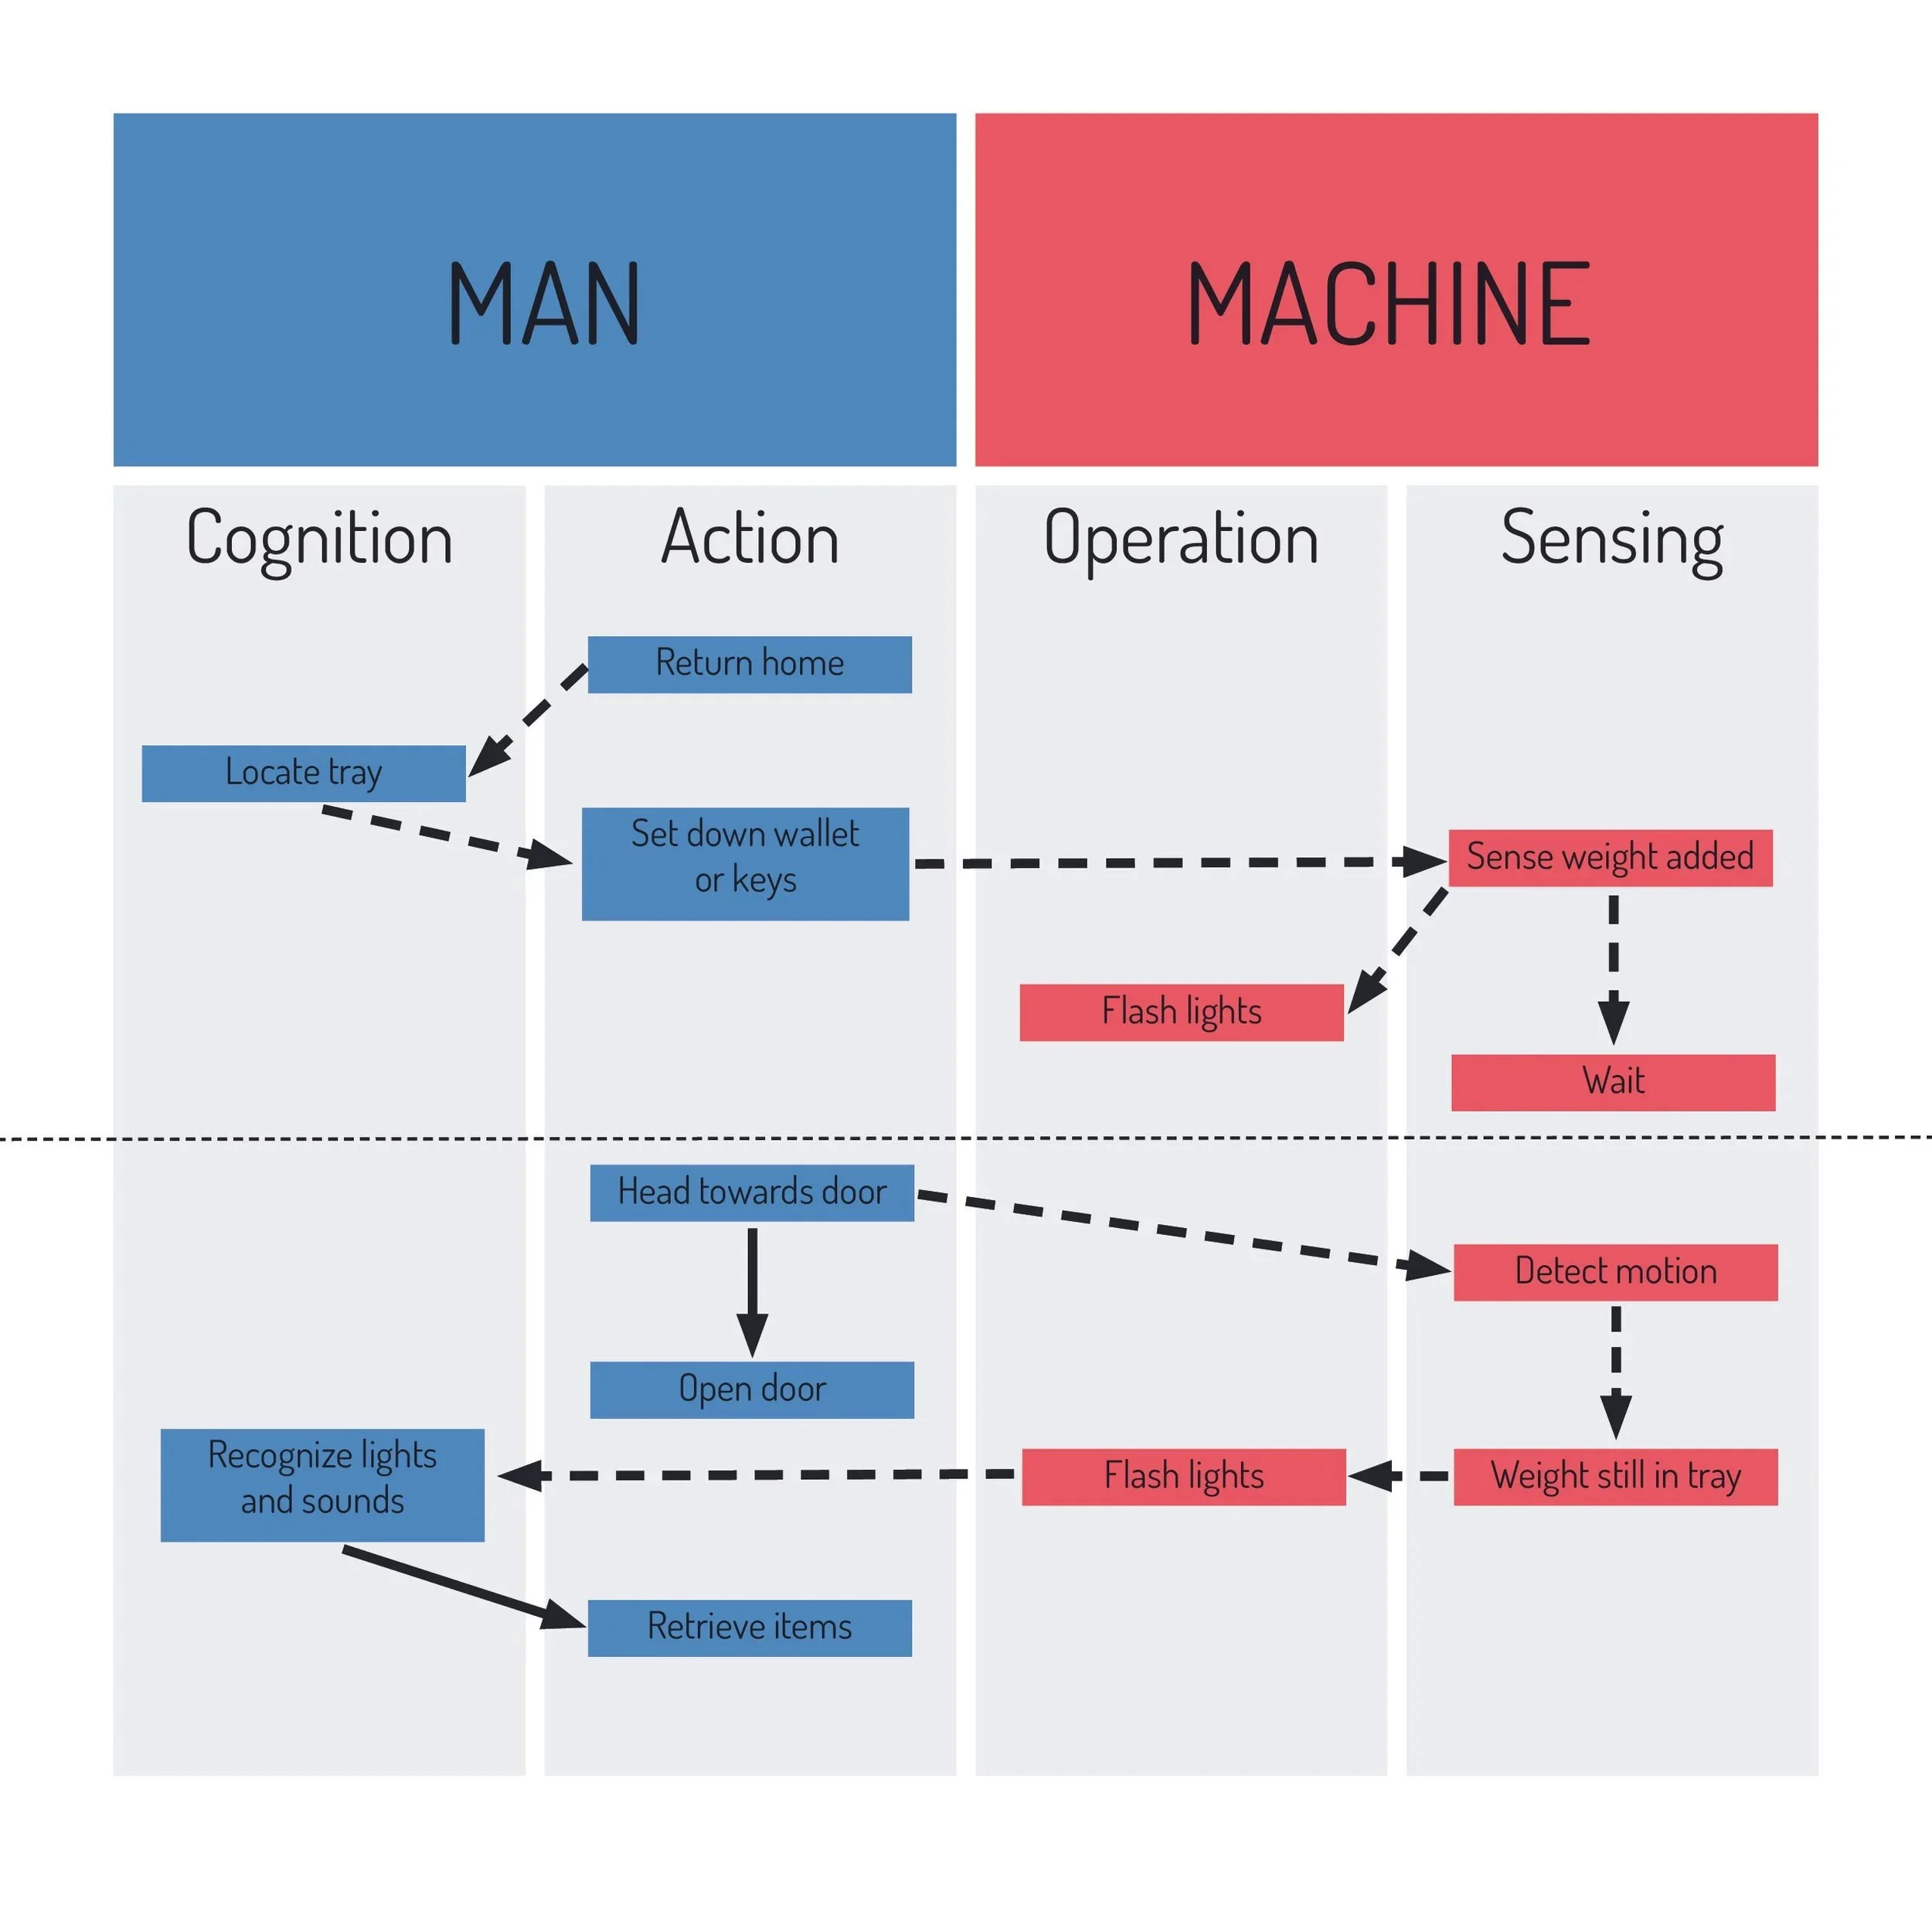
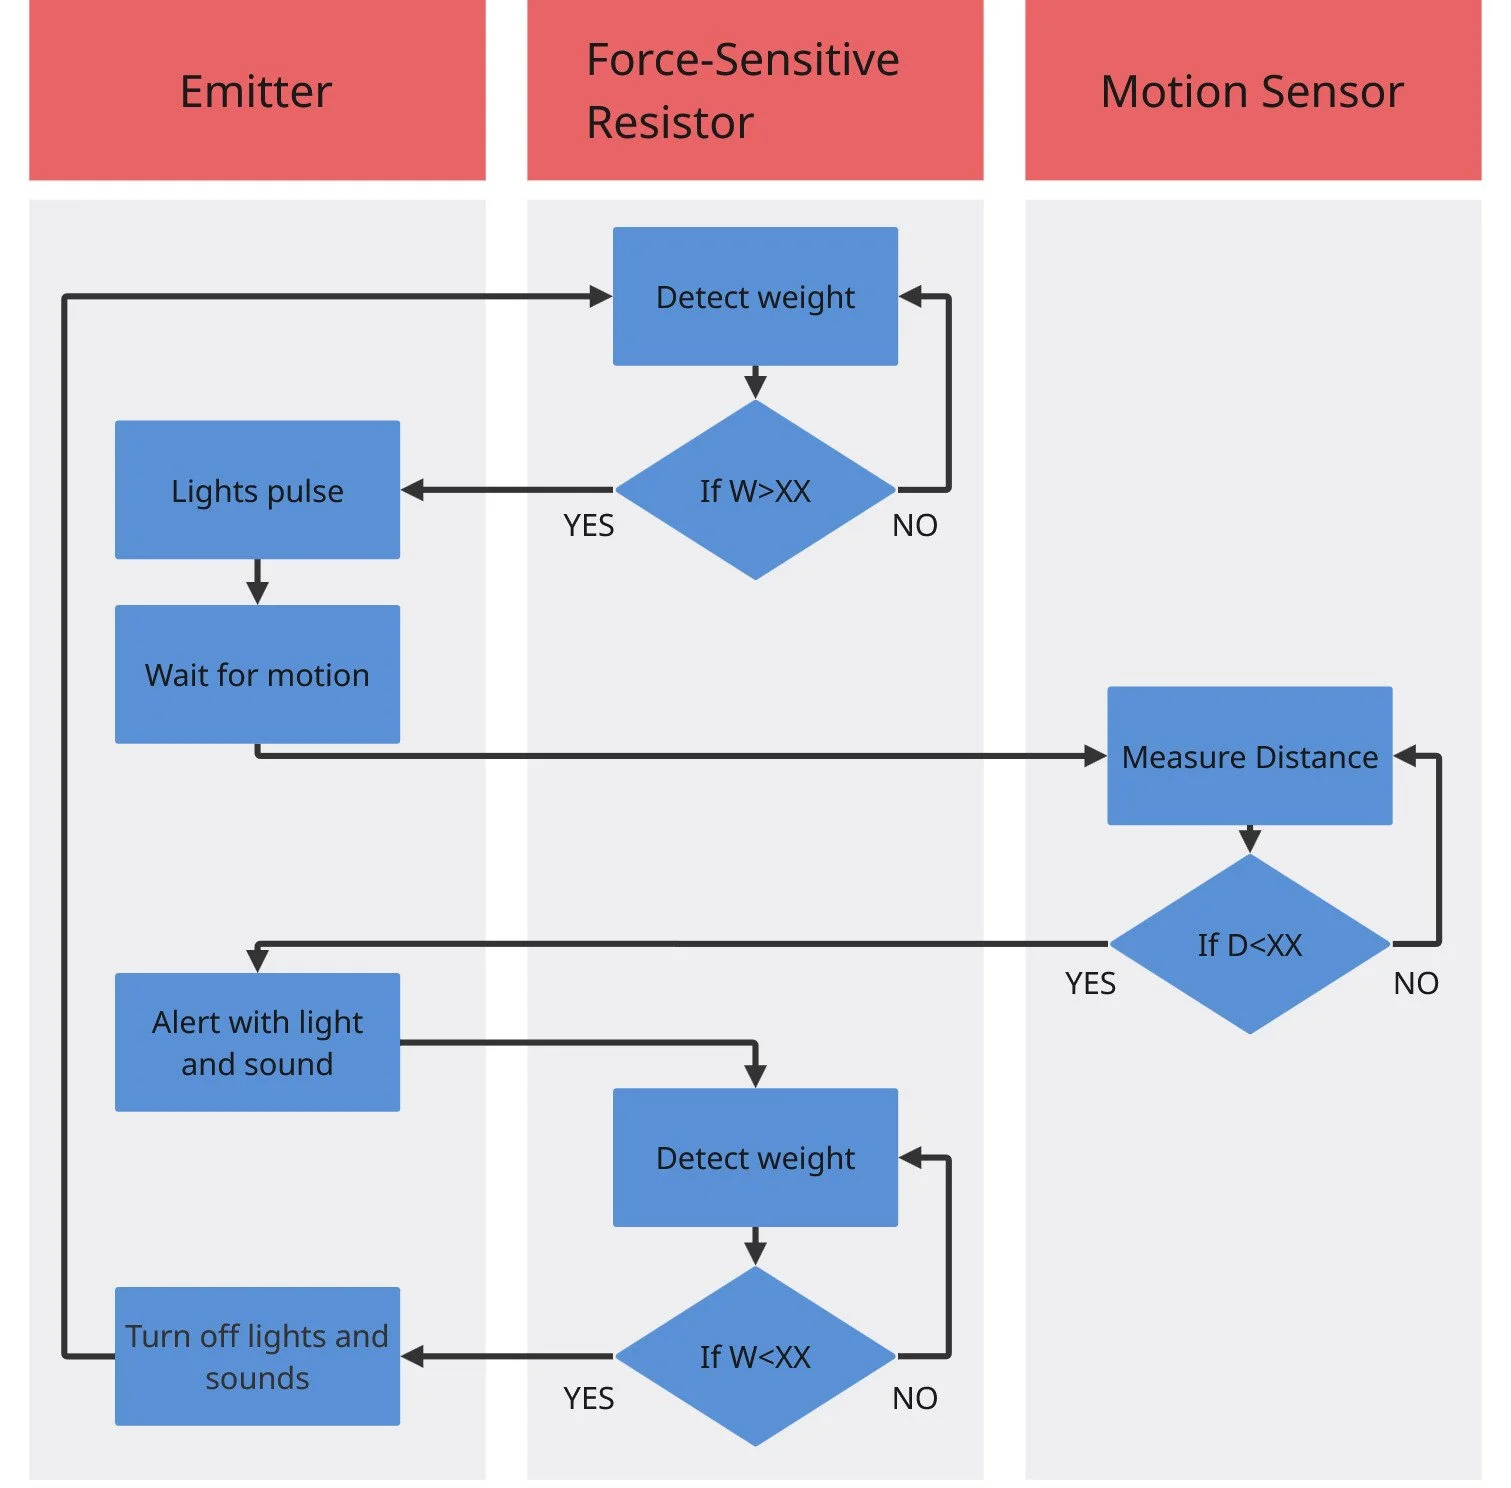
These charts were made to understand the interactions between the user and the machine. The diagram on the right shows the code logic.
INSPIRATION
For this project I wanted to create a relatively simple form that is made up of curves that meet in different ways and create ridges that catch your eye. I also wanted the final color and material to feel very modern, but not something that would force your attention to it.
IDeation
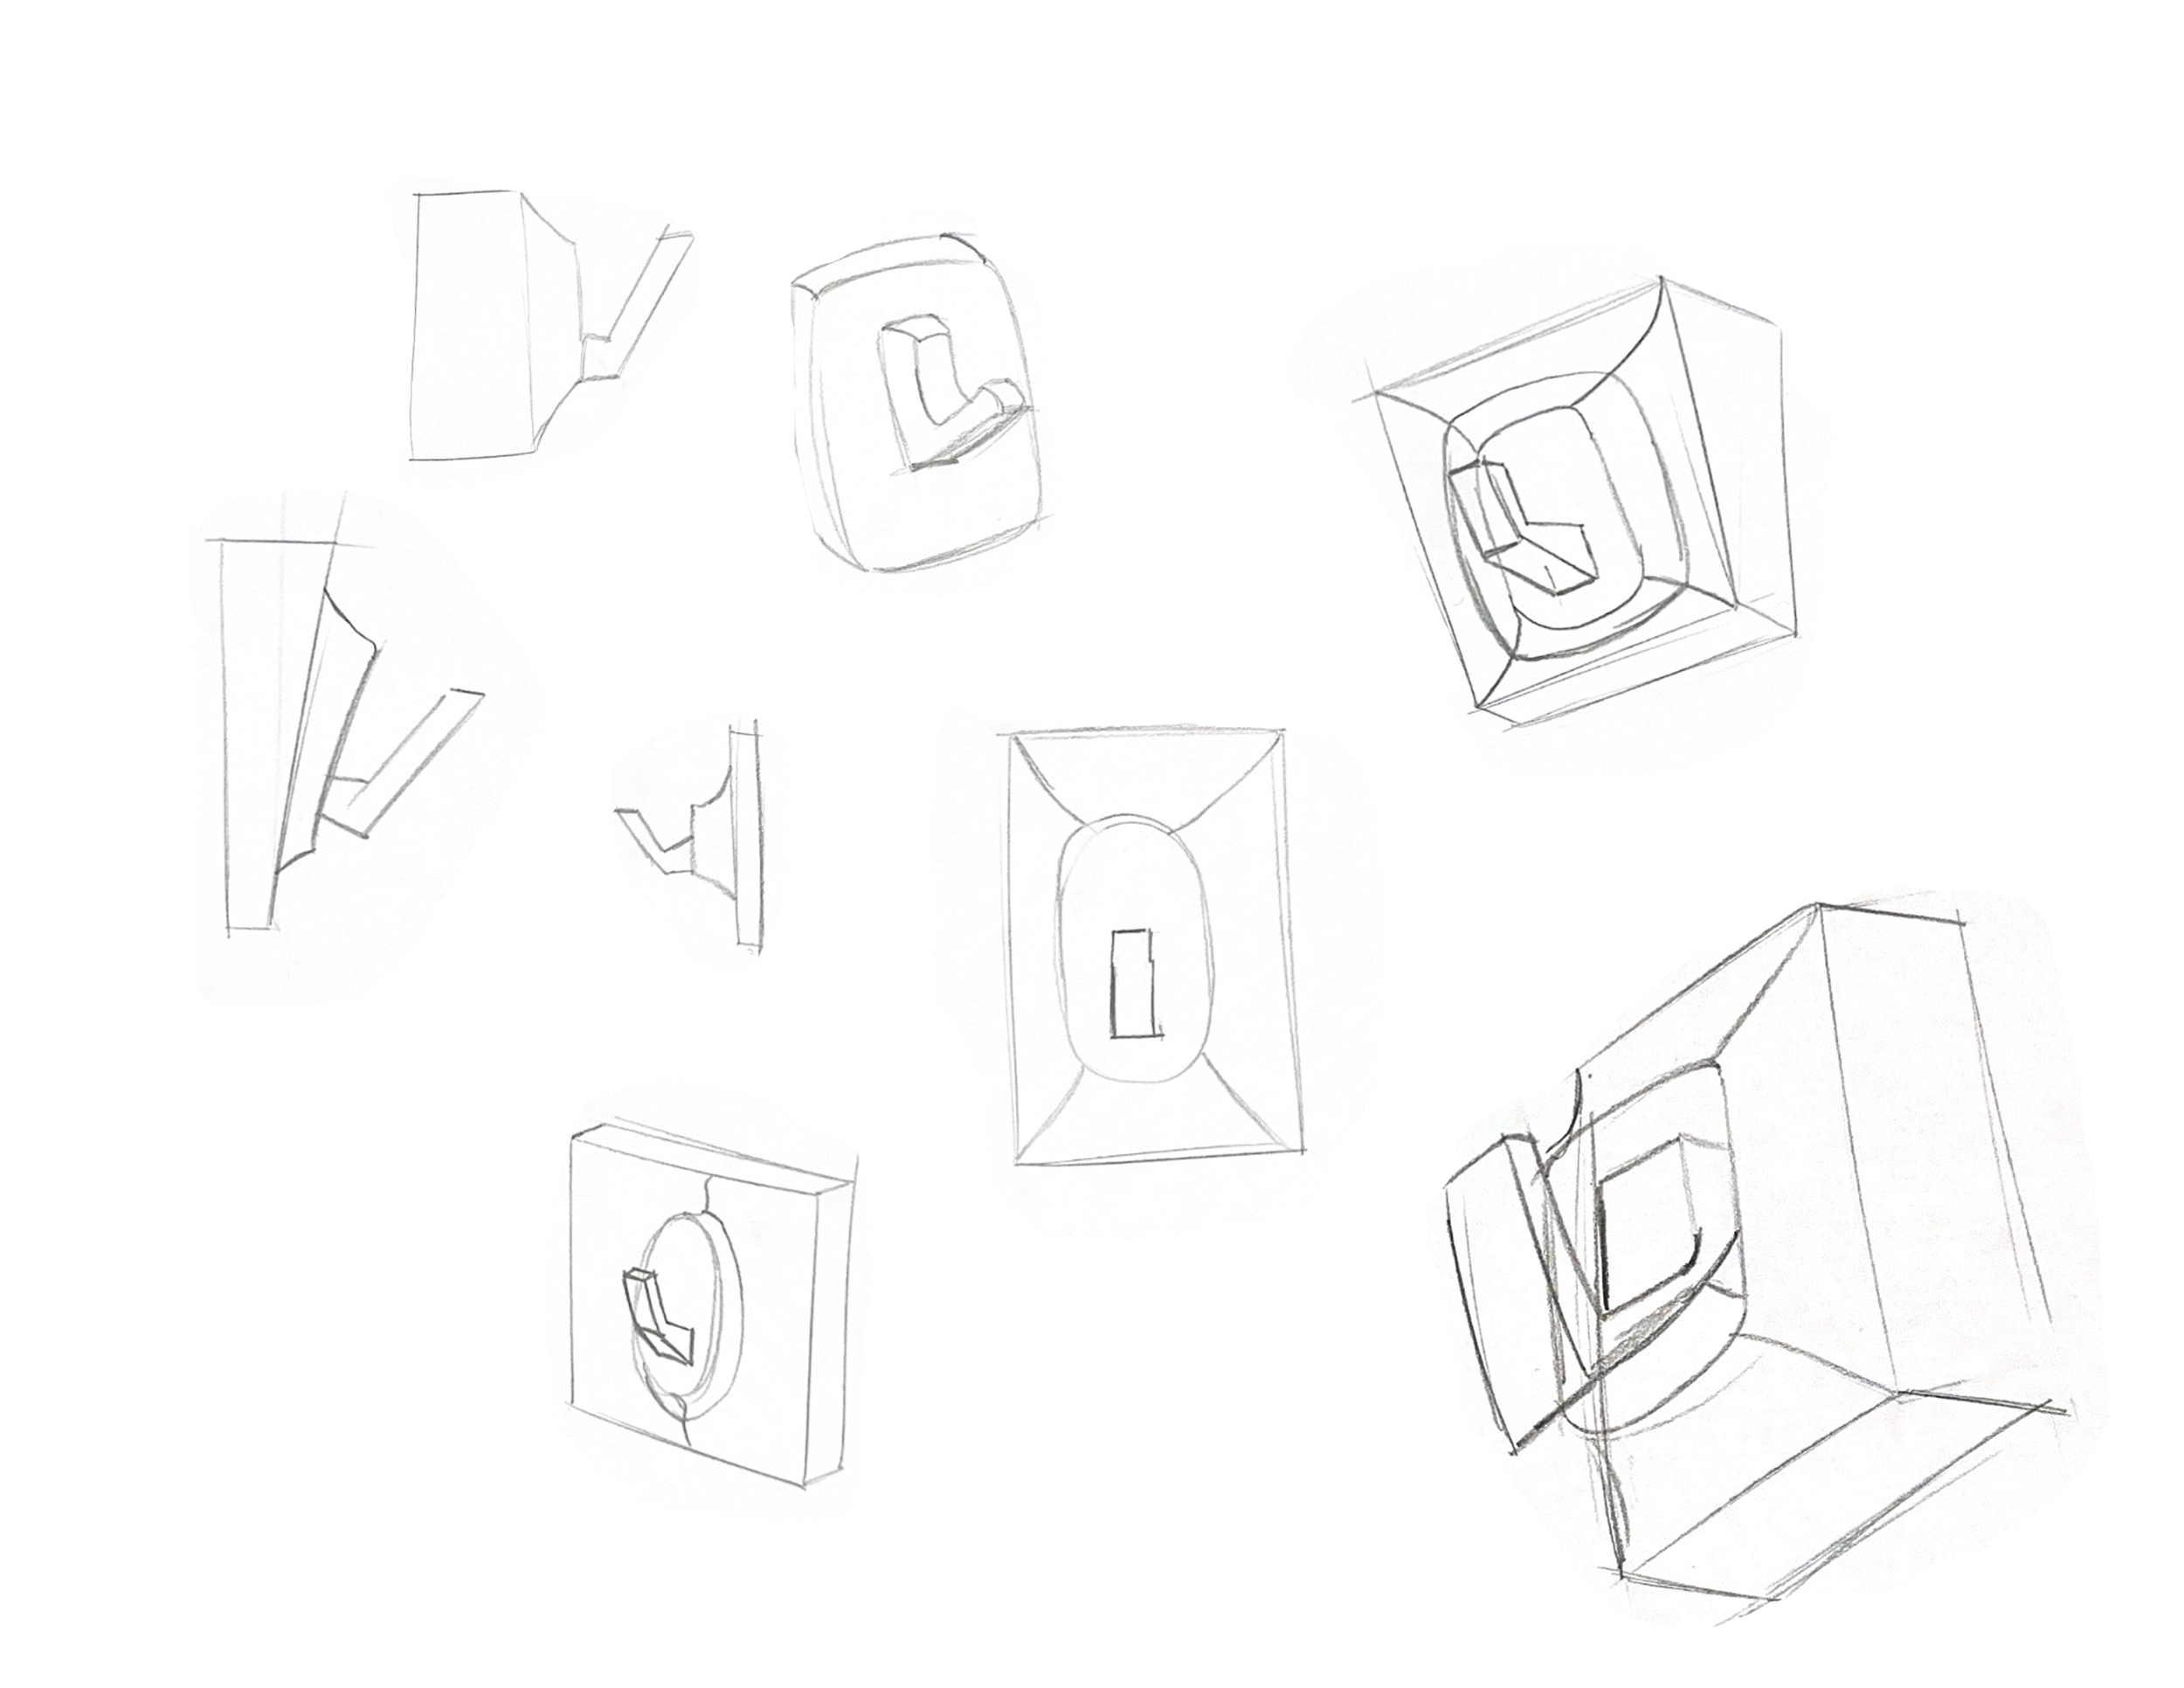
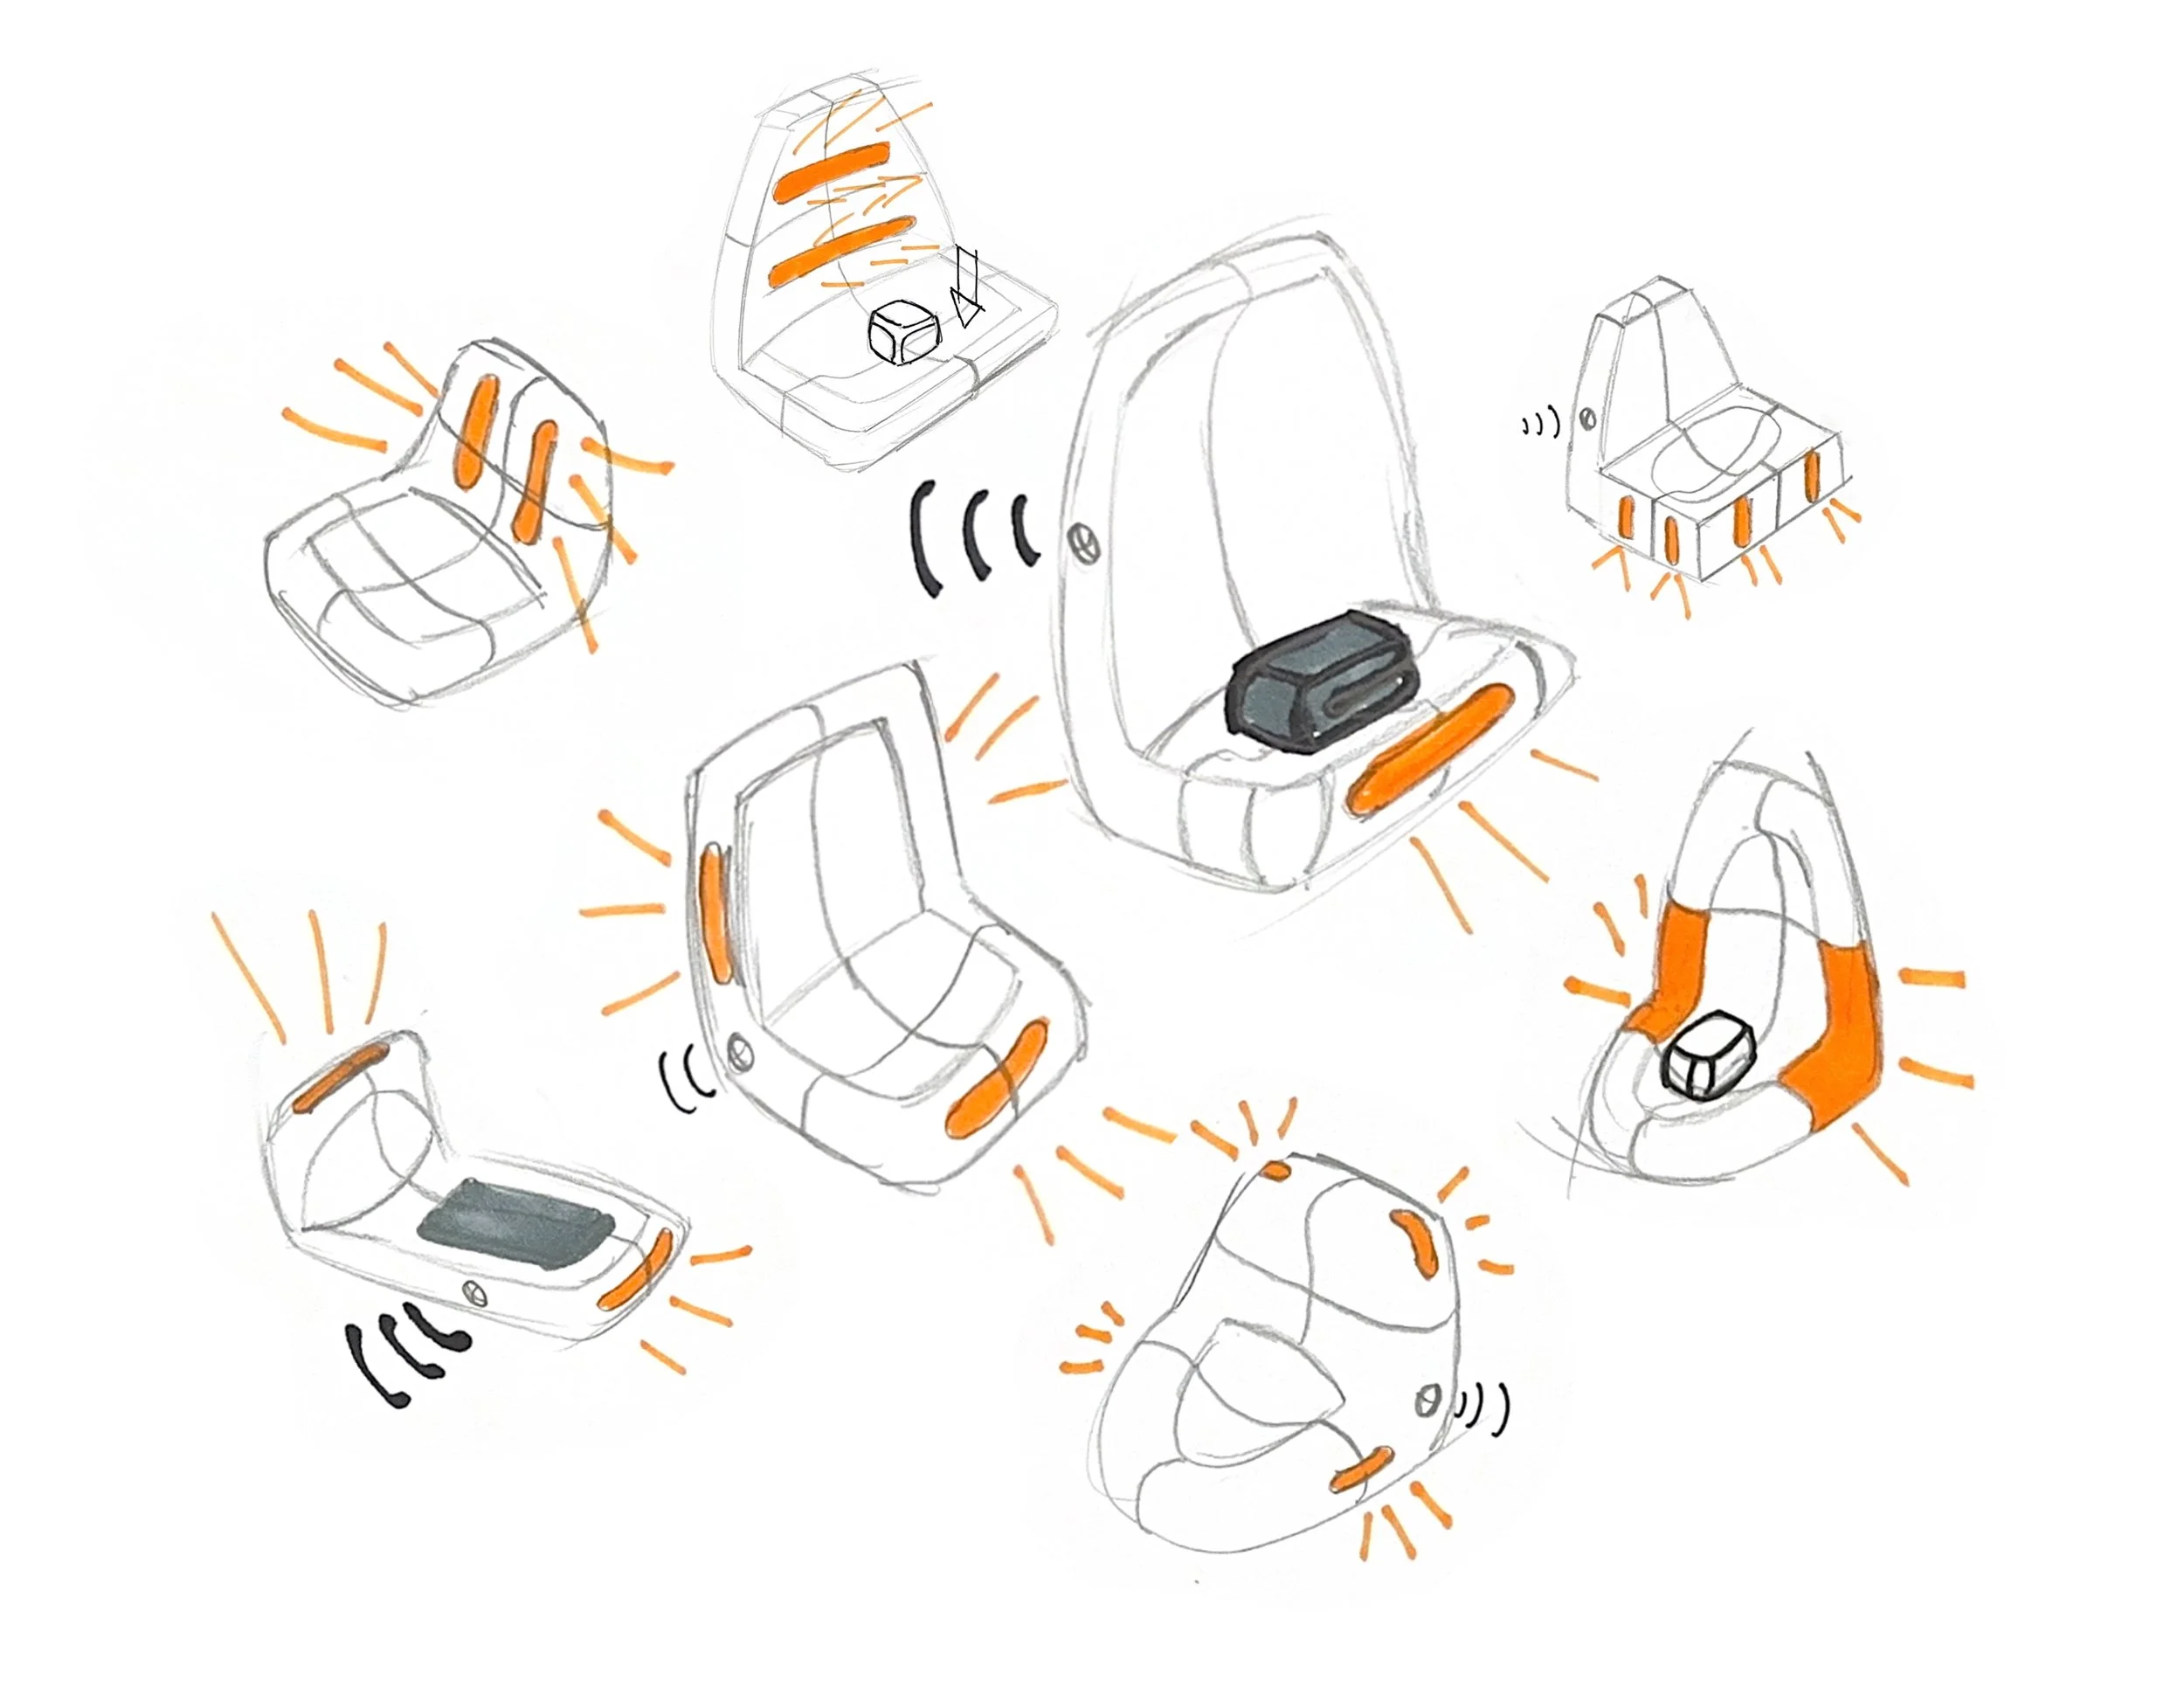
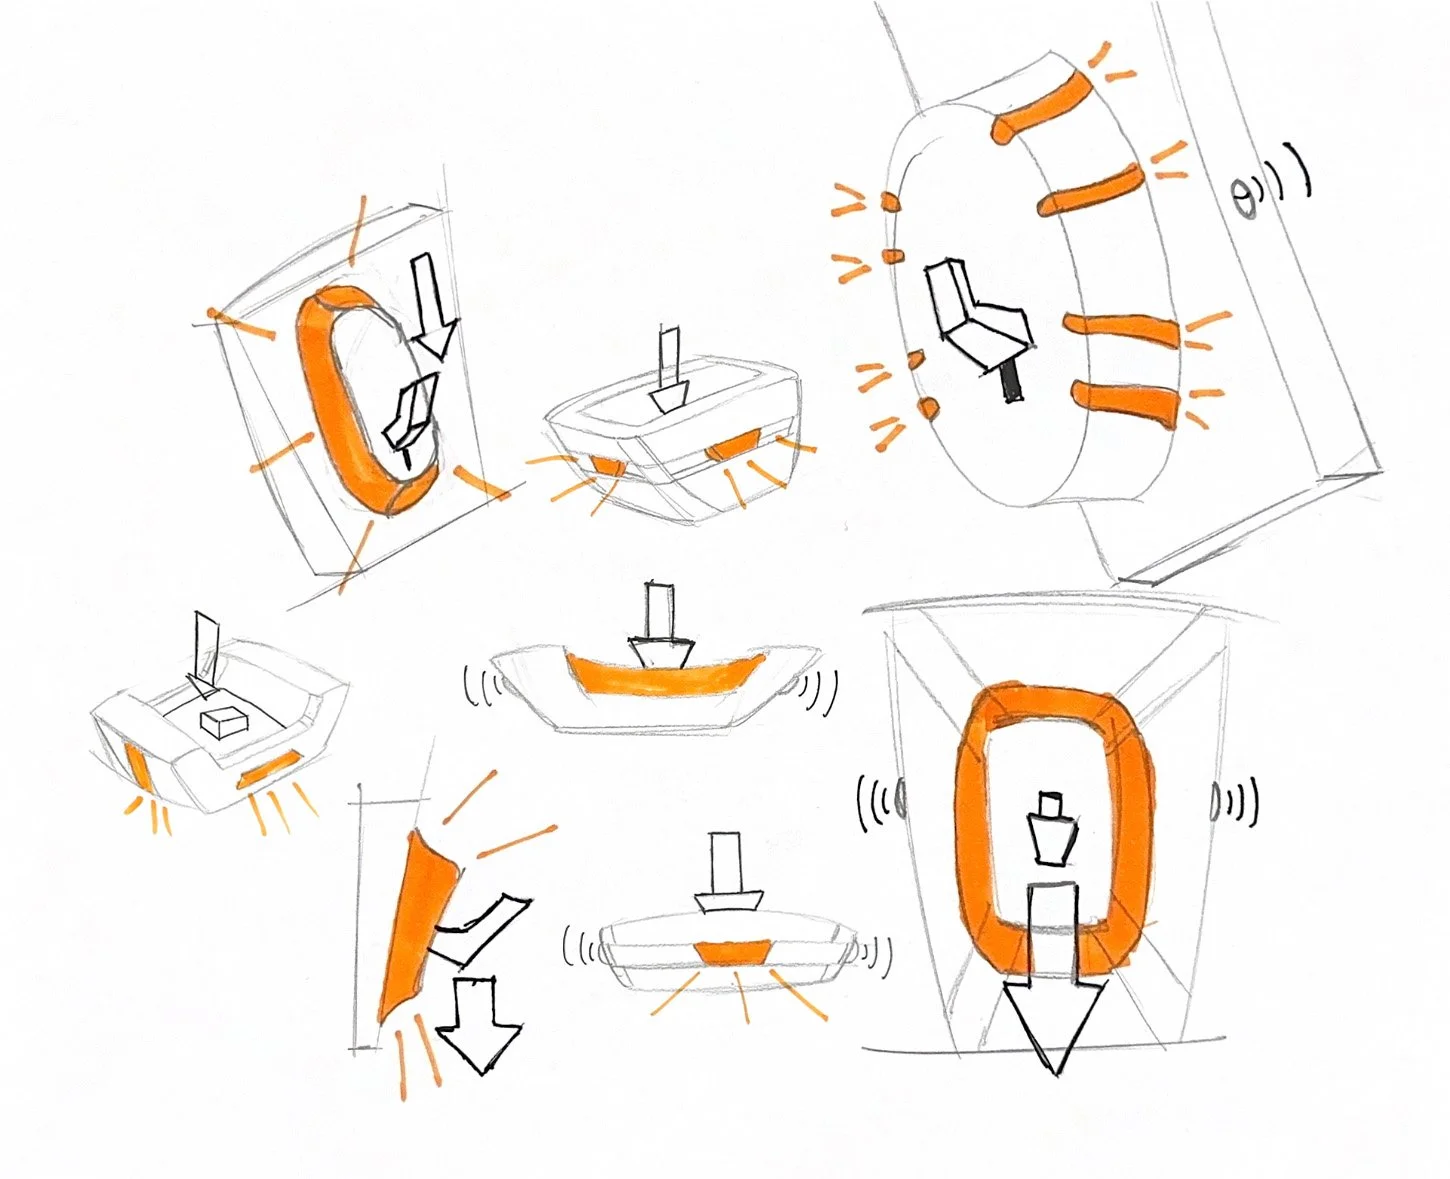
For most of my sketch iterations I was very focused on the user interaction, and how the storage of personal belonging would work. I wanted the lights to accent the form. I wanted to incorporate the primary light almost like a headlight on a car.
preliminary model making
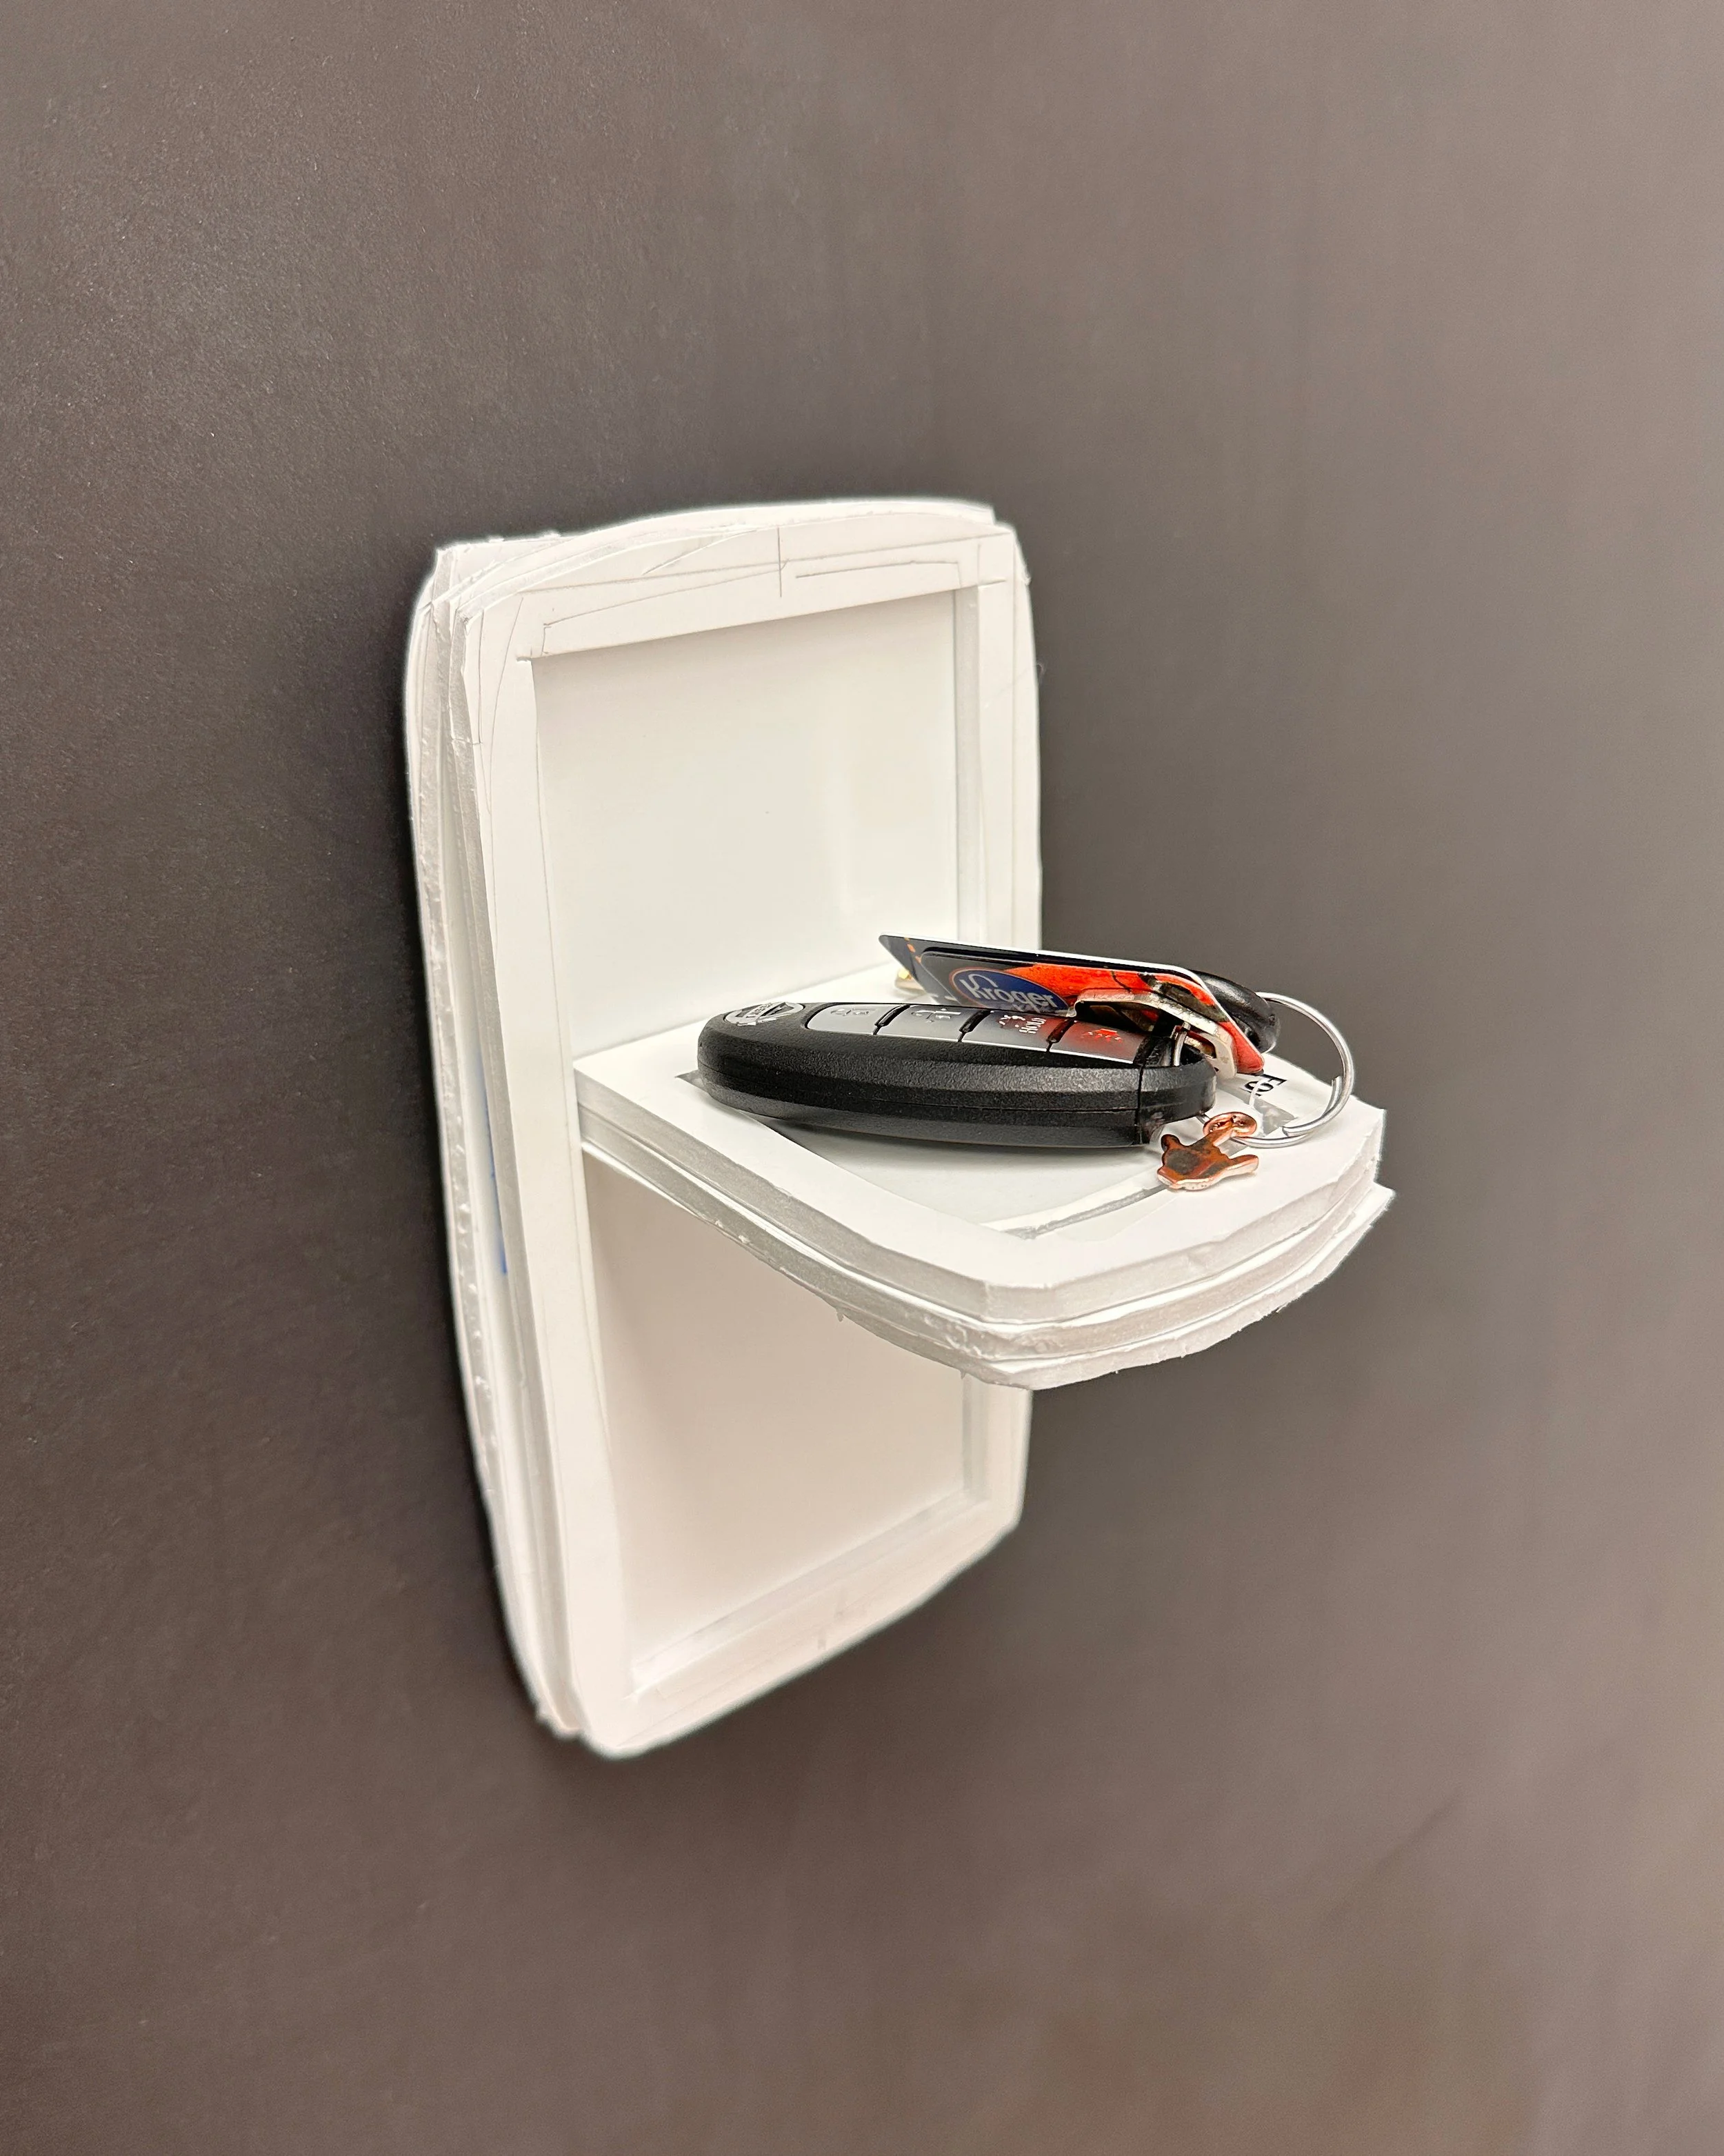
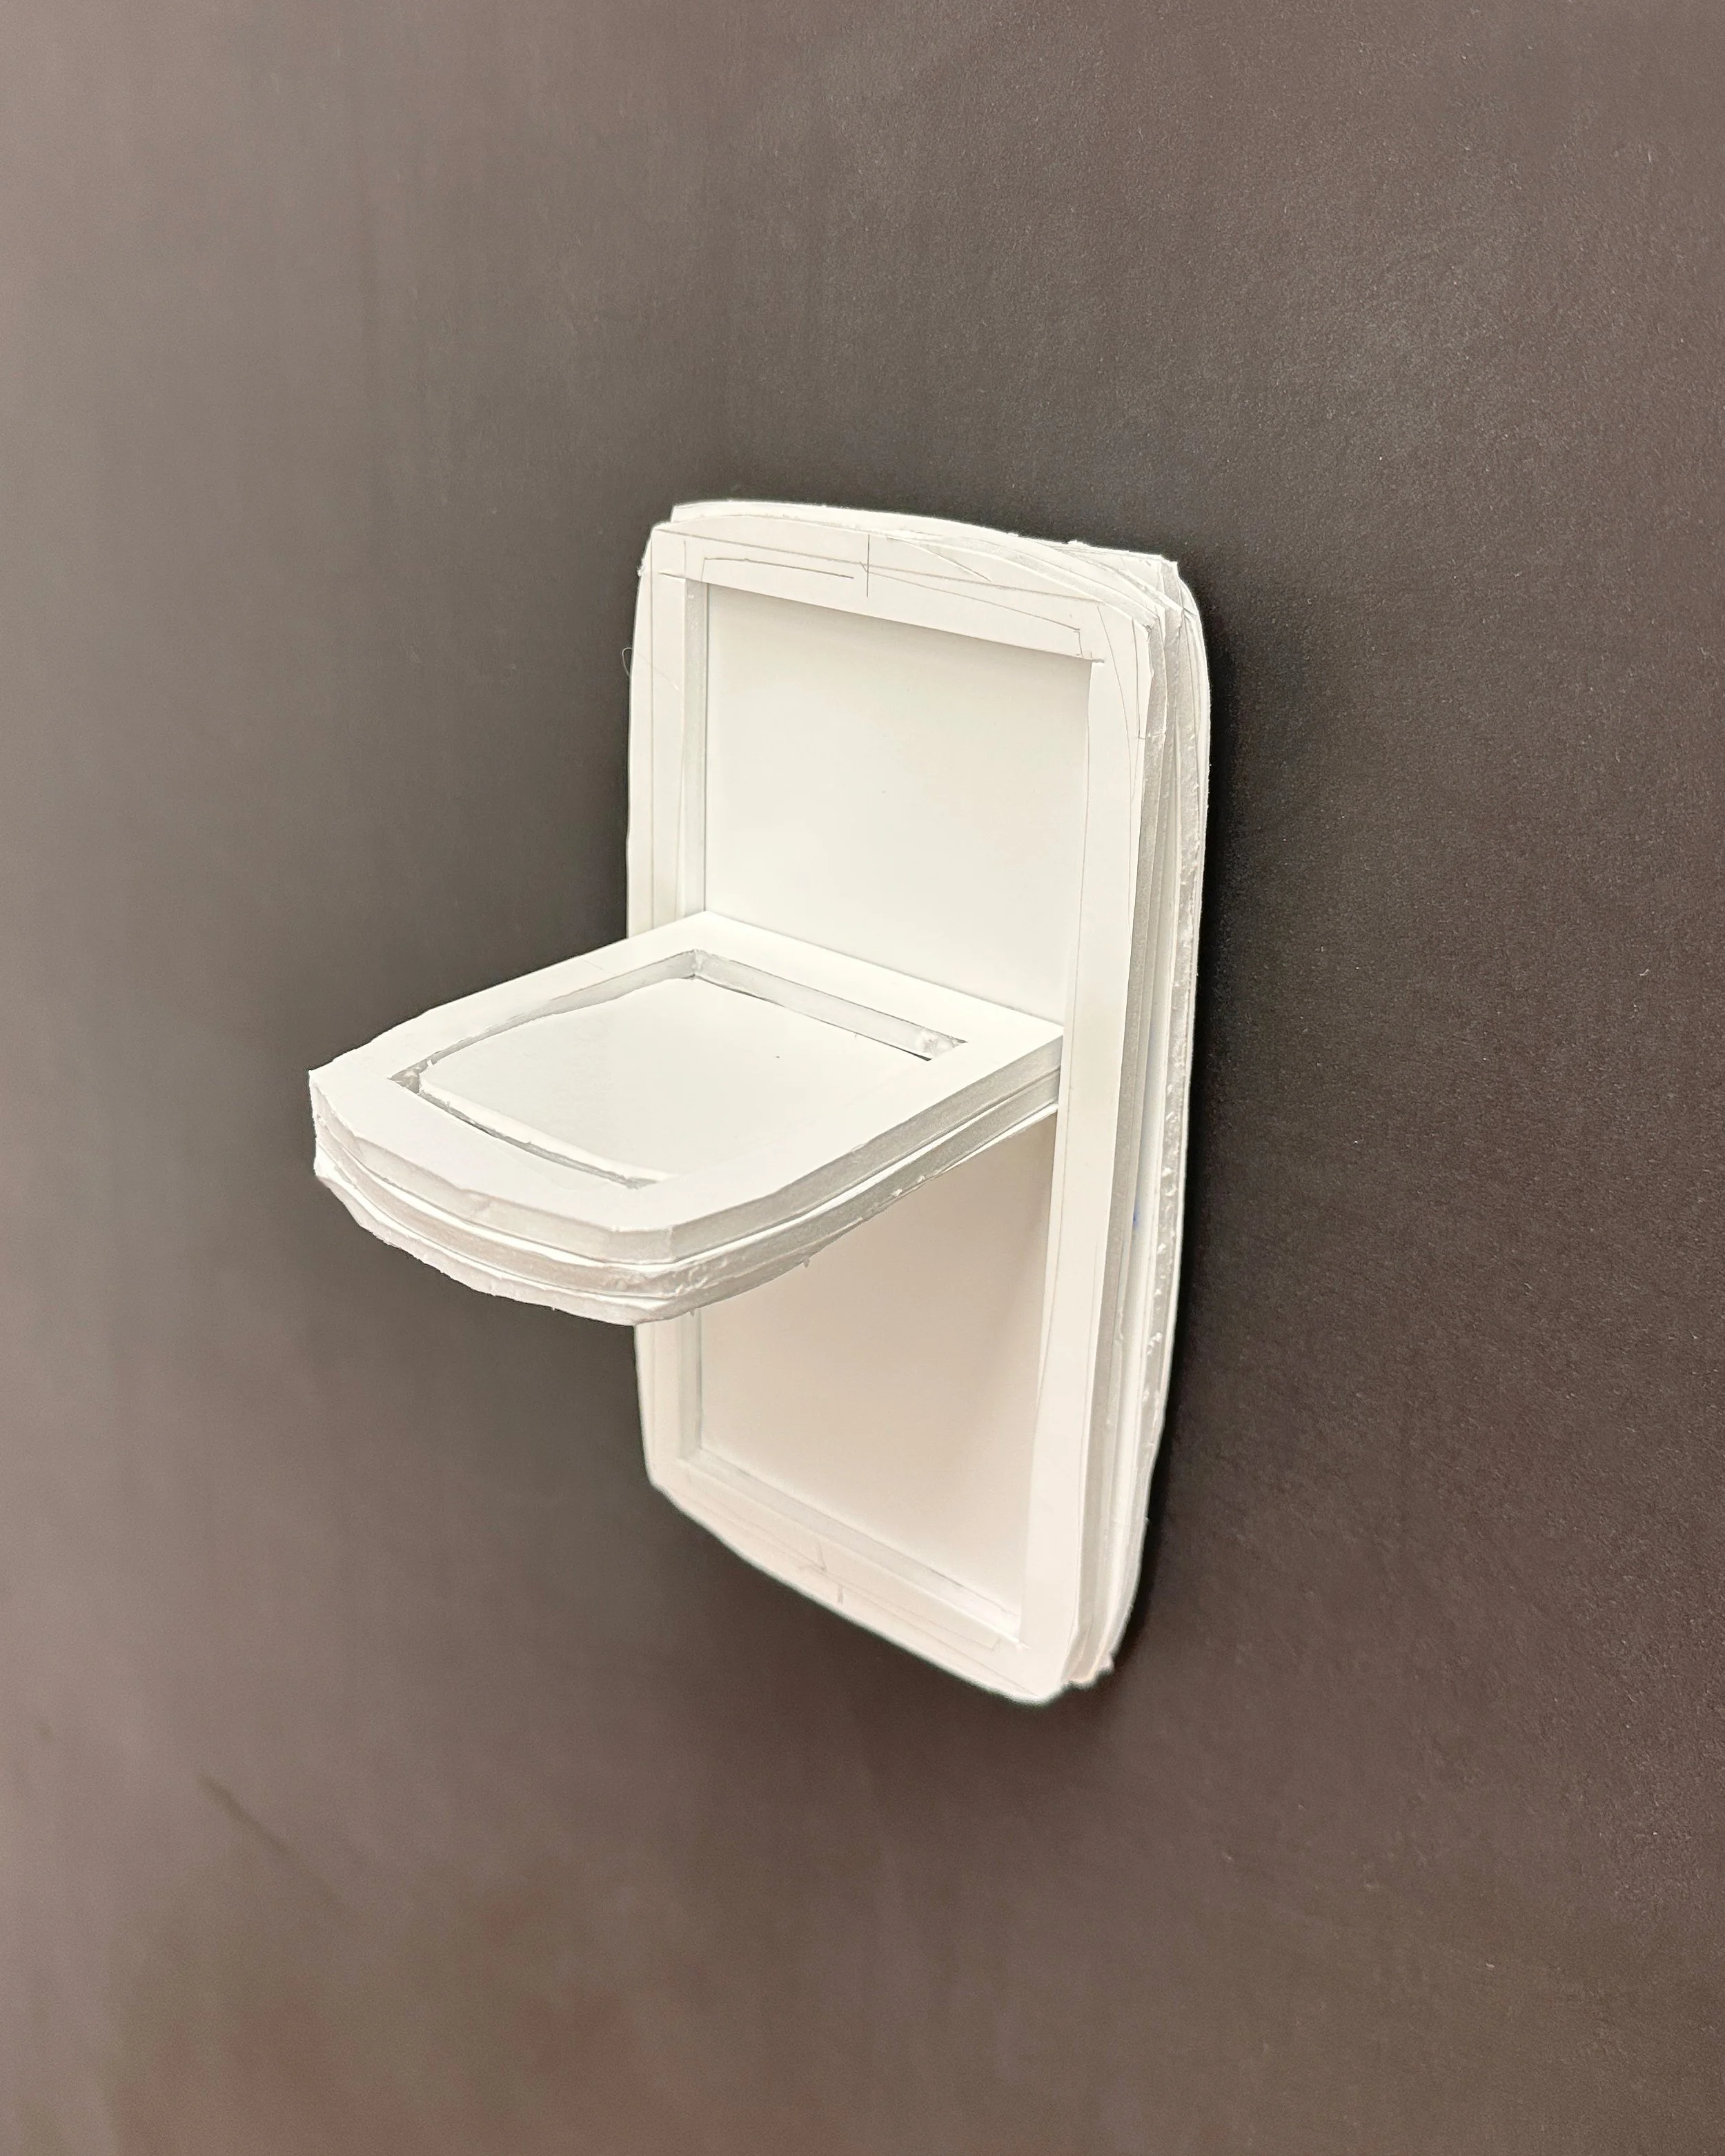
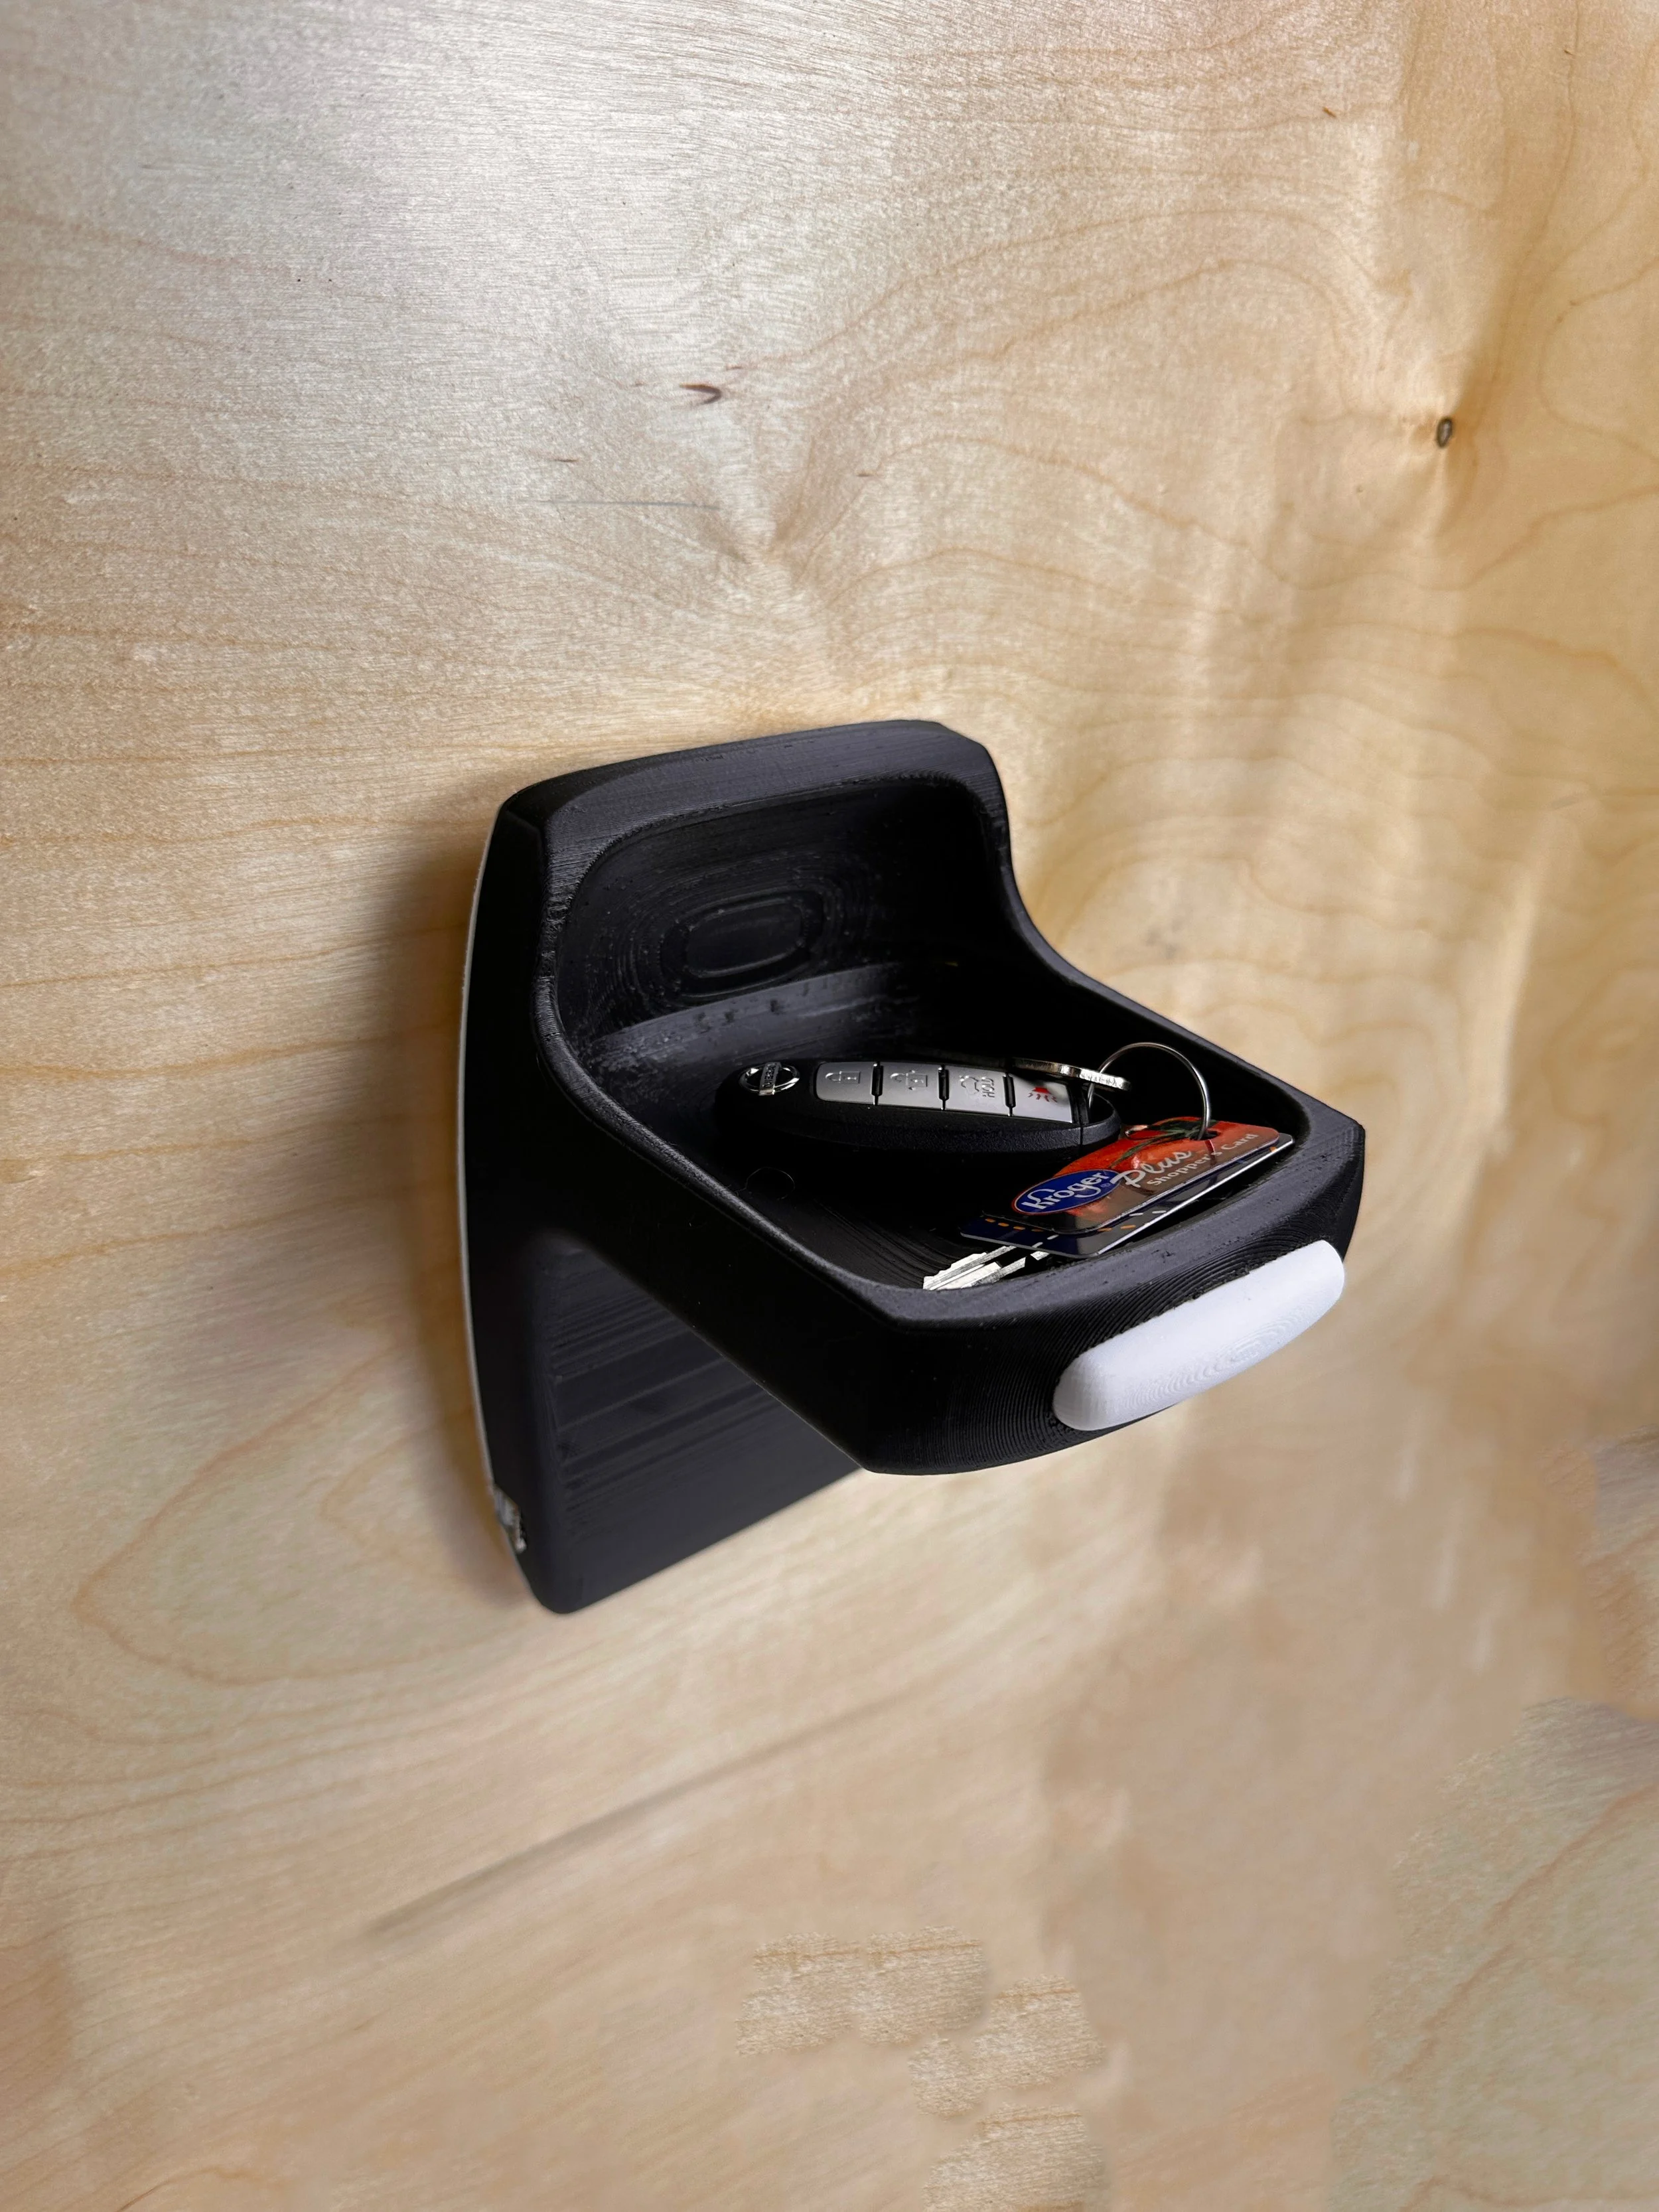
At this stage I was experimenting with the main form I was developing. I wanted to see the physical size of the design, and how different items looked in comparison to it. Here is the model with a set of car keys, to show scale.
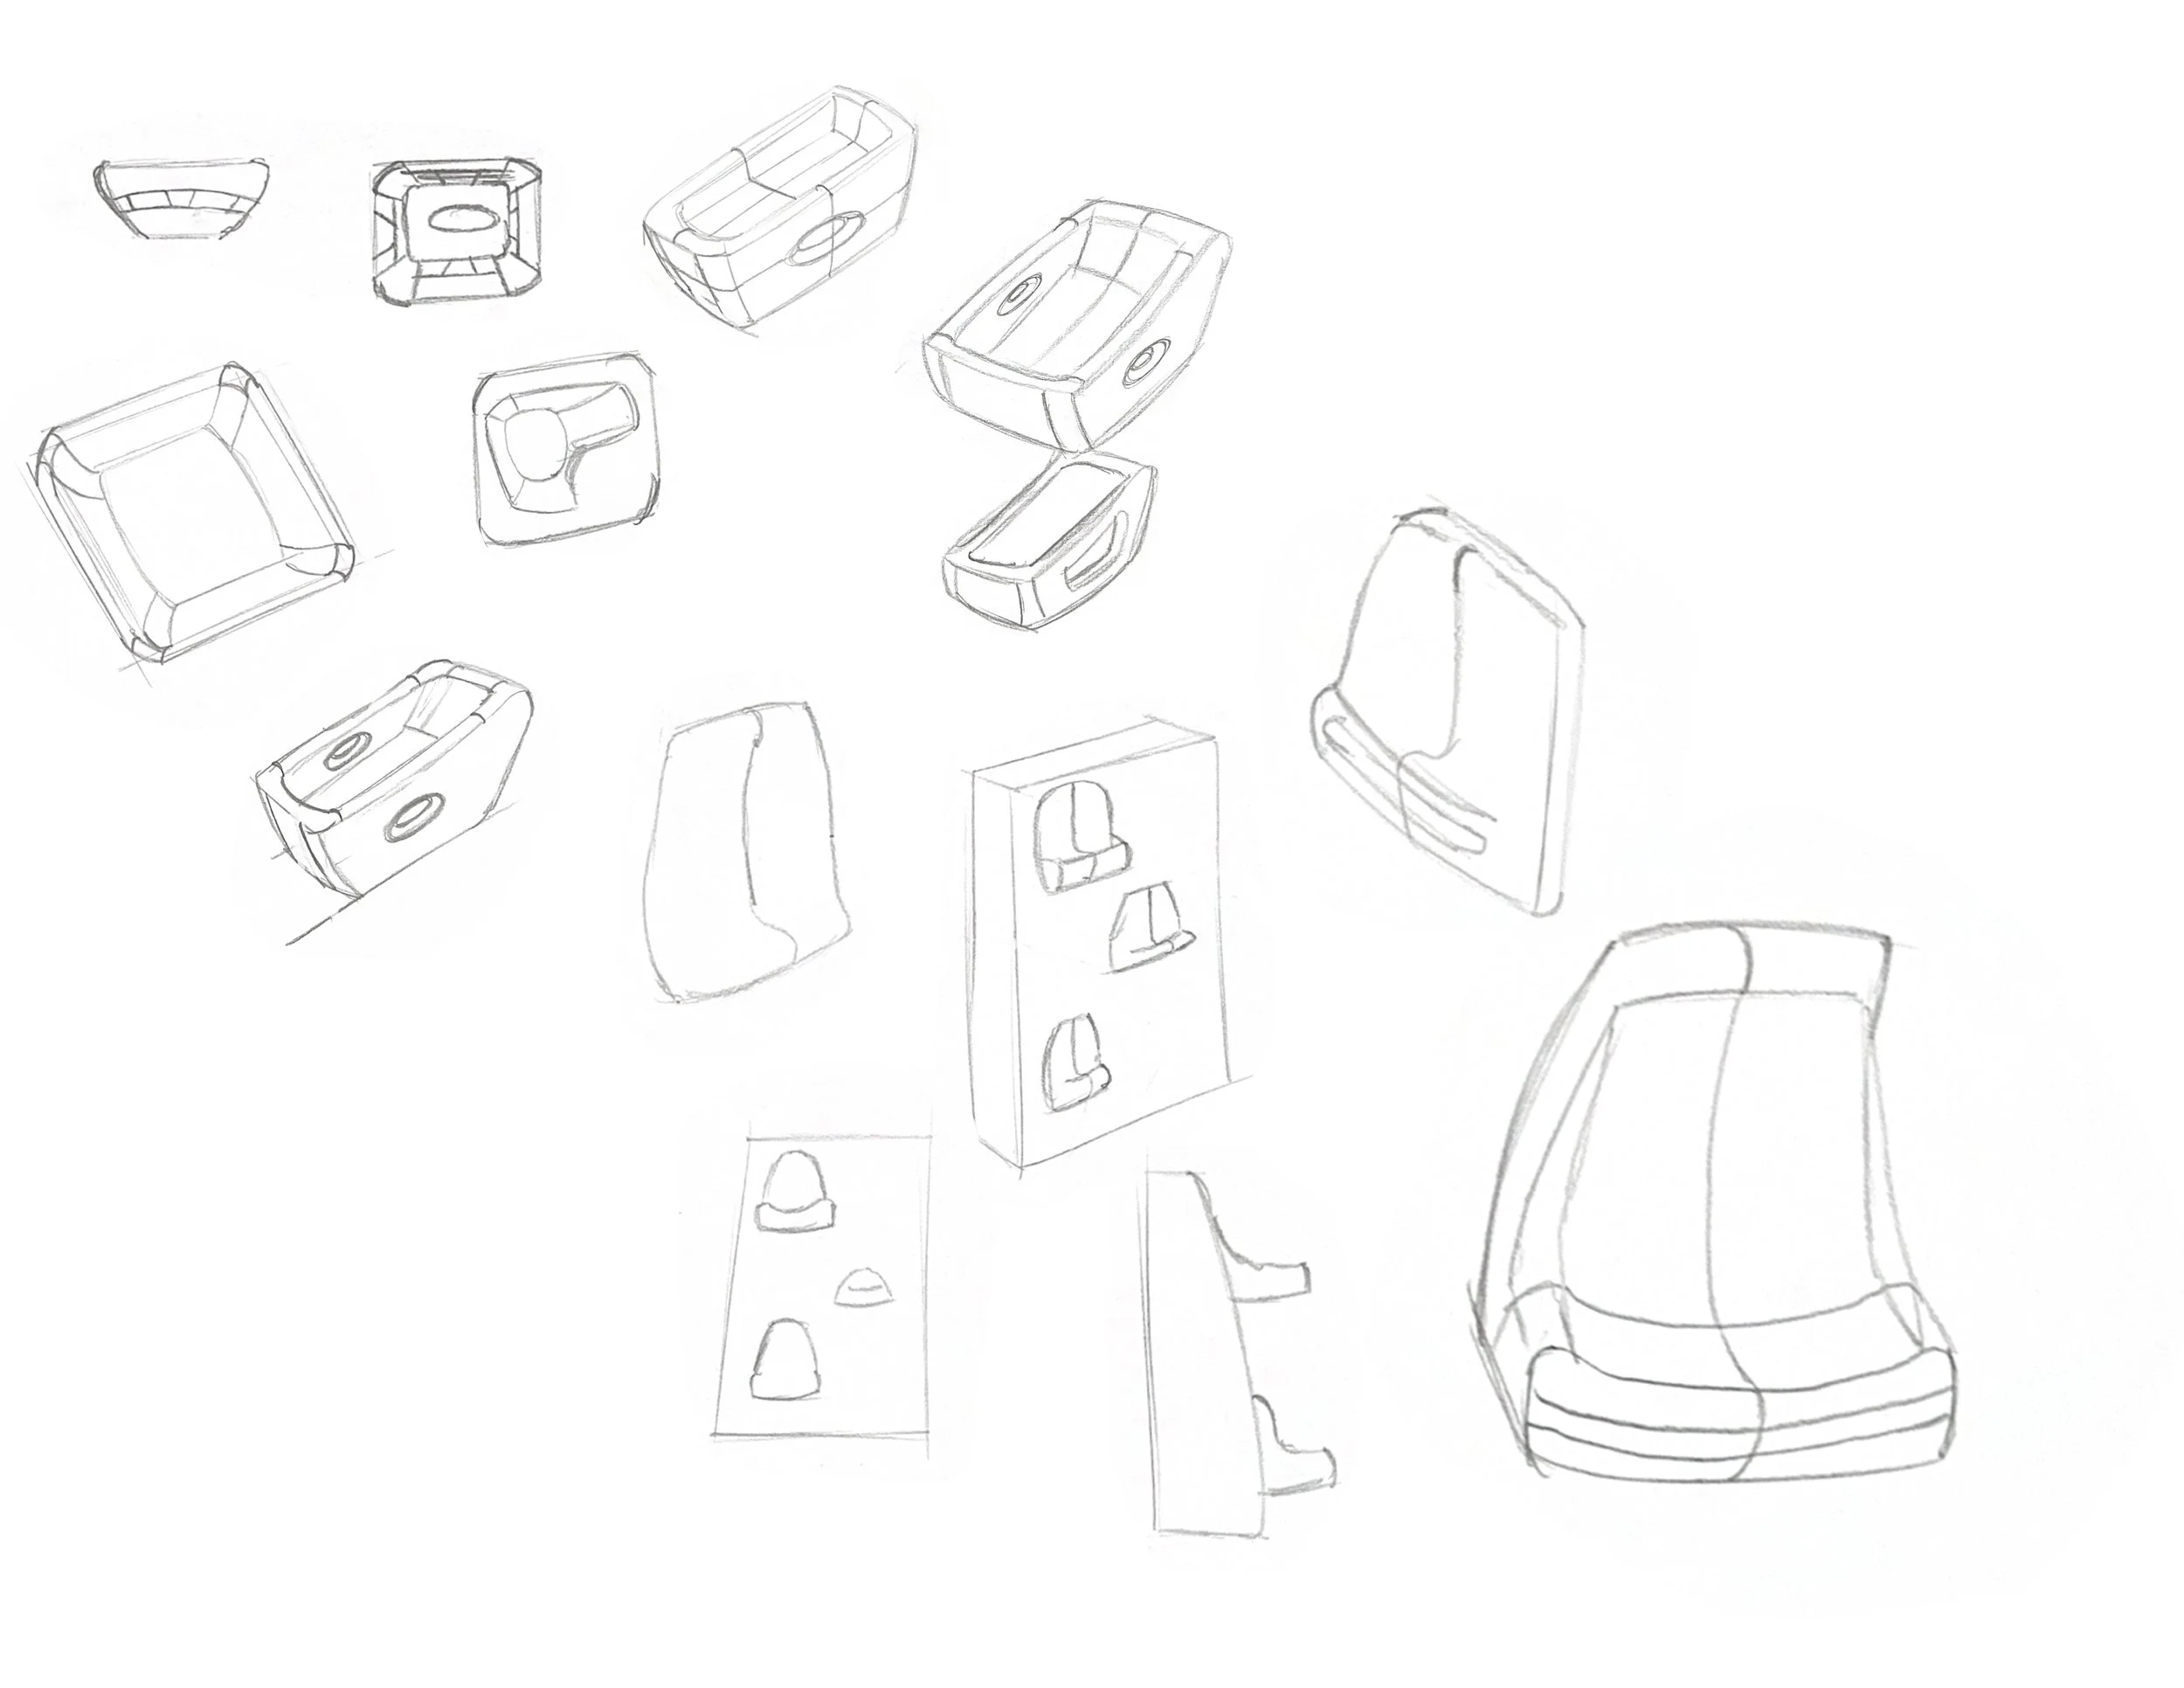
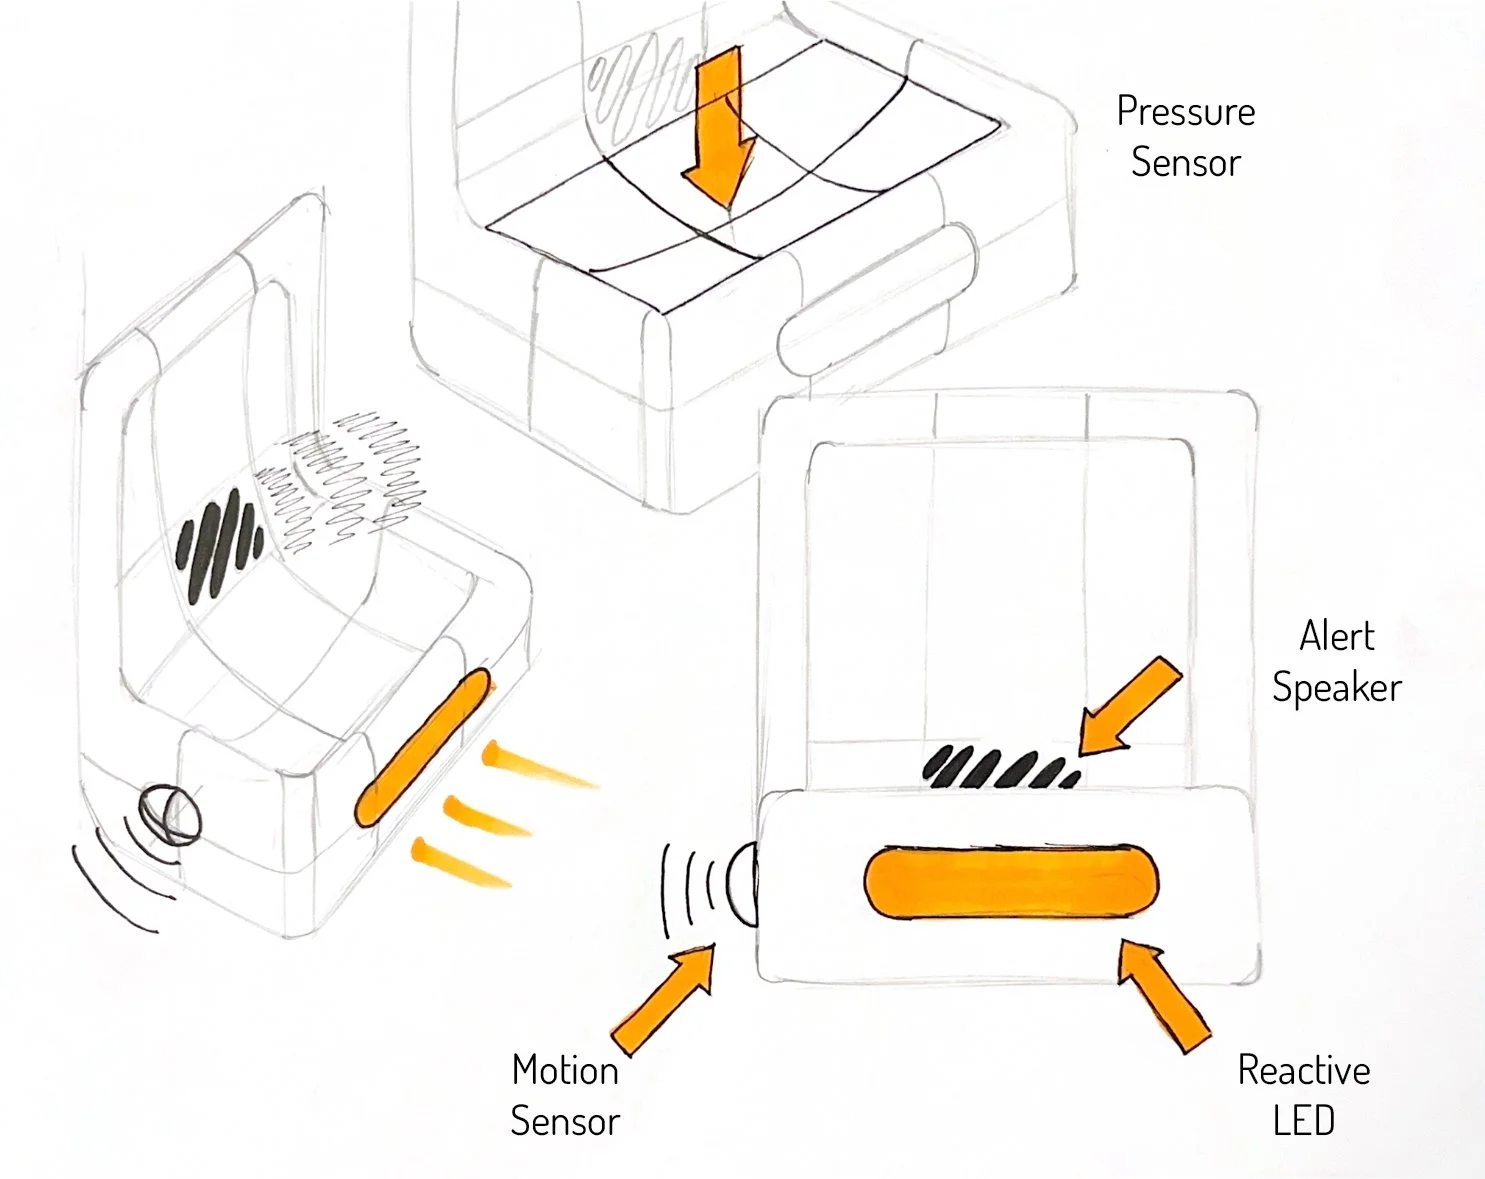
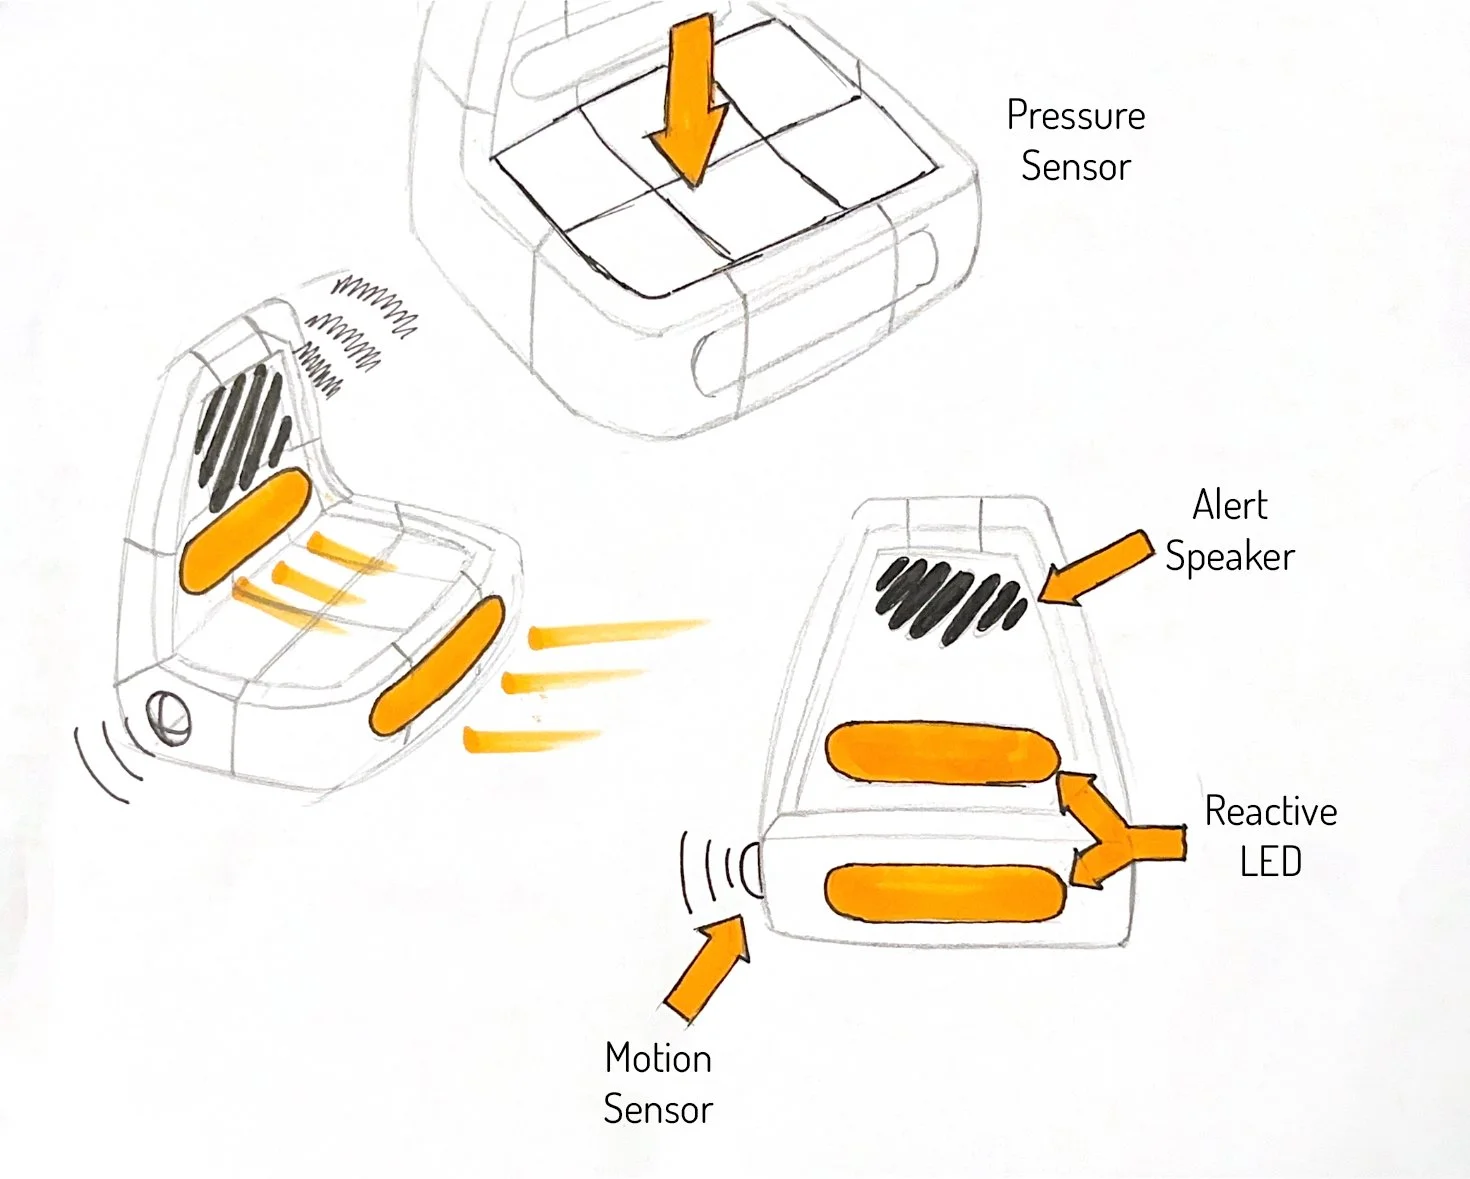
Final Sketch pages
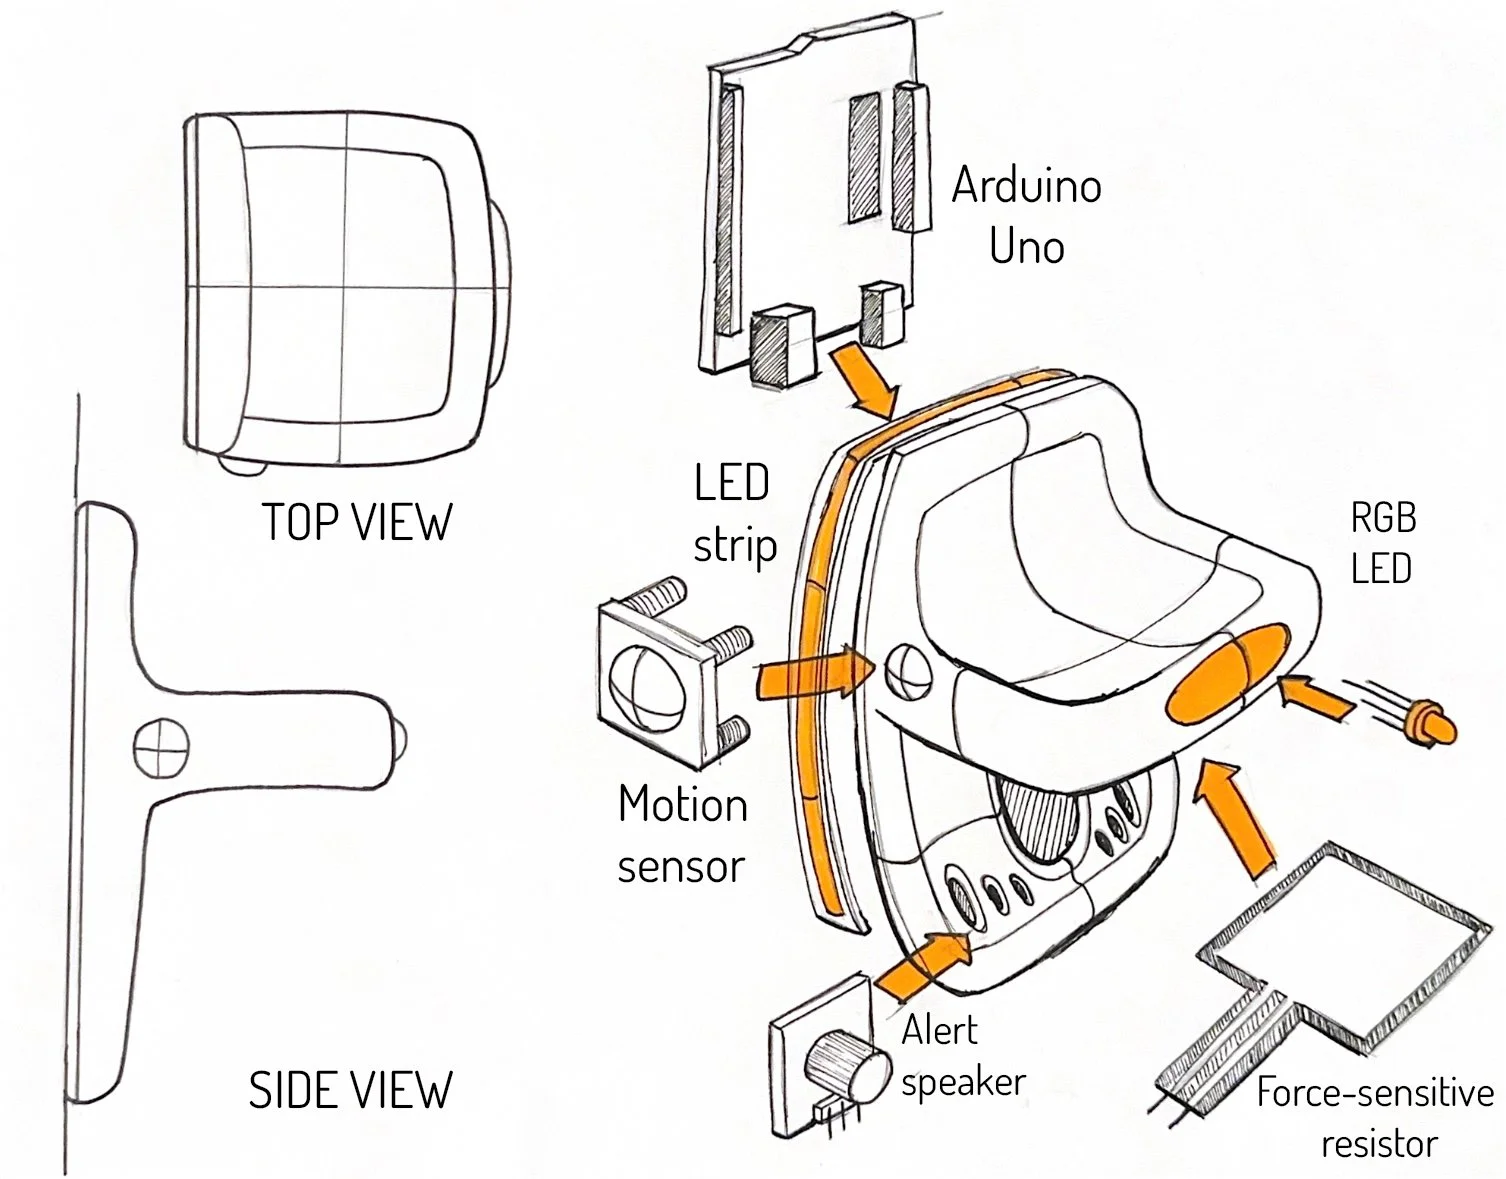
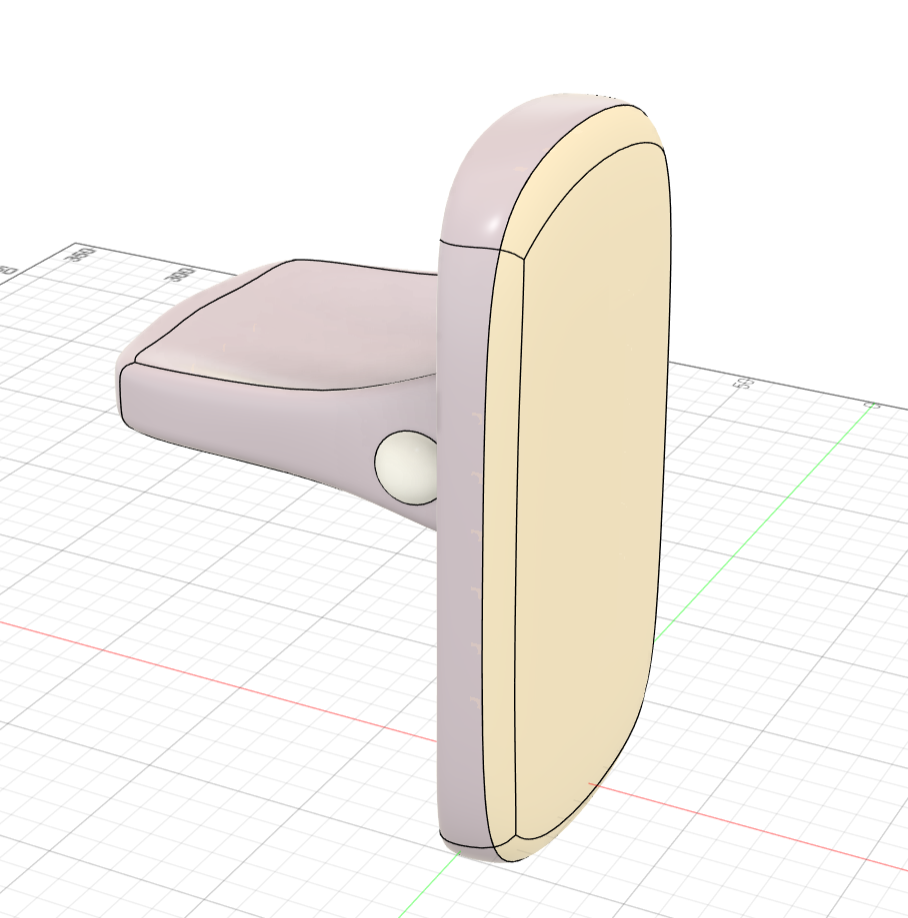
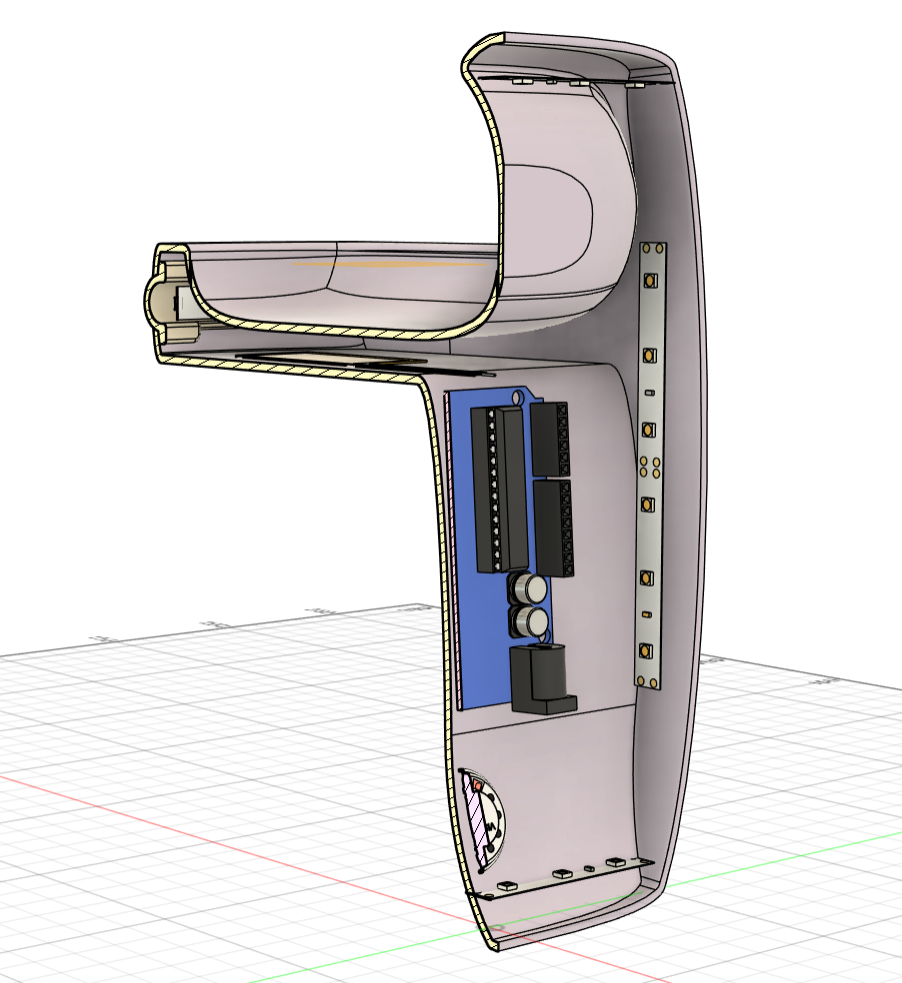
This point in the process is where I decided on my final direction before deep diving into CAD. The left image shows the major components and where they sit inside the final product.
CaD Iteration
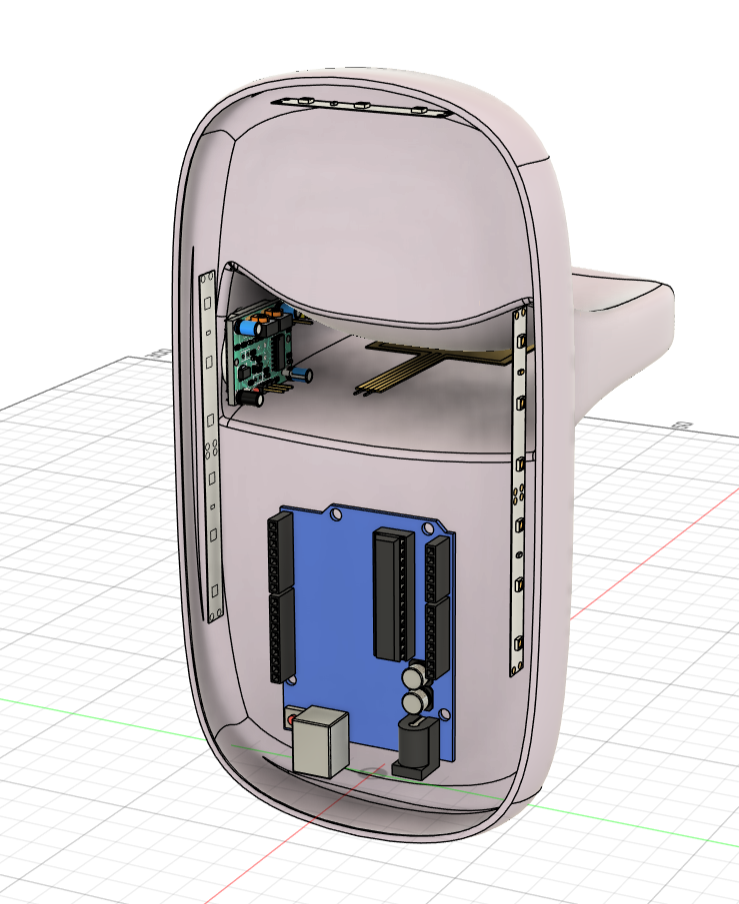
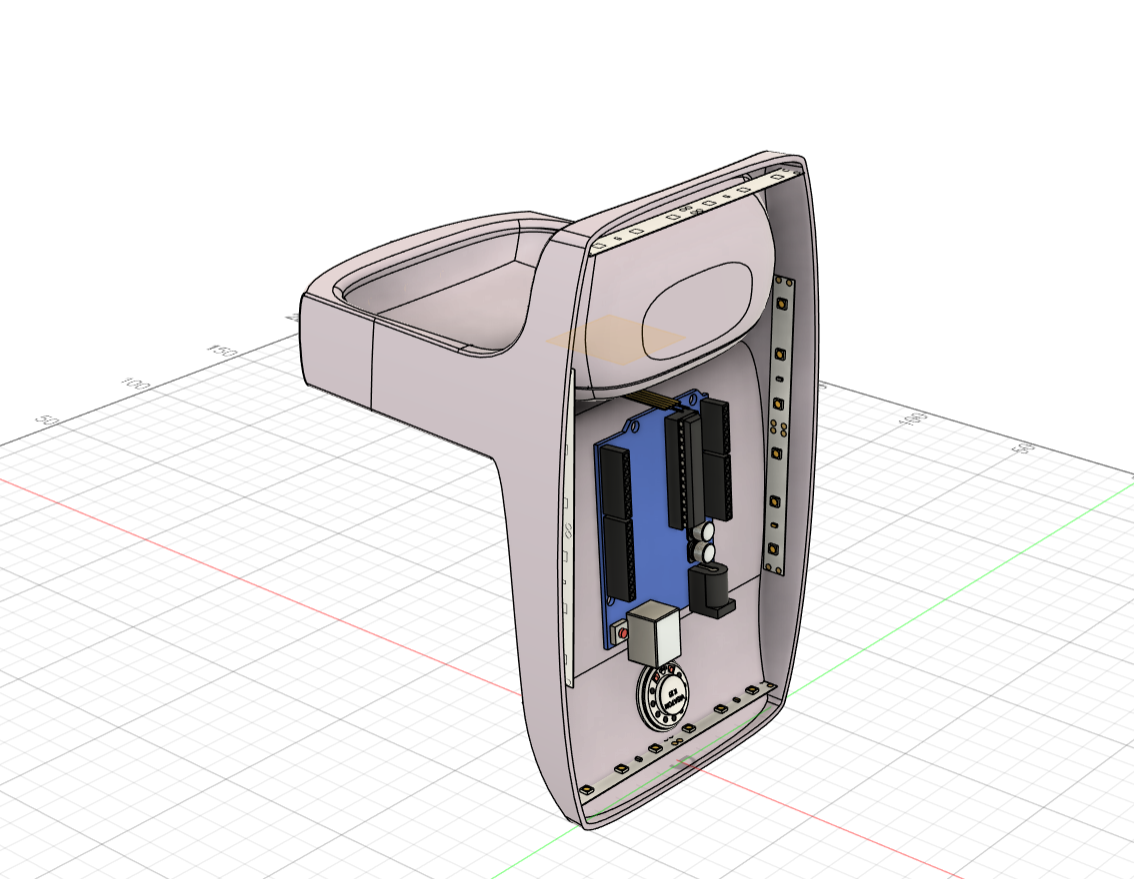
This model went through many stages of modeling before reaching the final design. The planning the location and mounting of all of the internals was easily the most difficult part of the process.
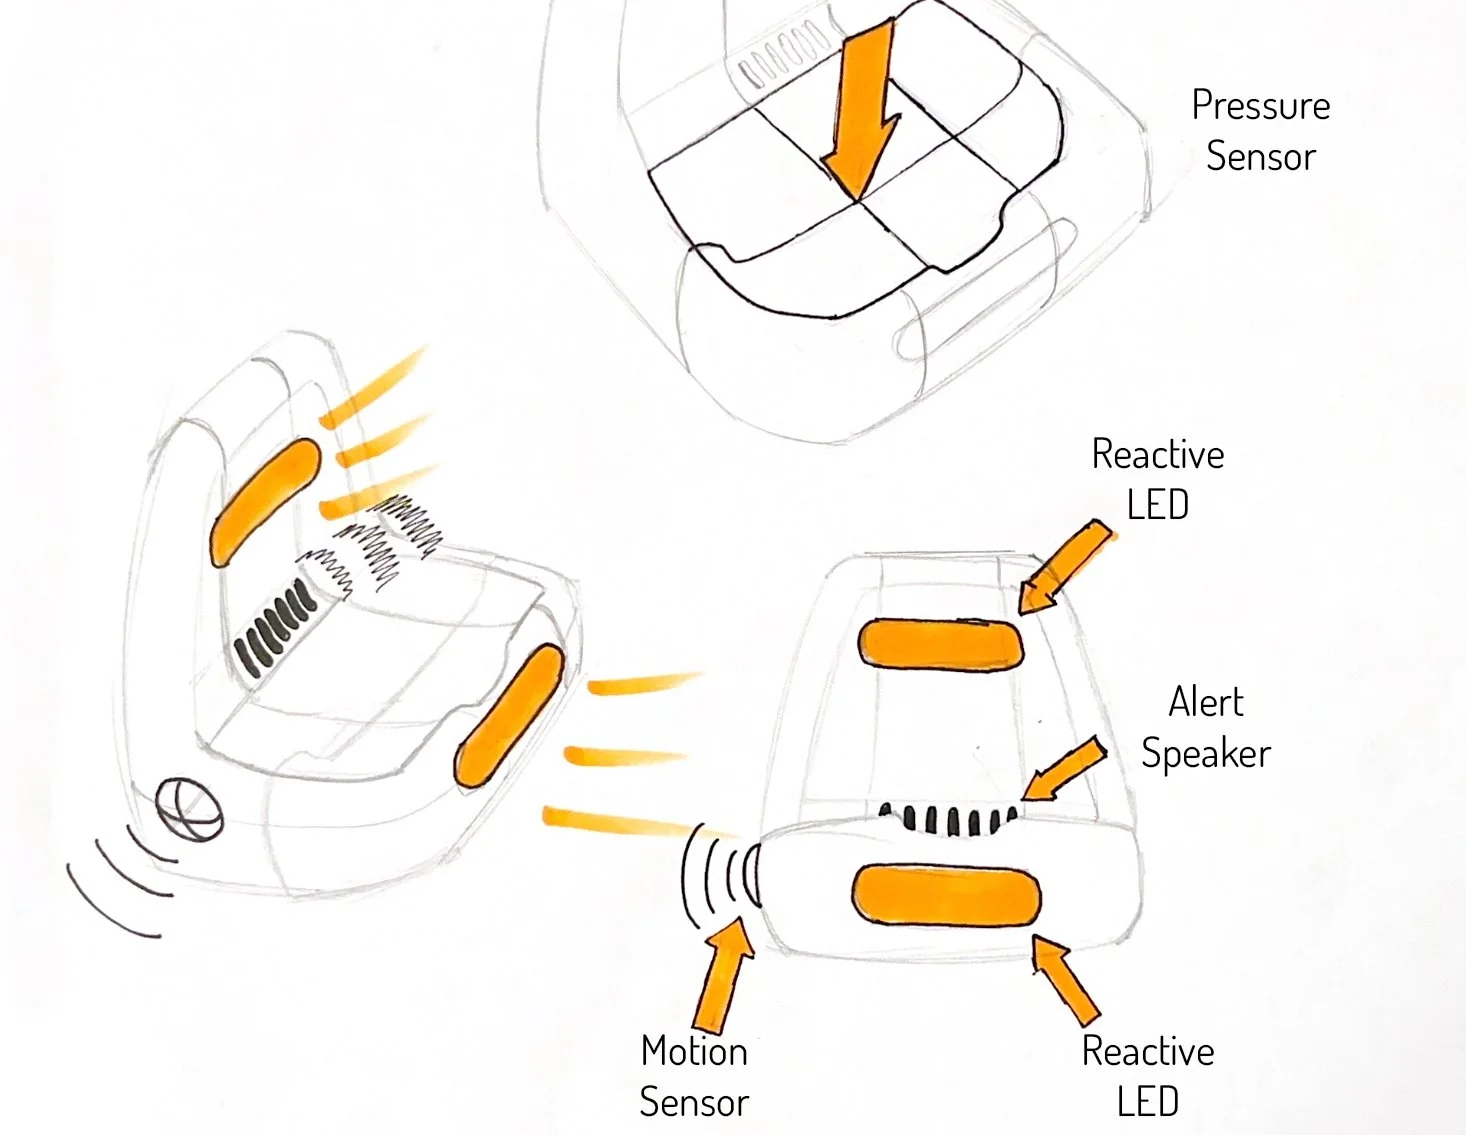
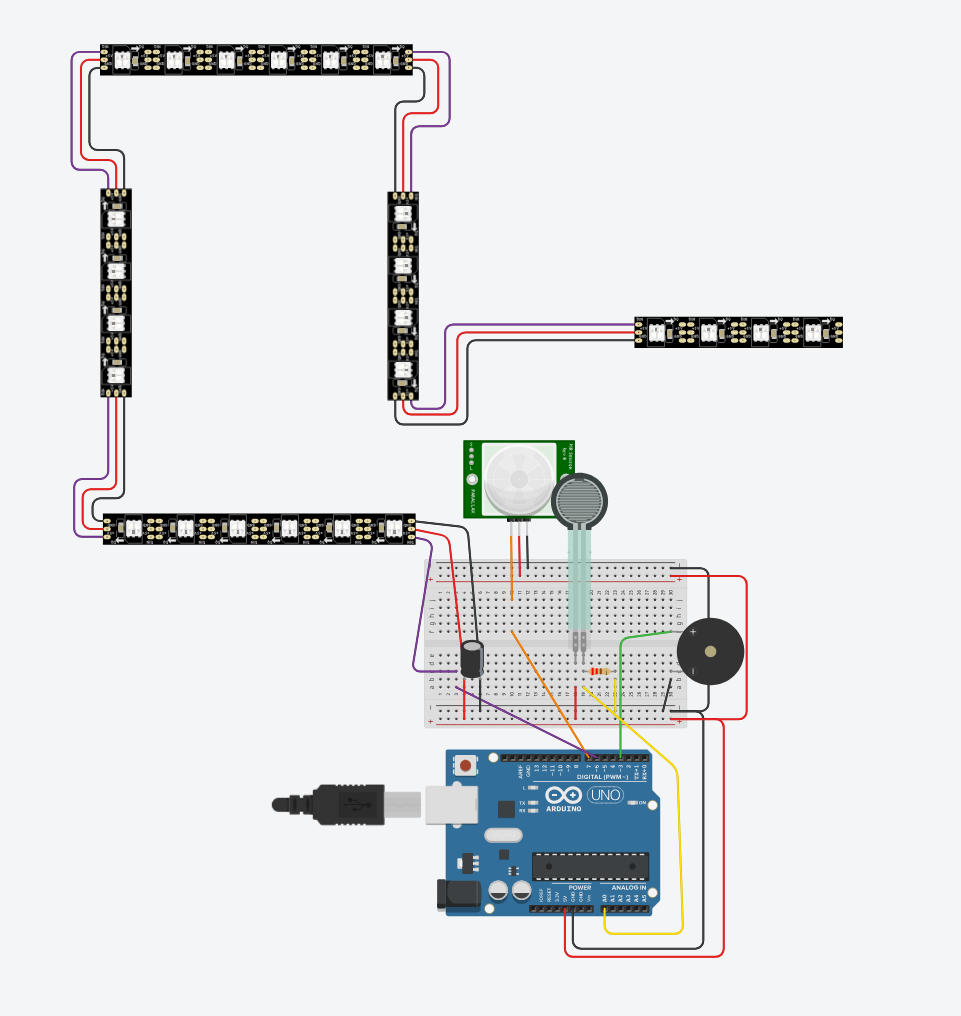
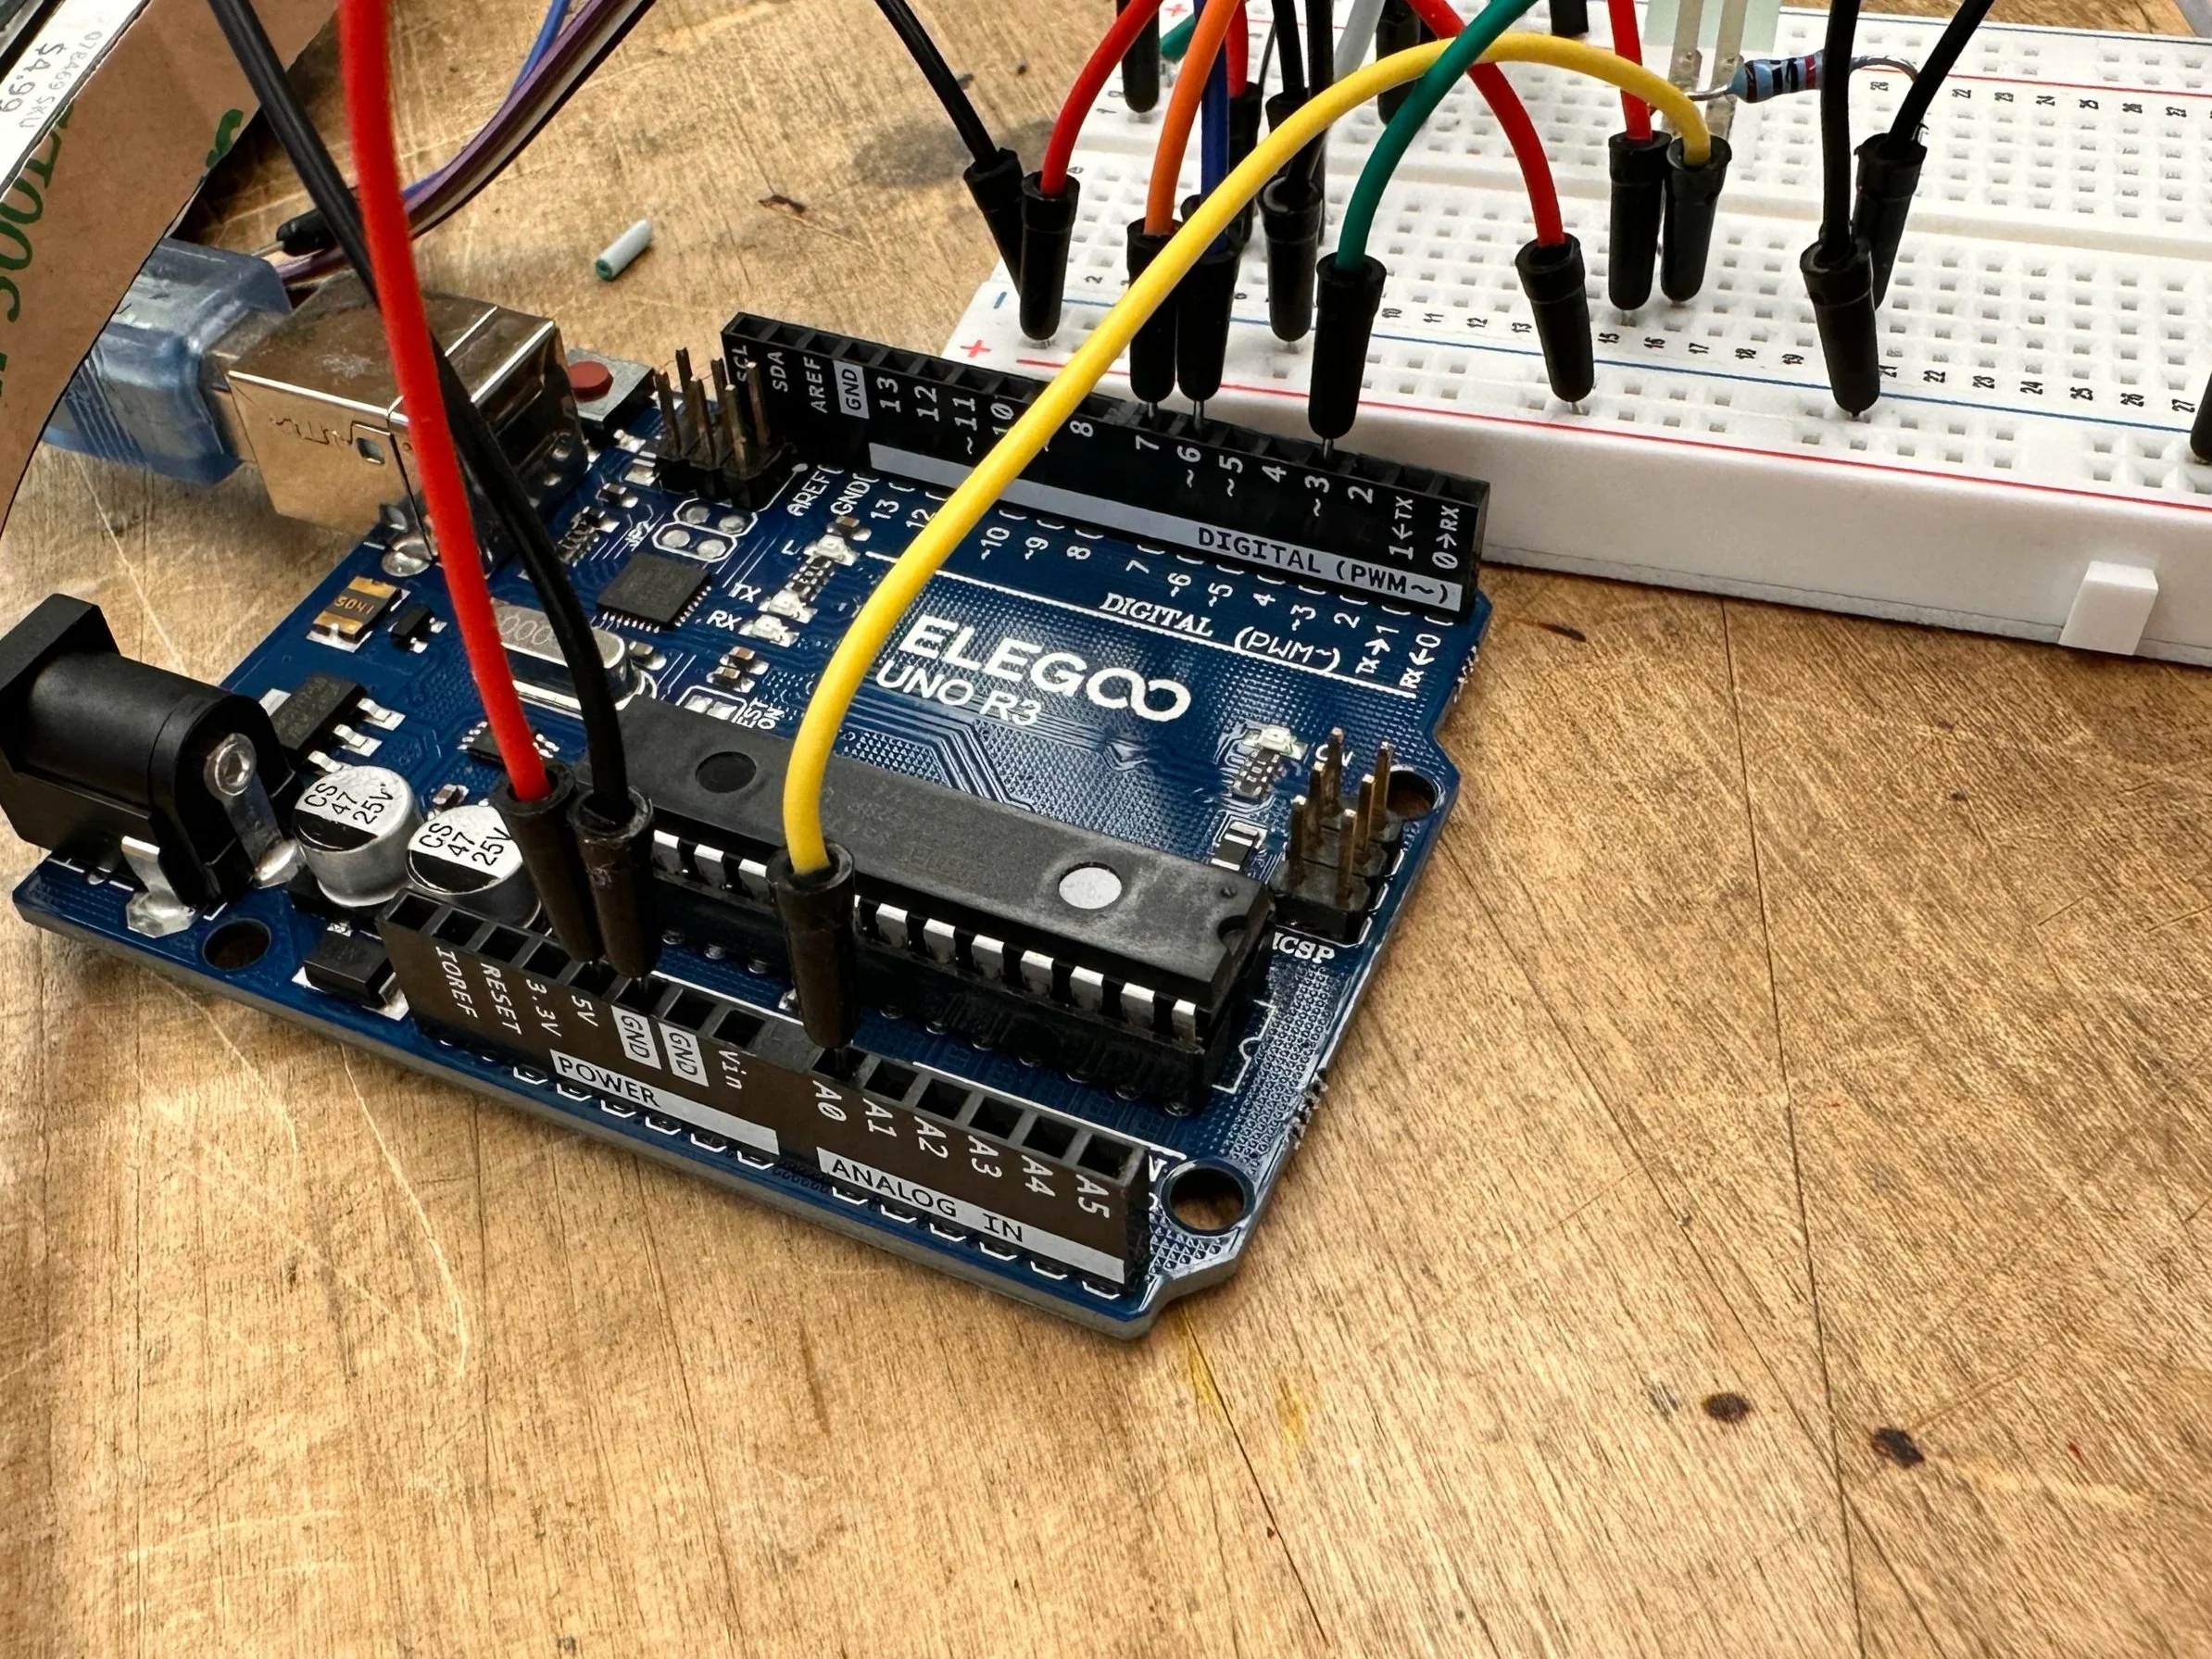
wiring Tests

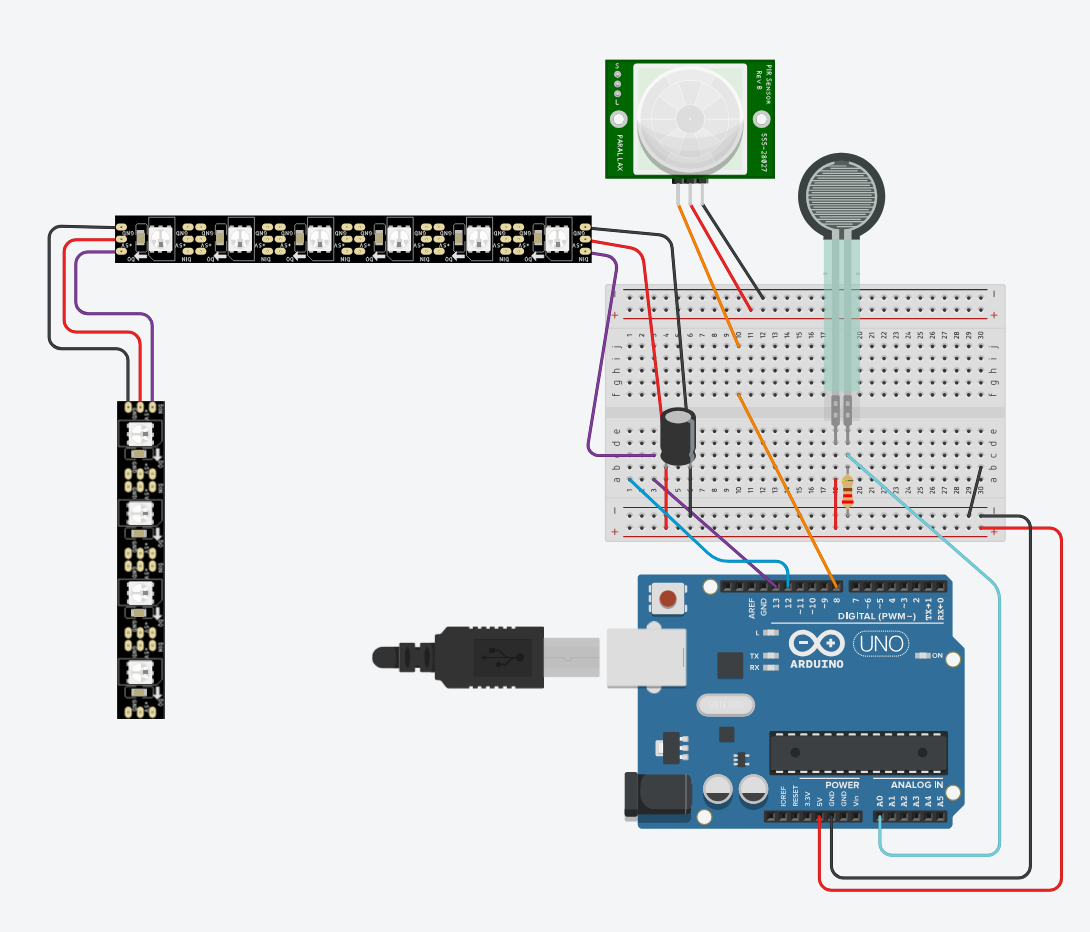
Planning and prototyping the wiring was a process that was heavy in trial and error, but all of that time built a reliable circuit that rarely fails.
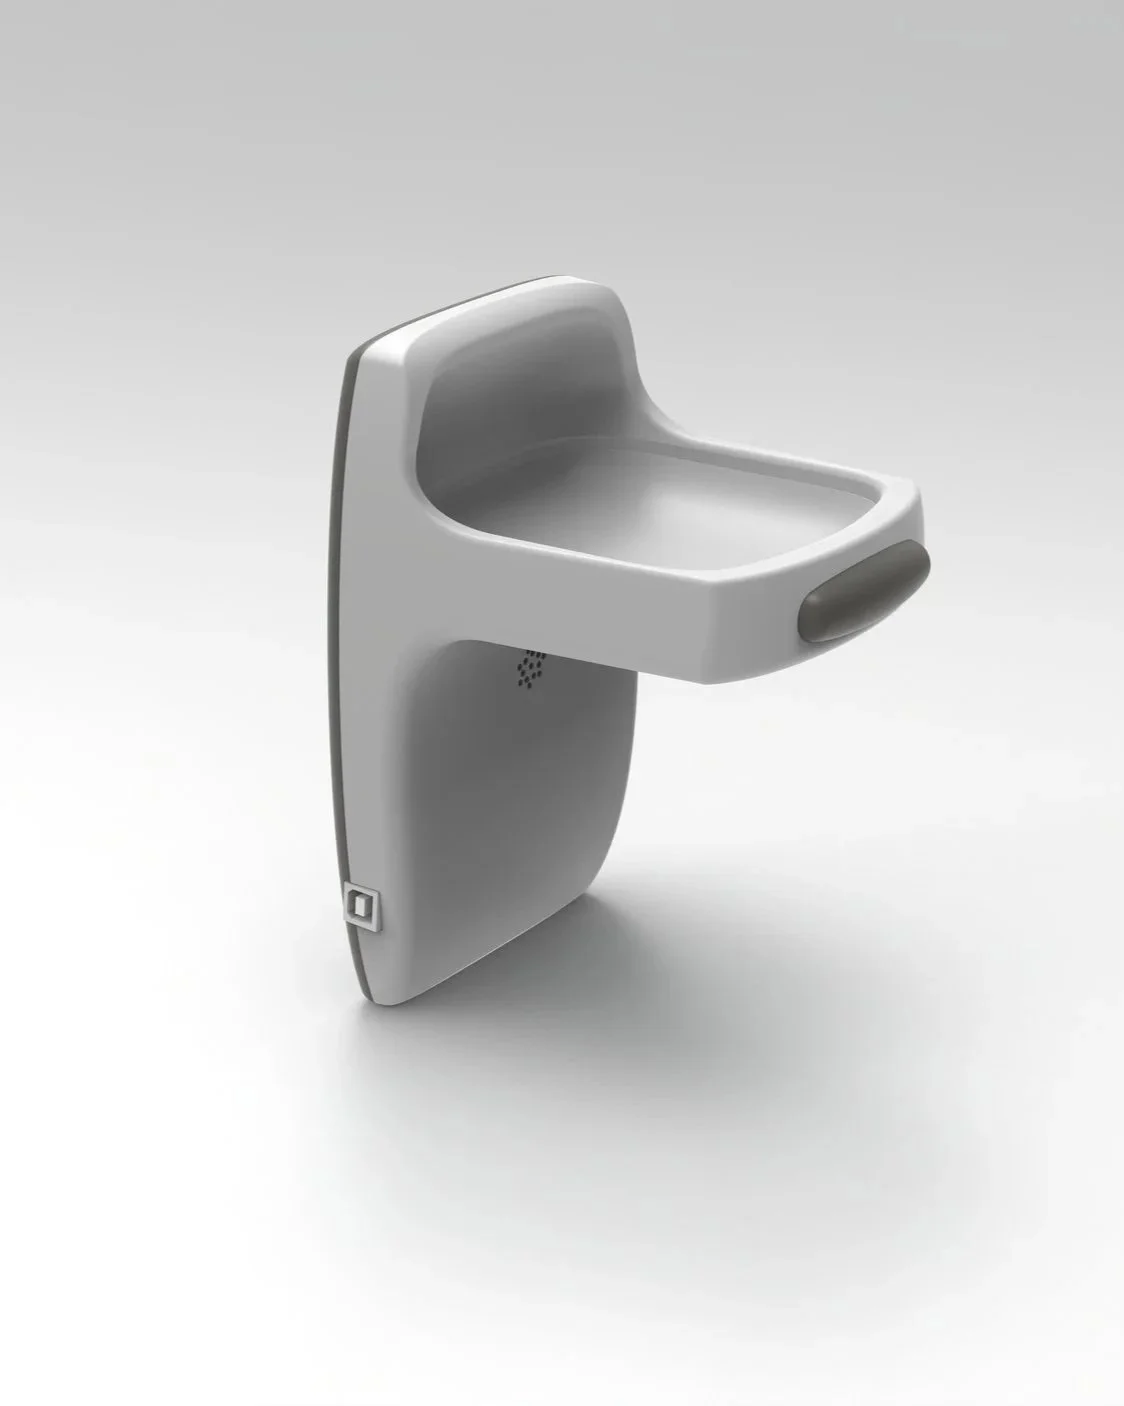
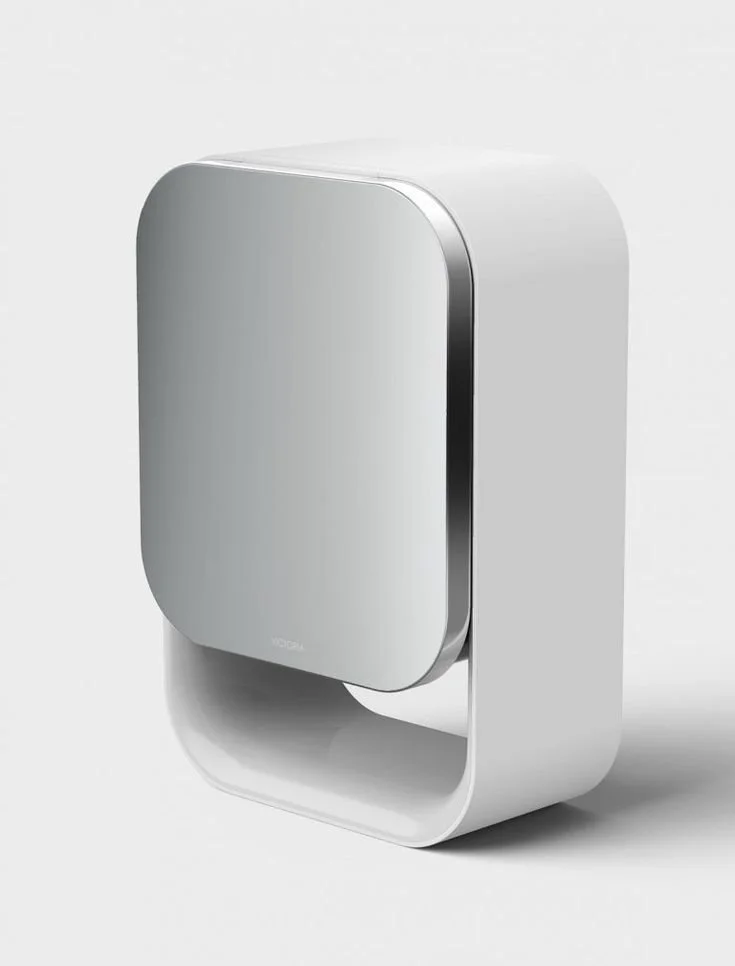
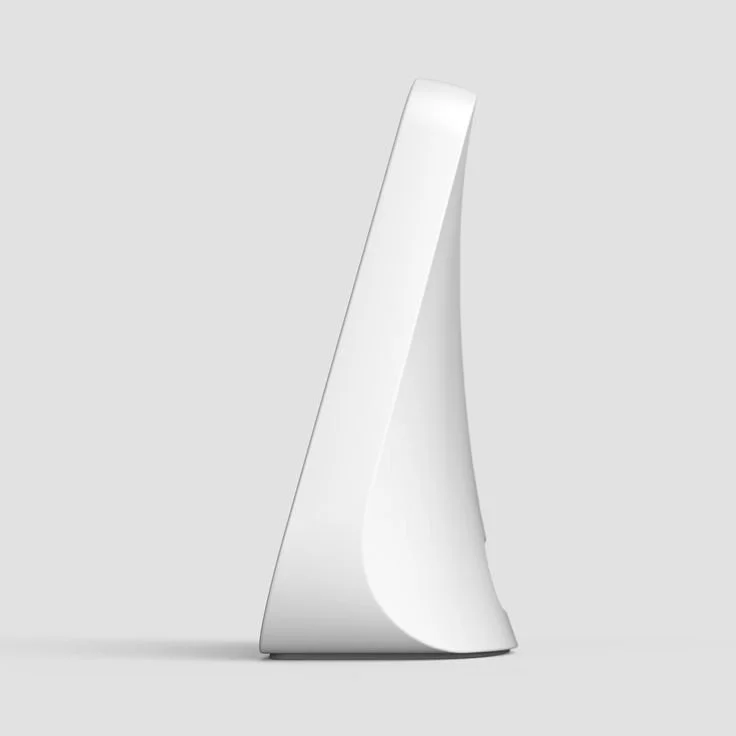
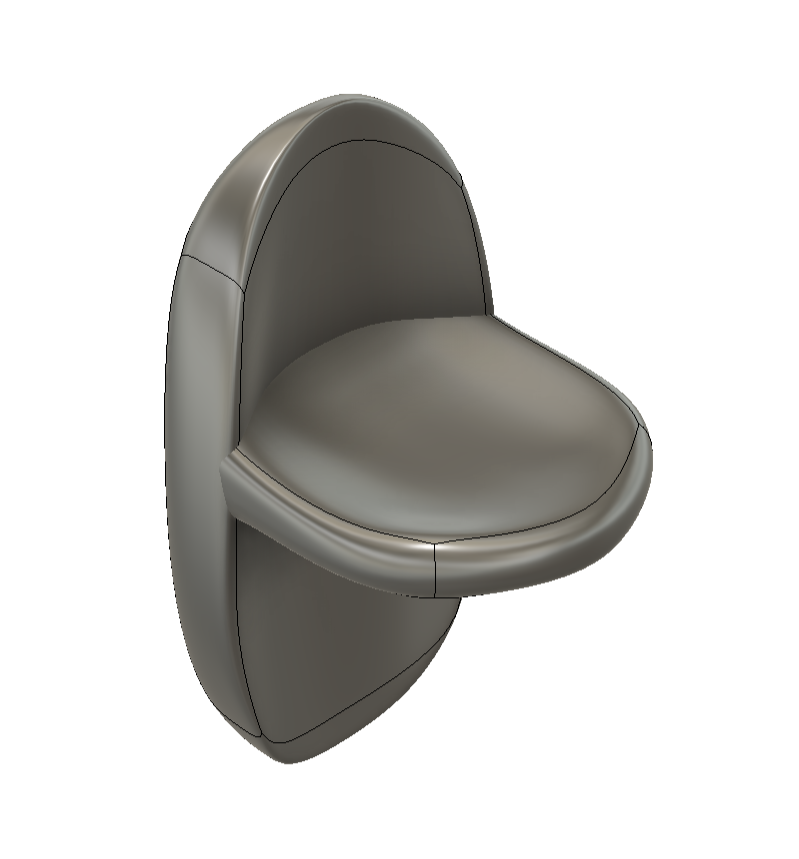
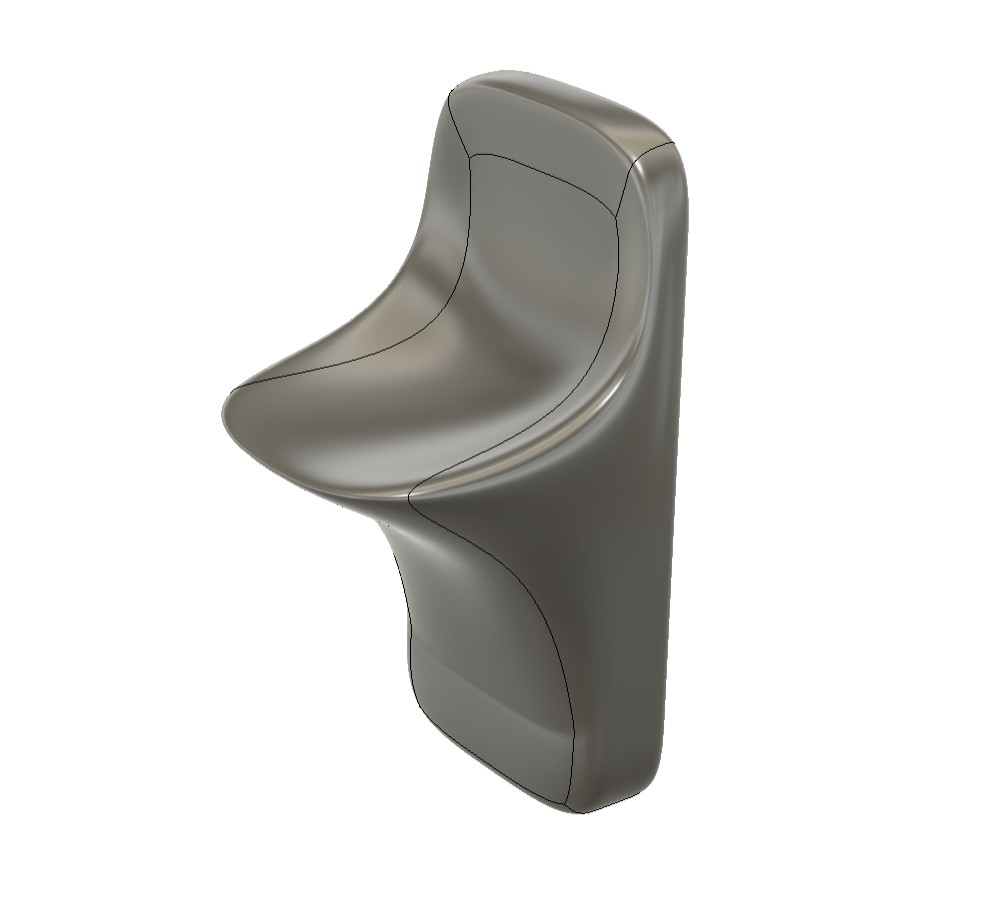
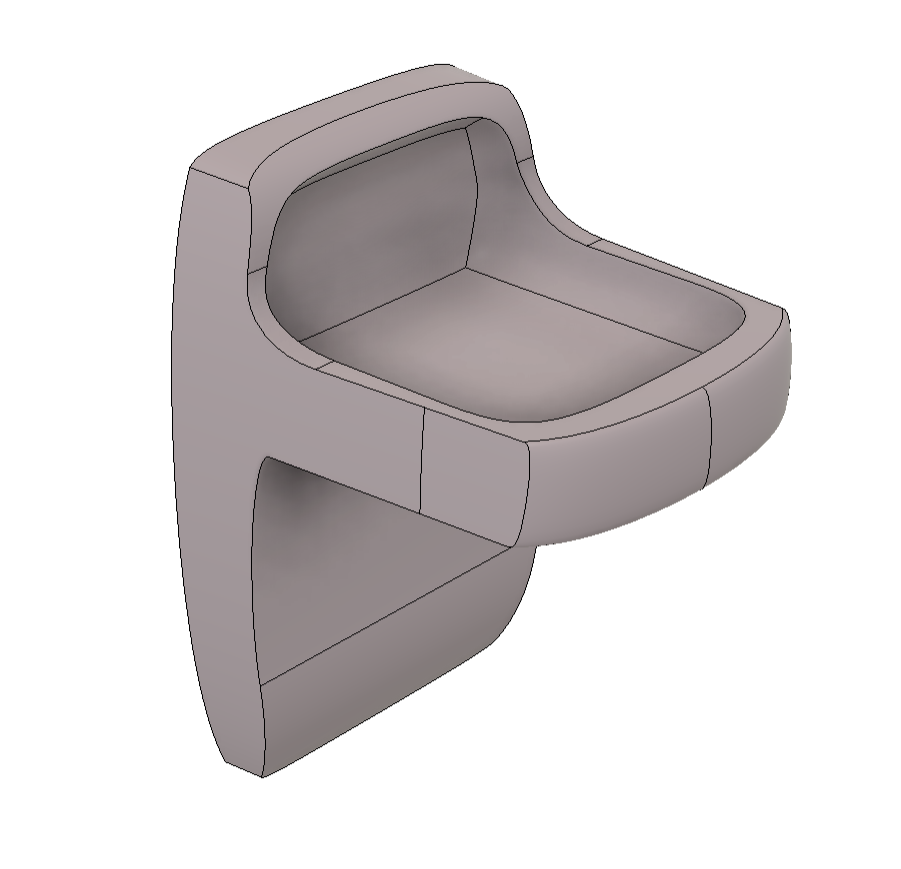
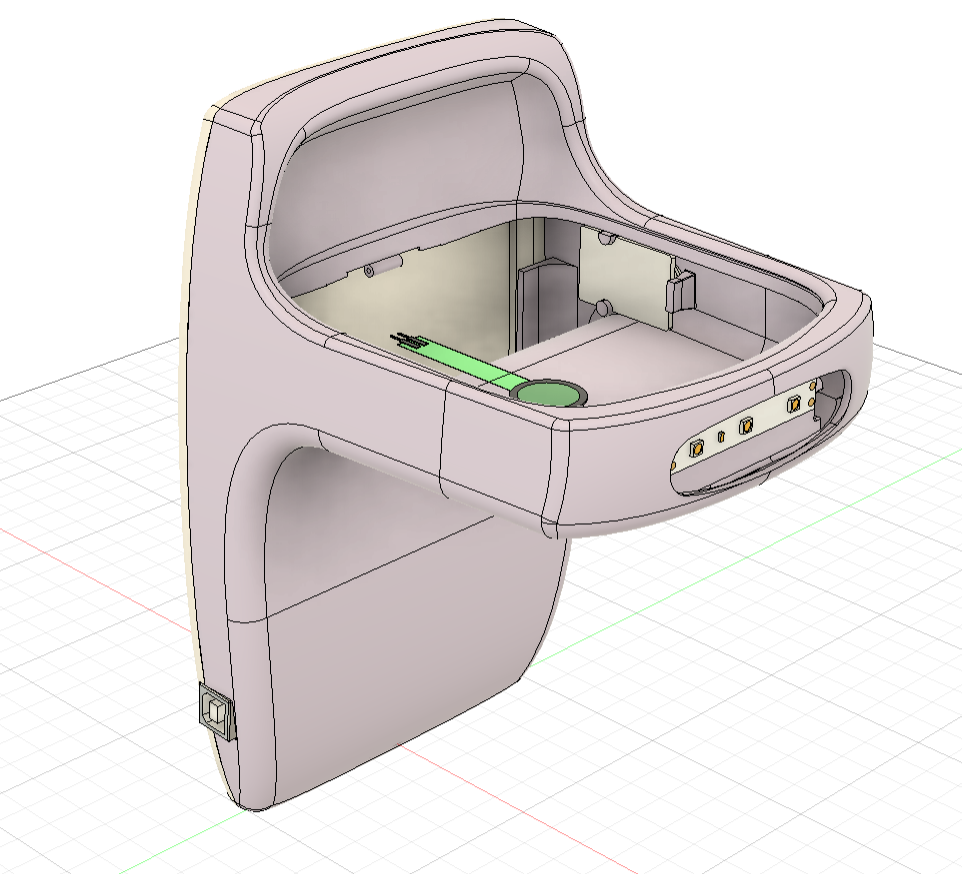
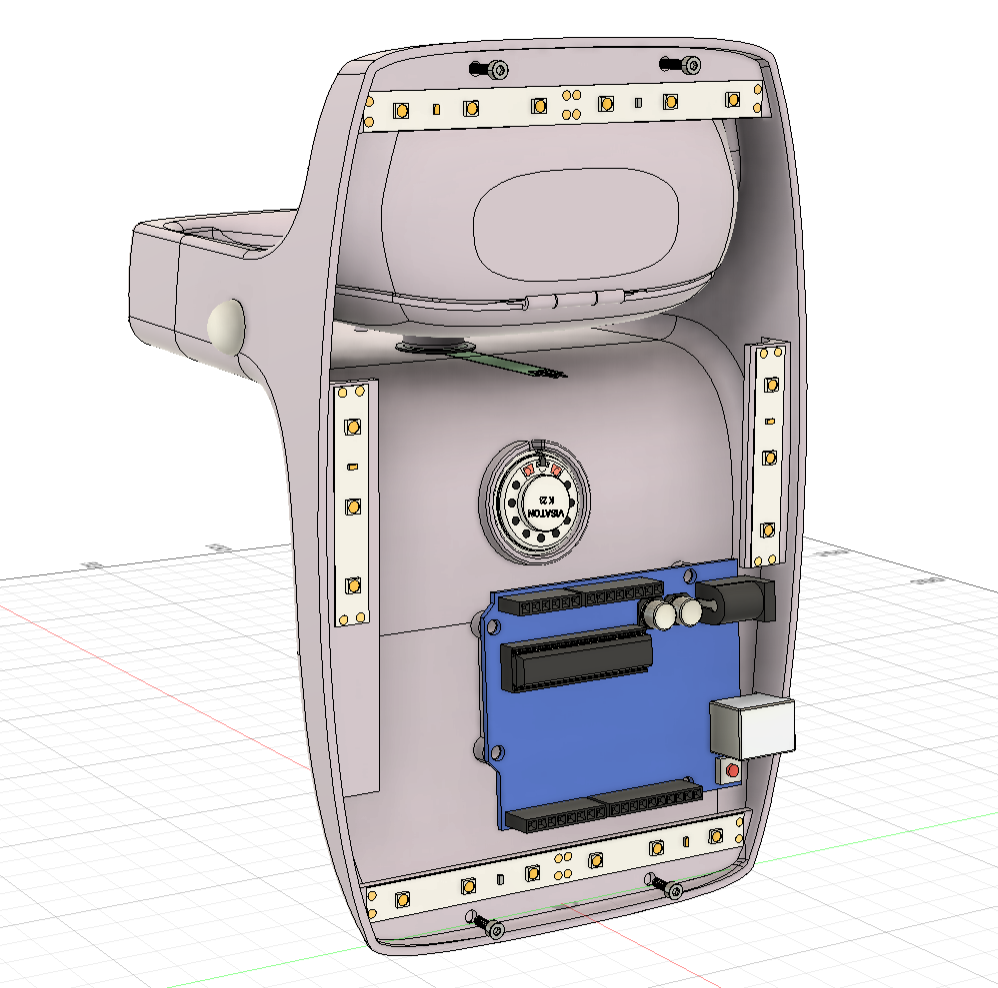
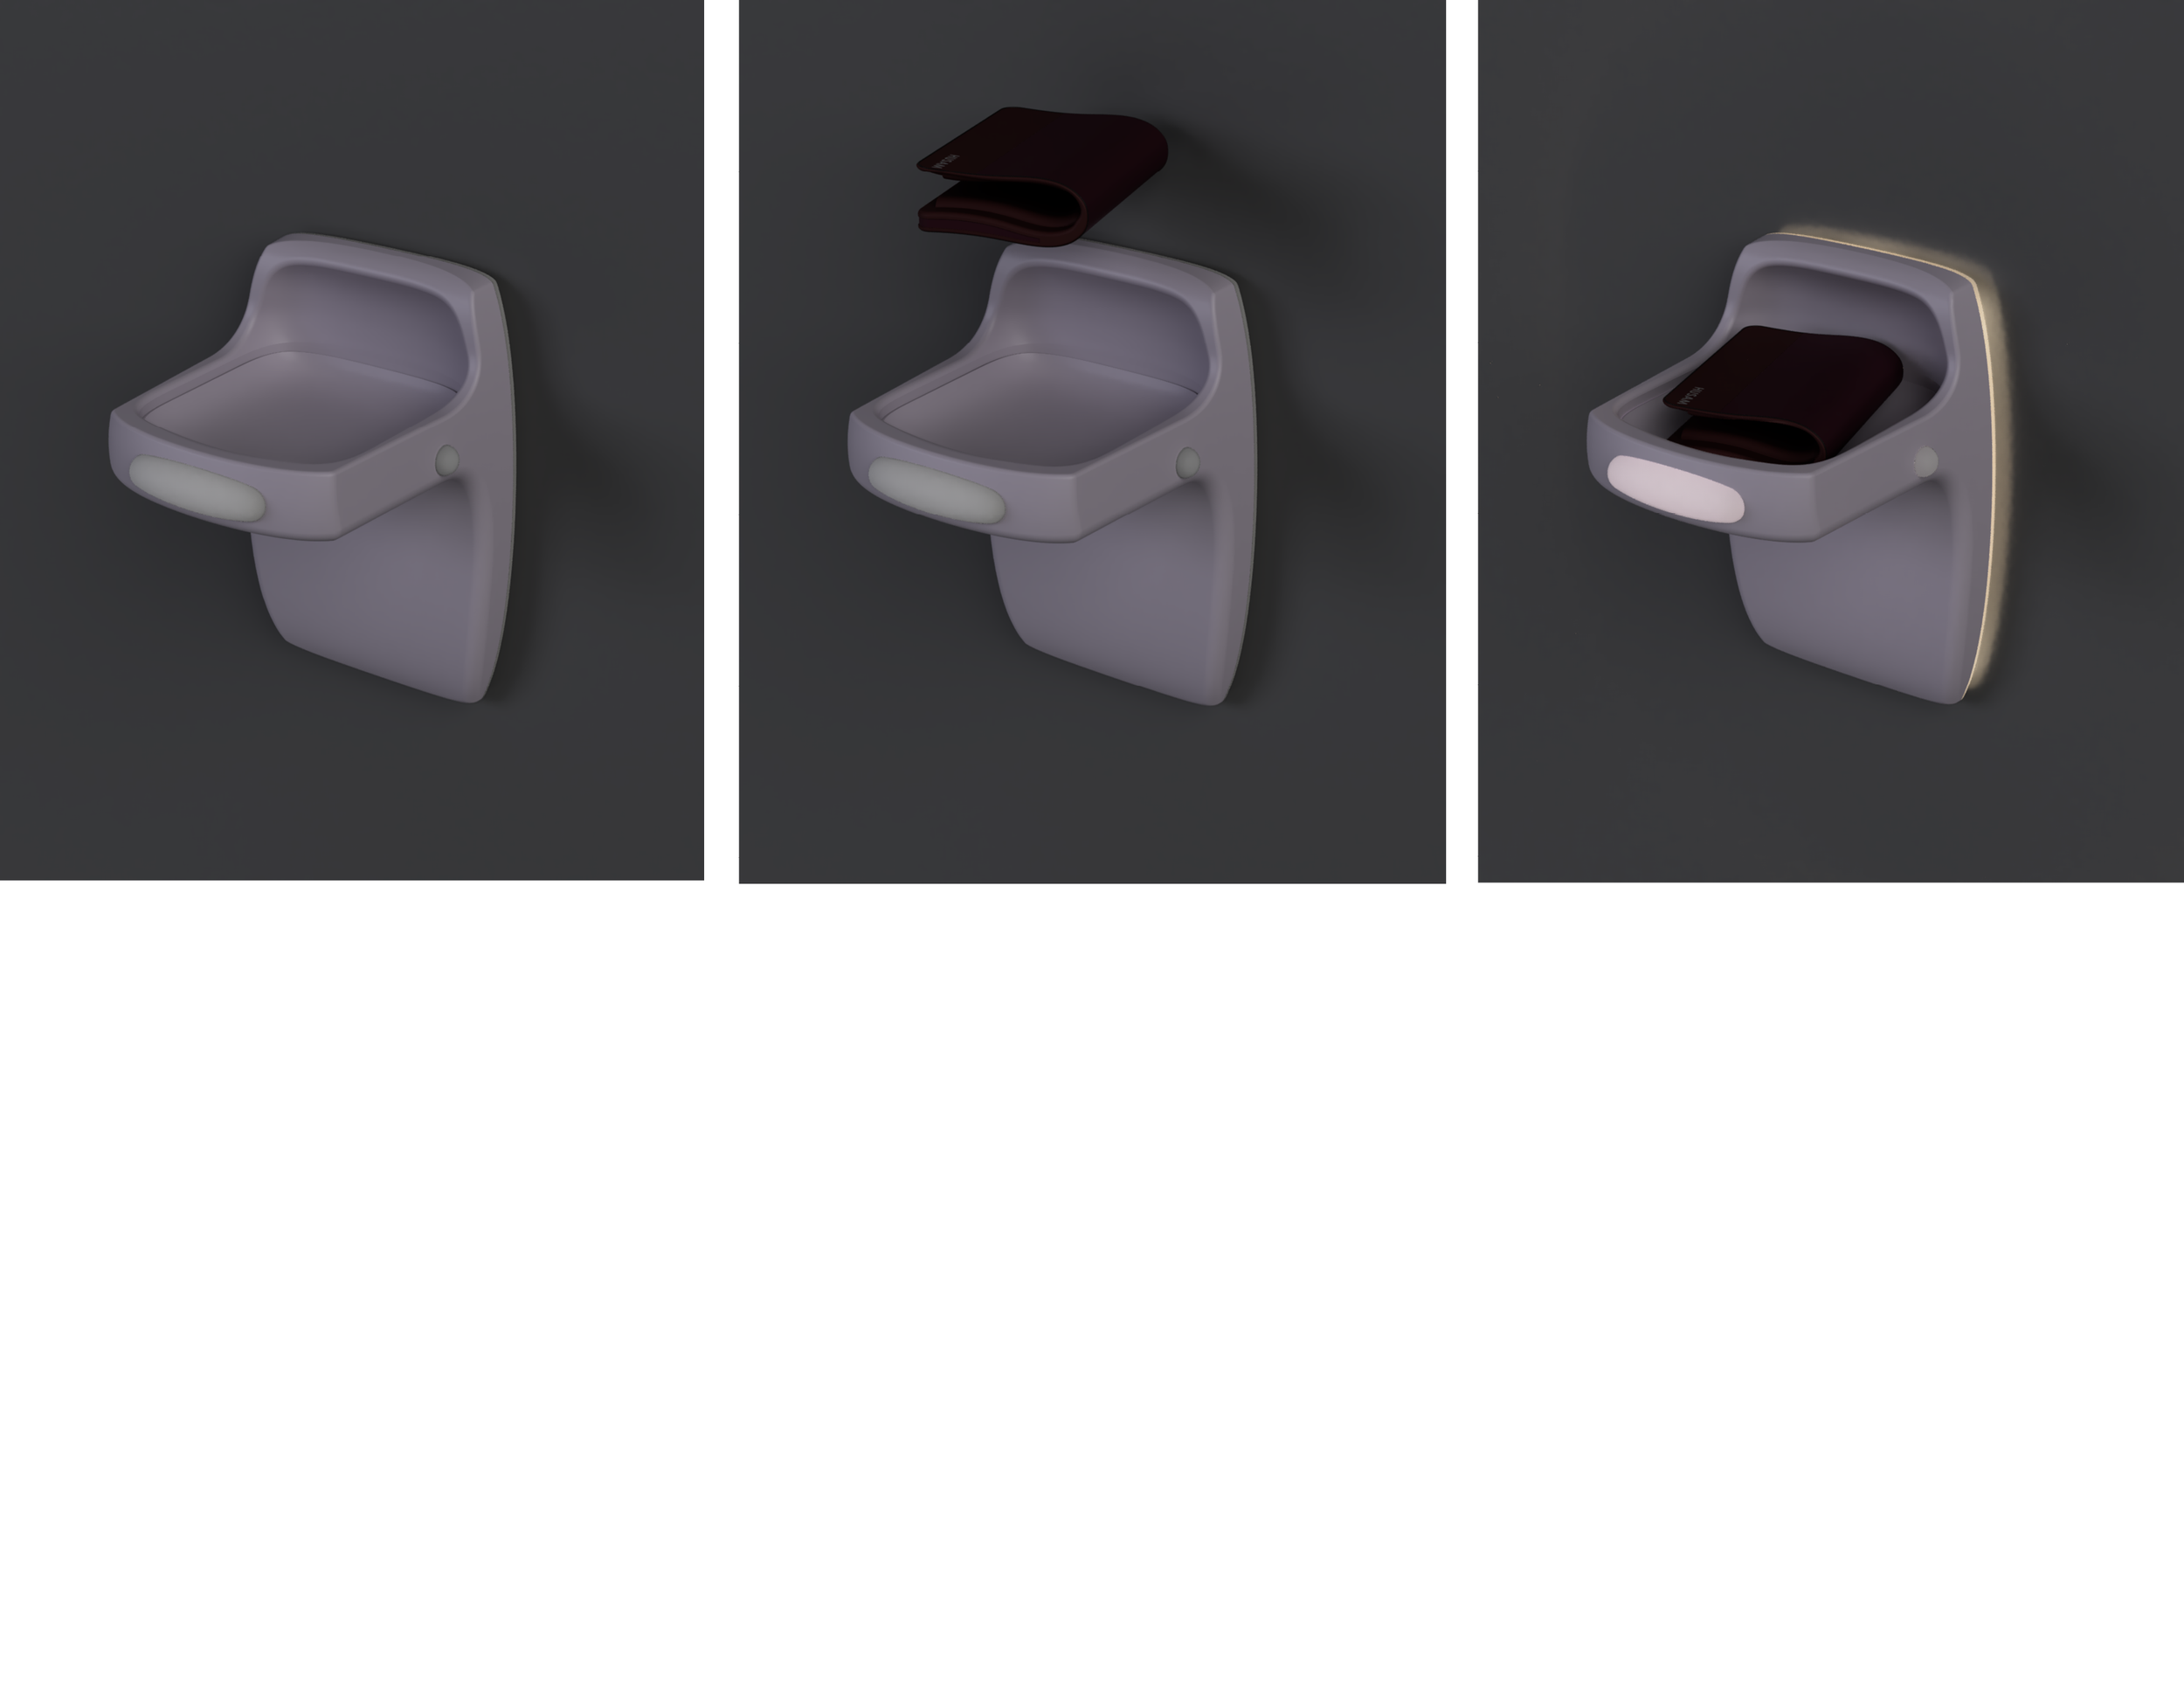
Final CAD Model

After the final tweaks were made to the model it was finalized and ready for printing and assembly.
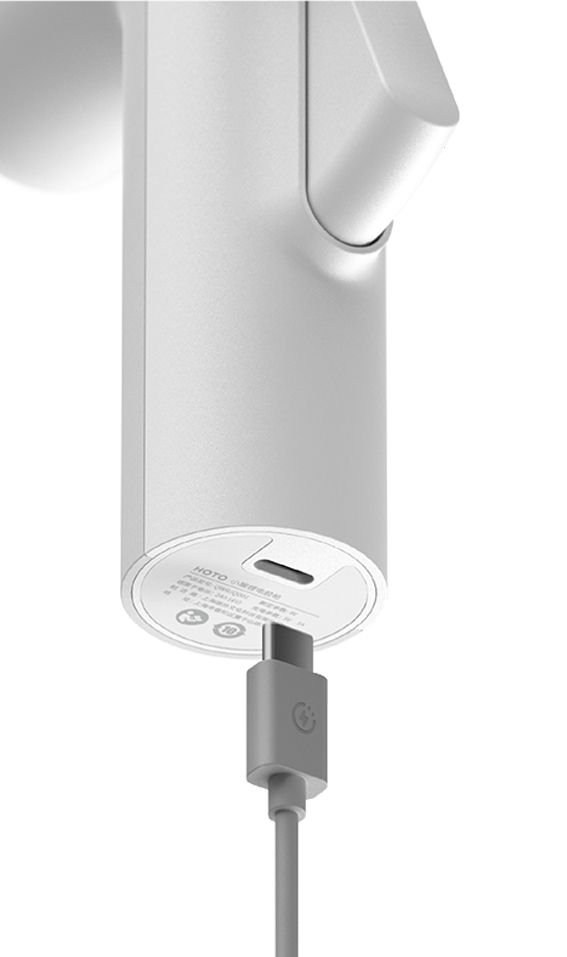
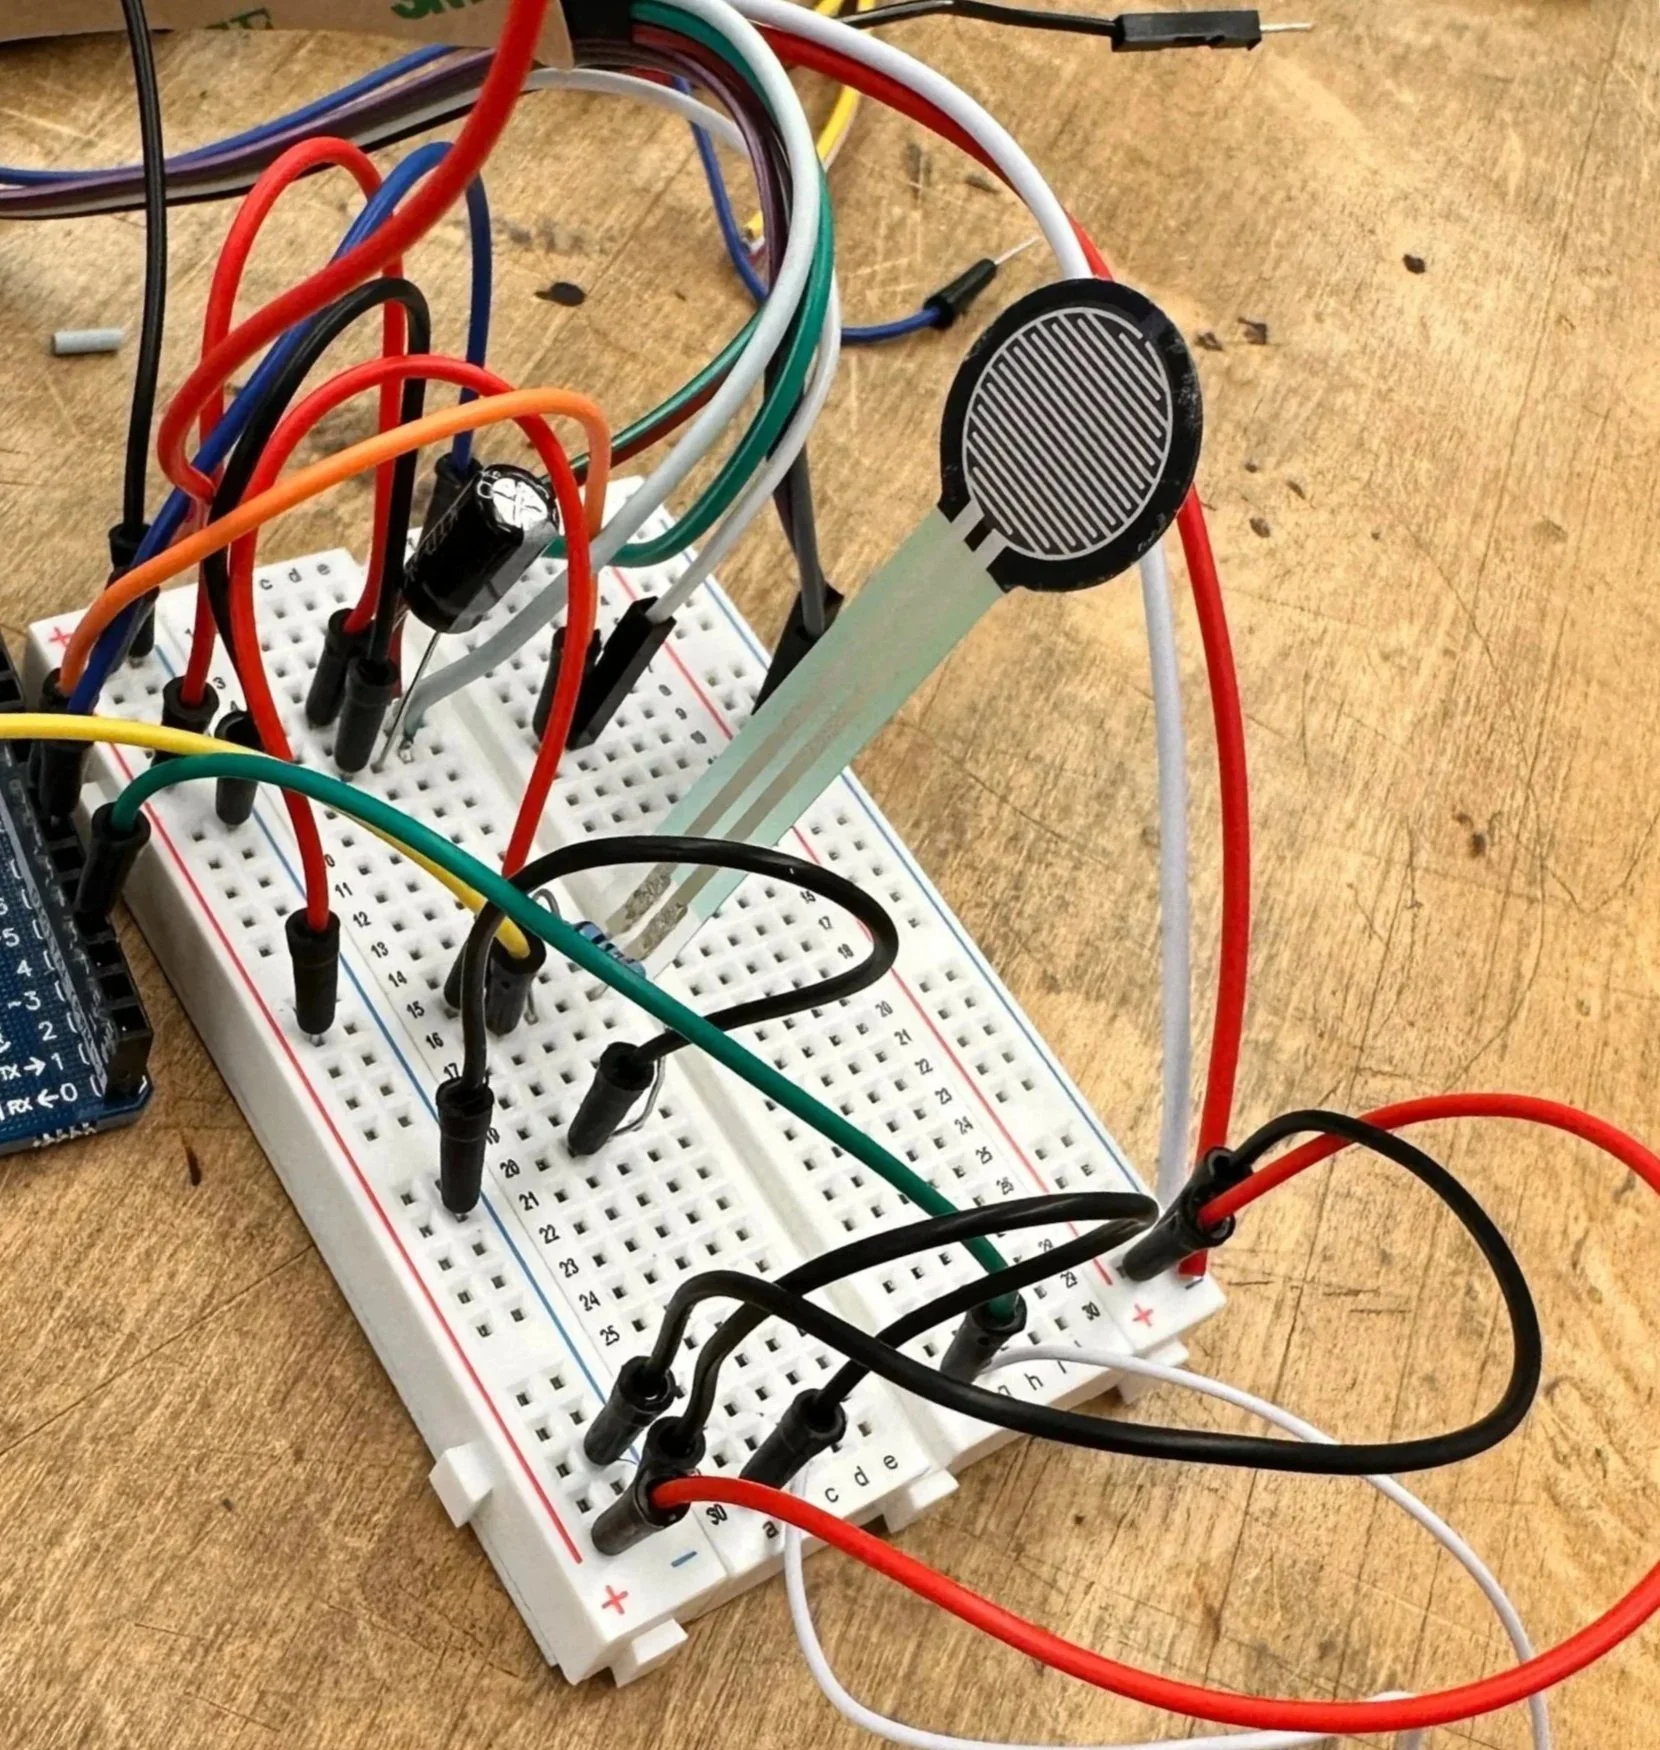
prototype Wiring
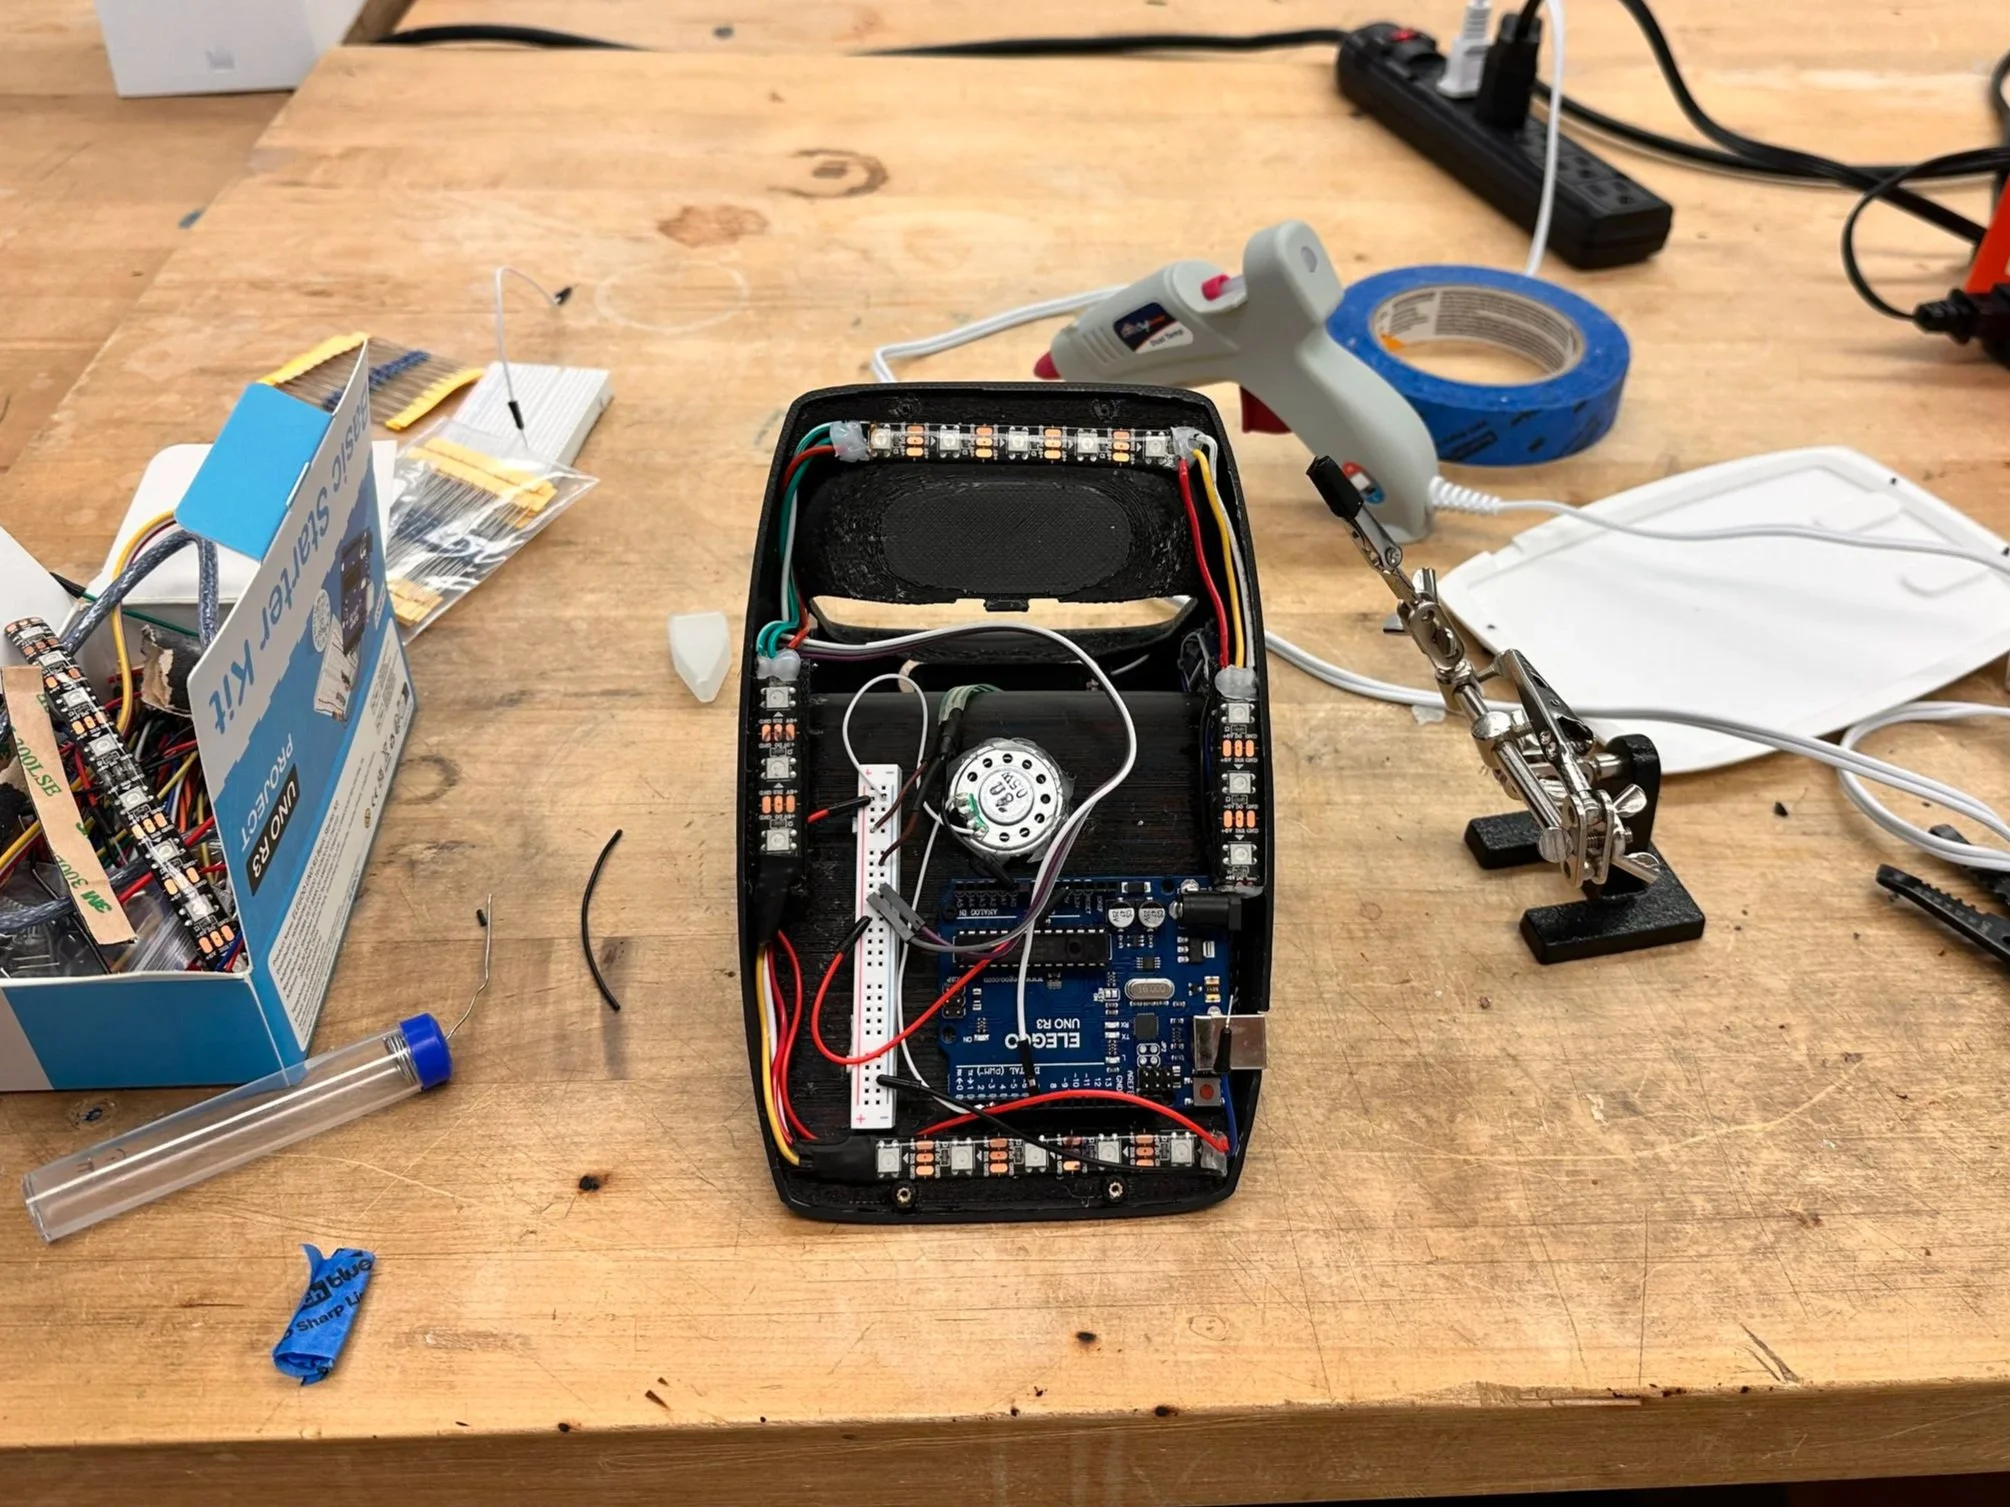
Once the print was finished the final step was to place all of the wiring
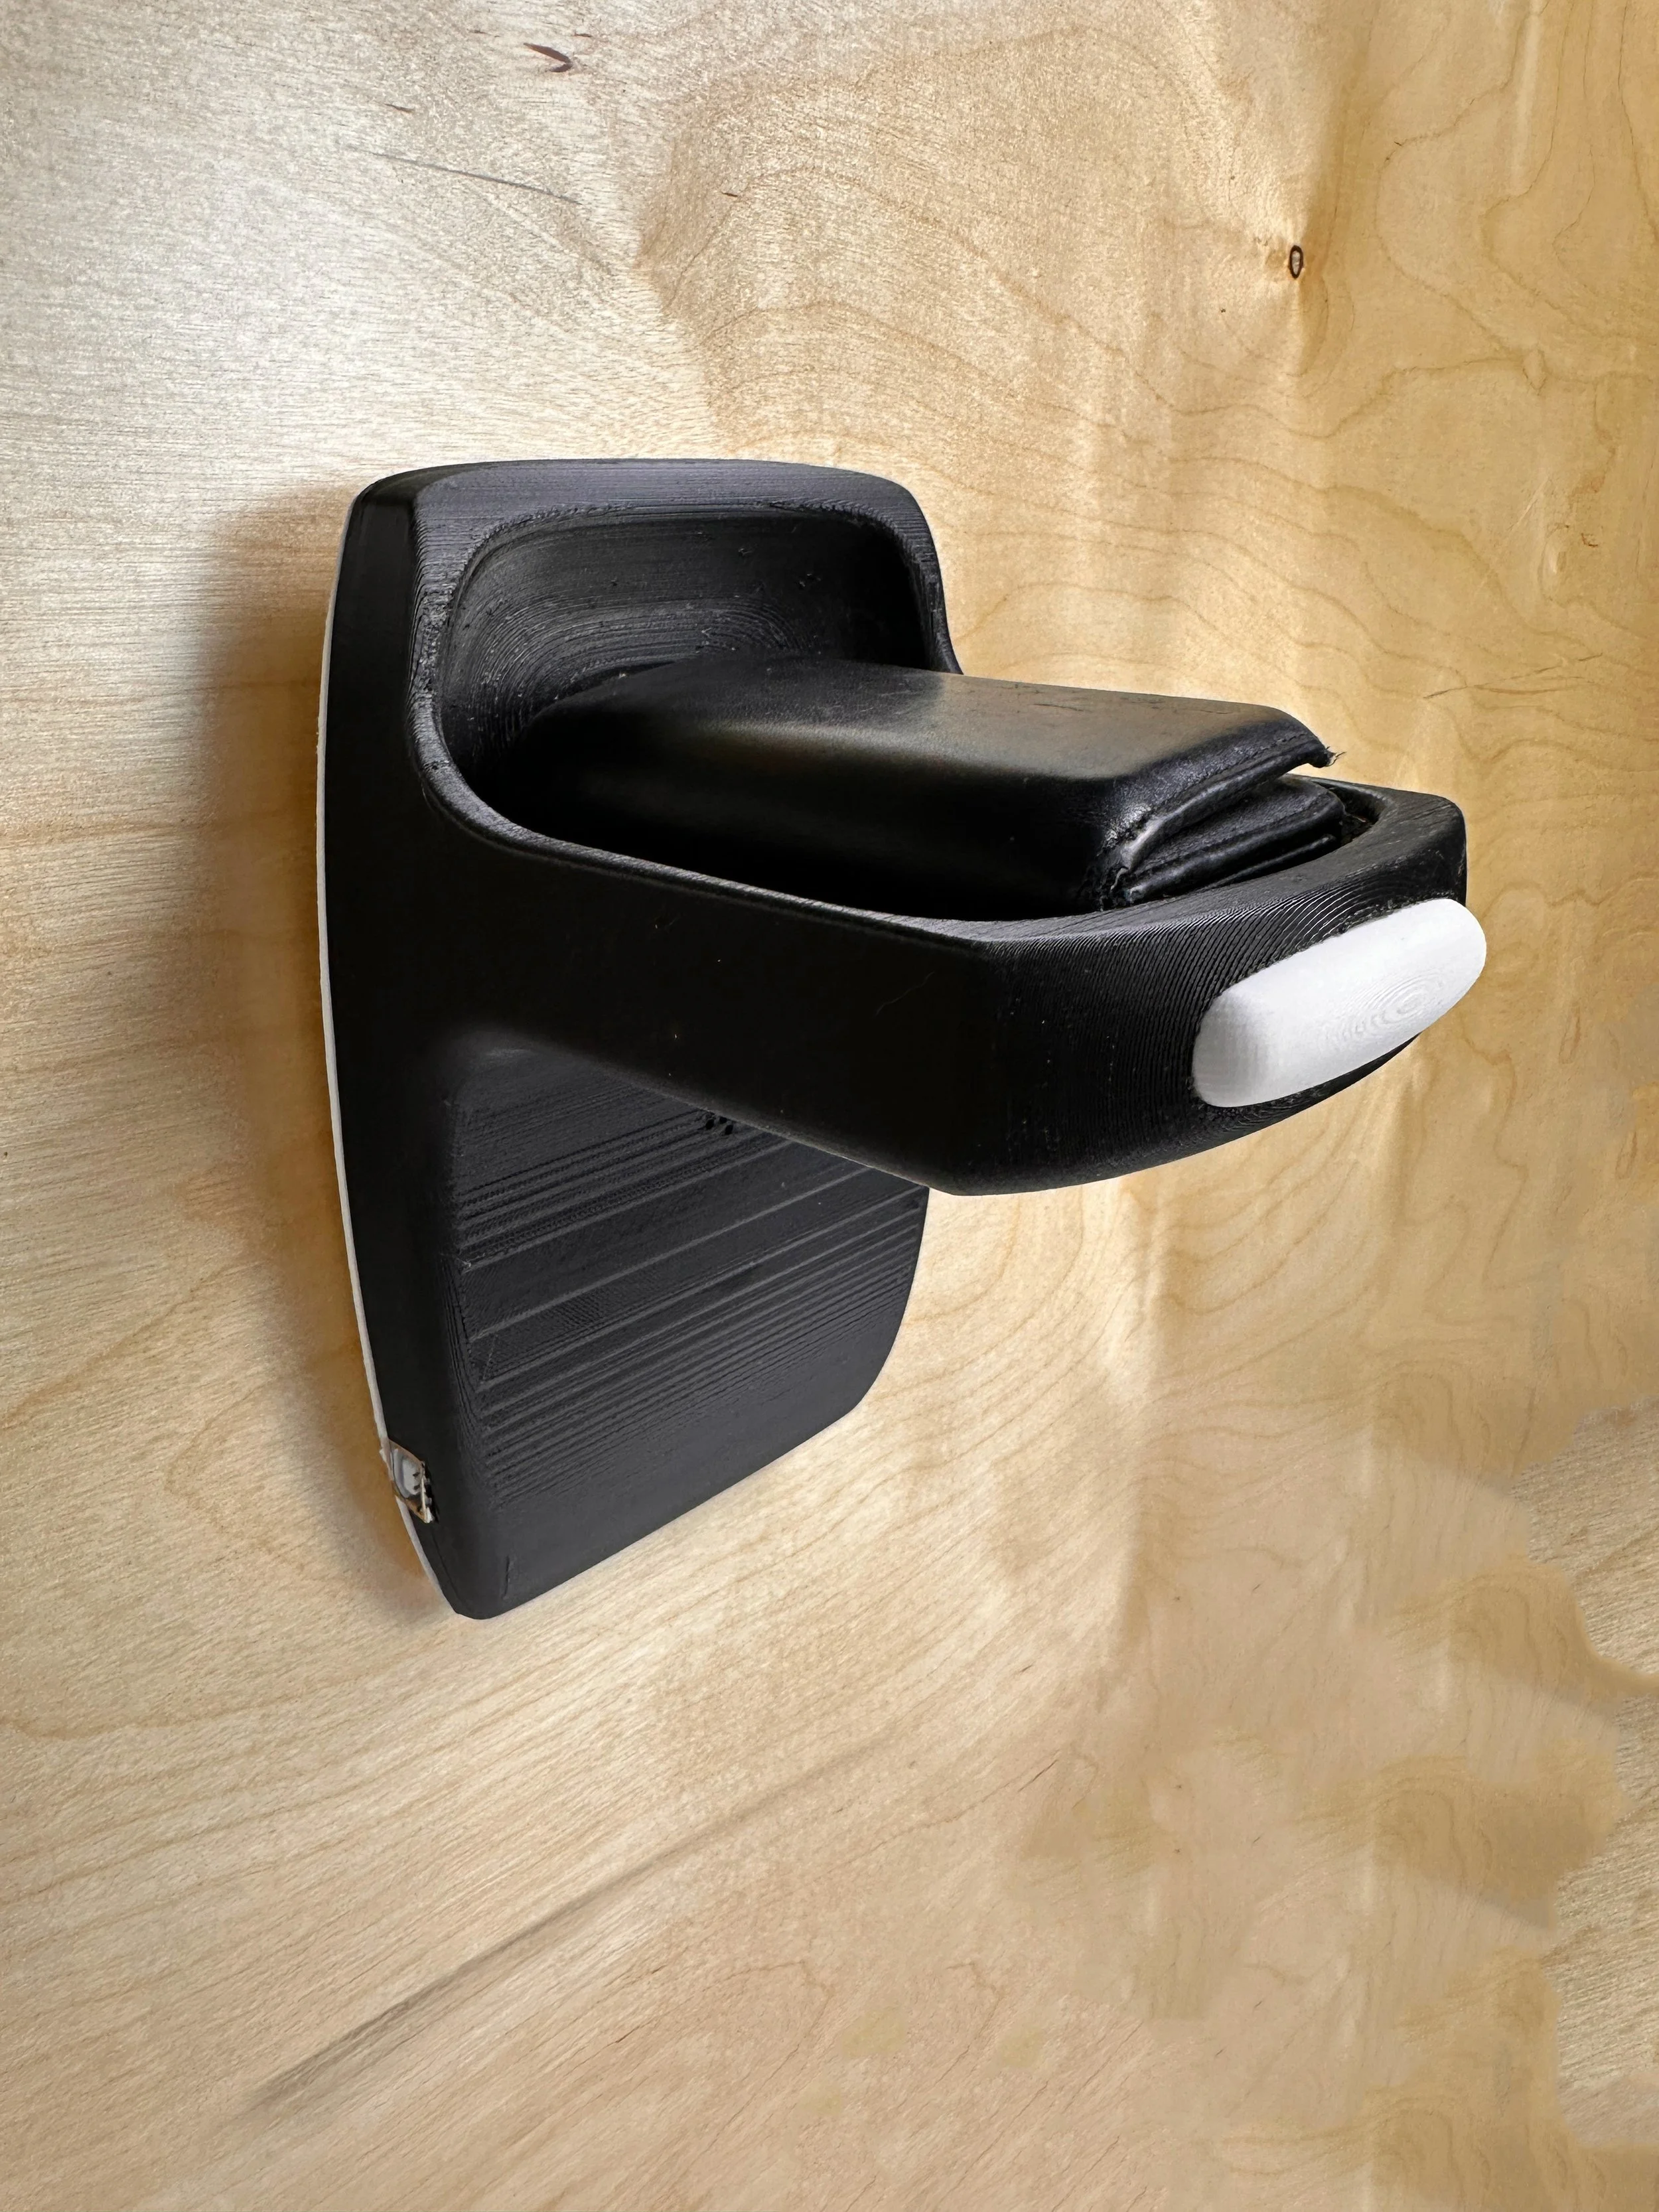
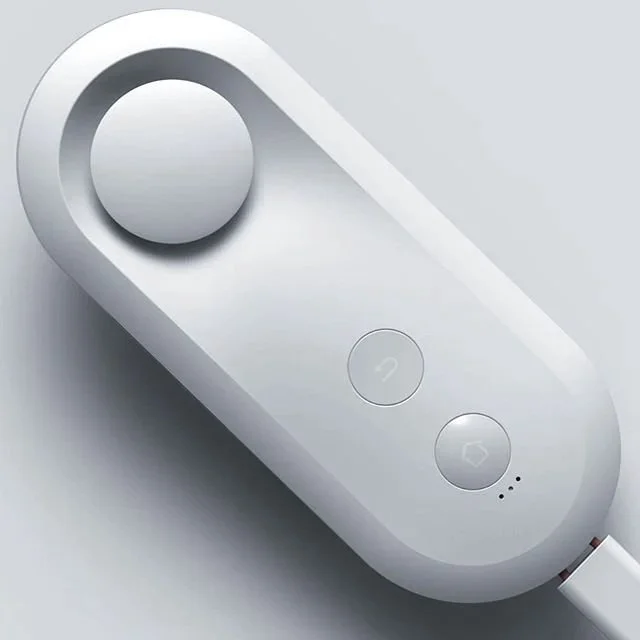
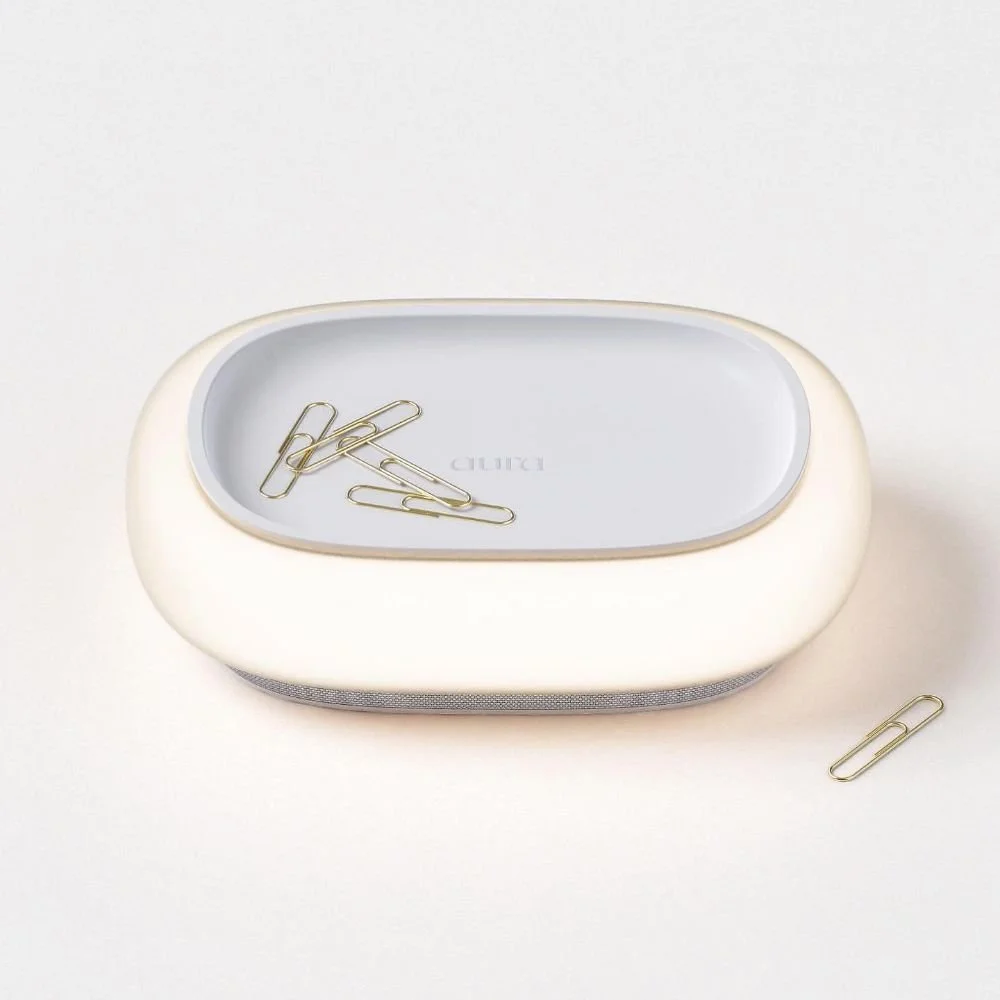
working prototype
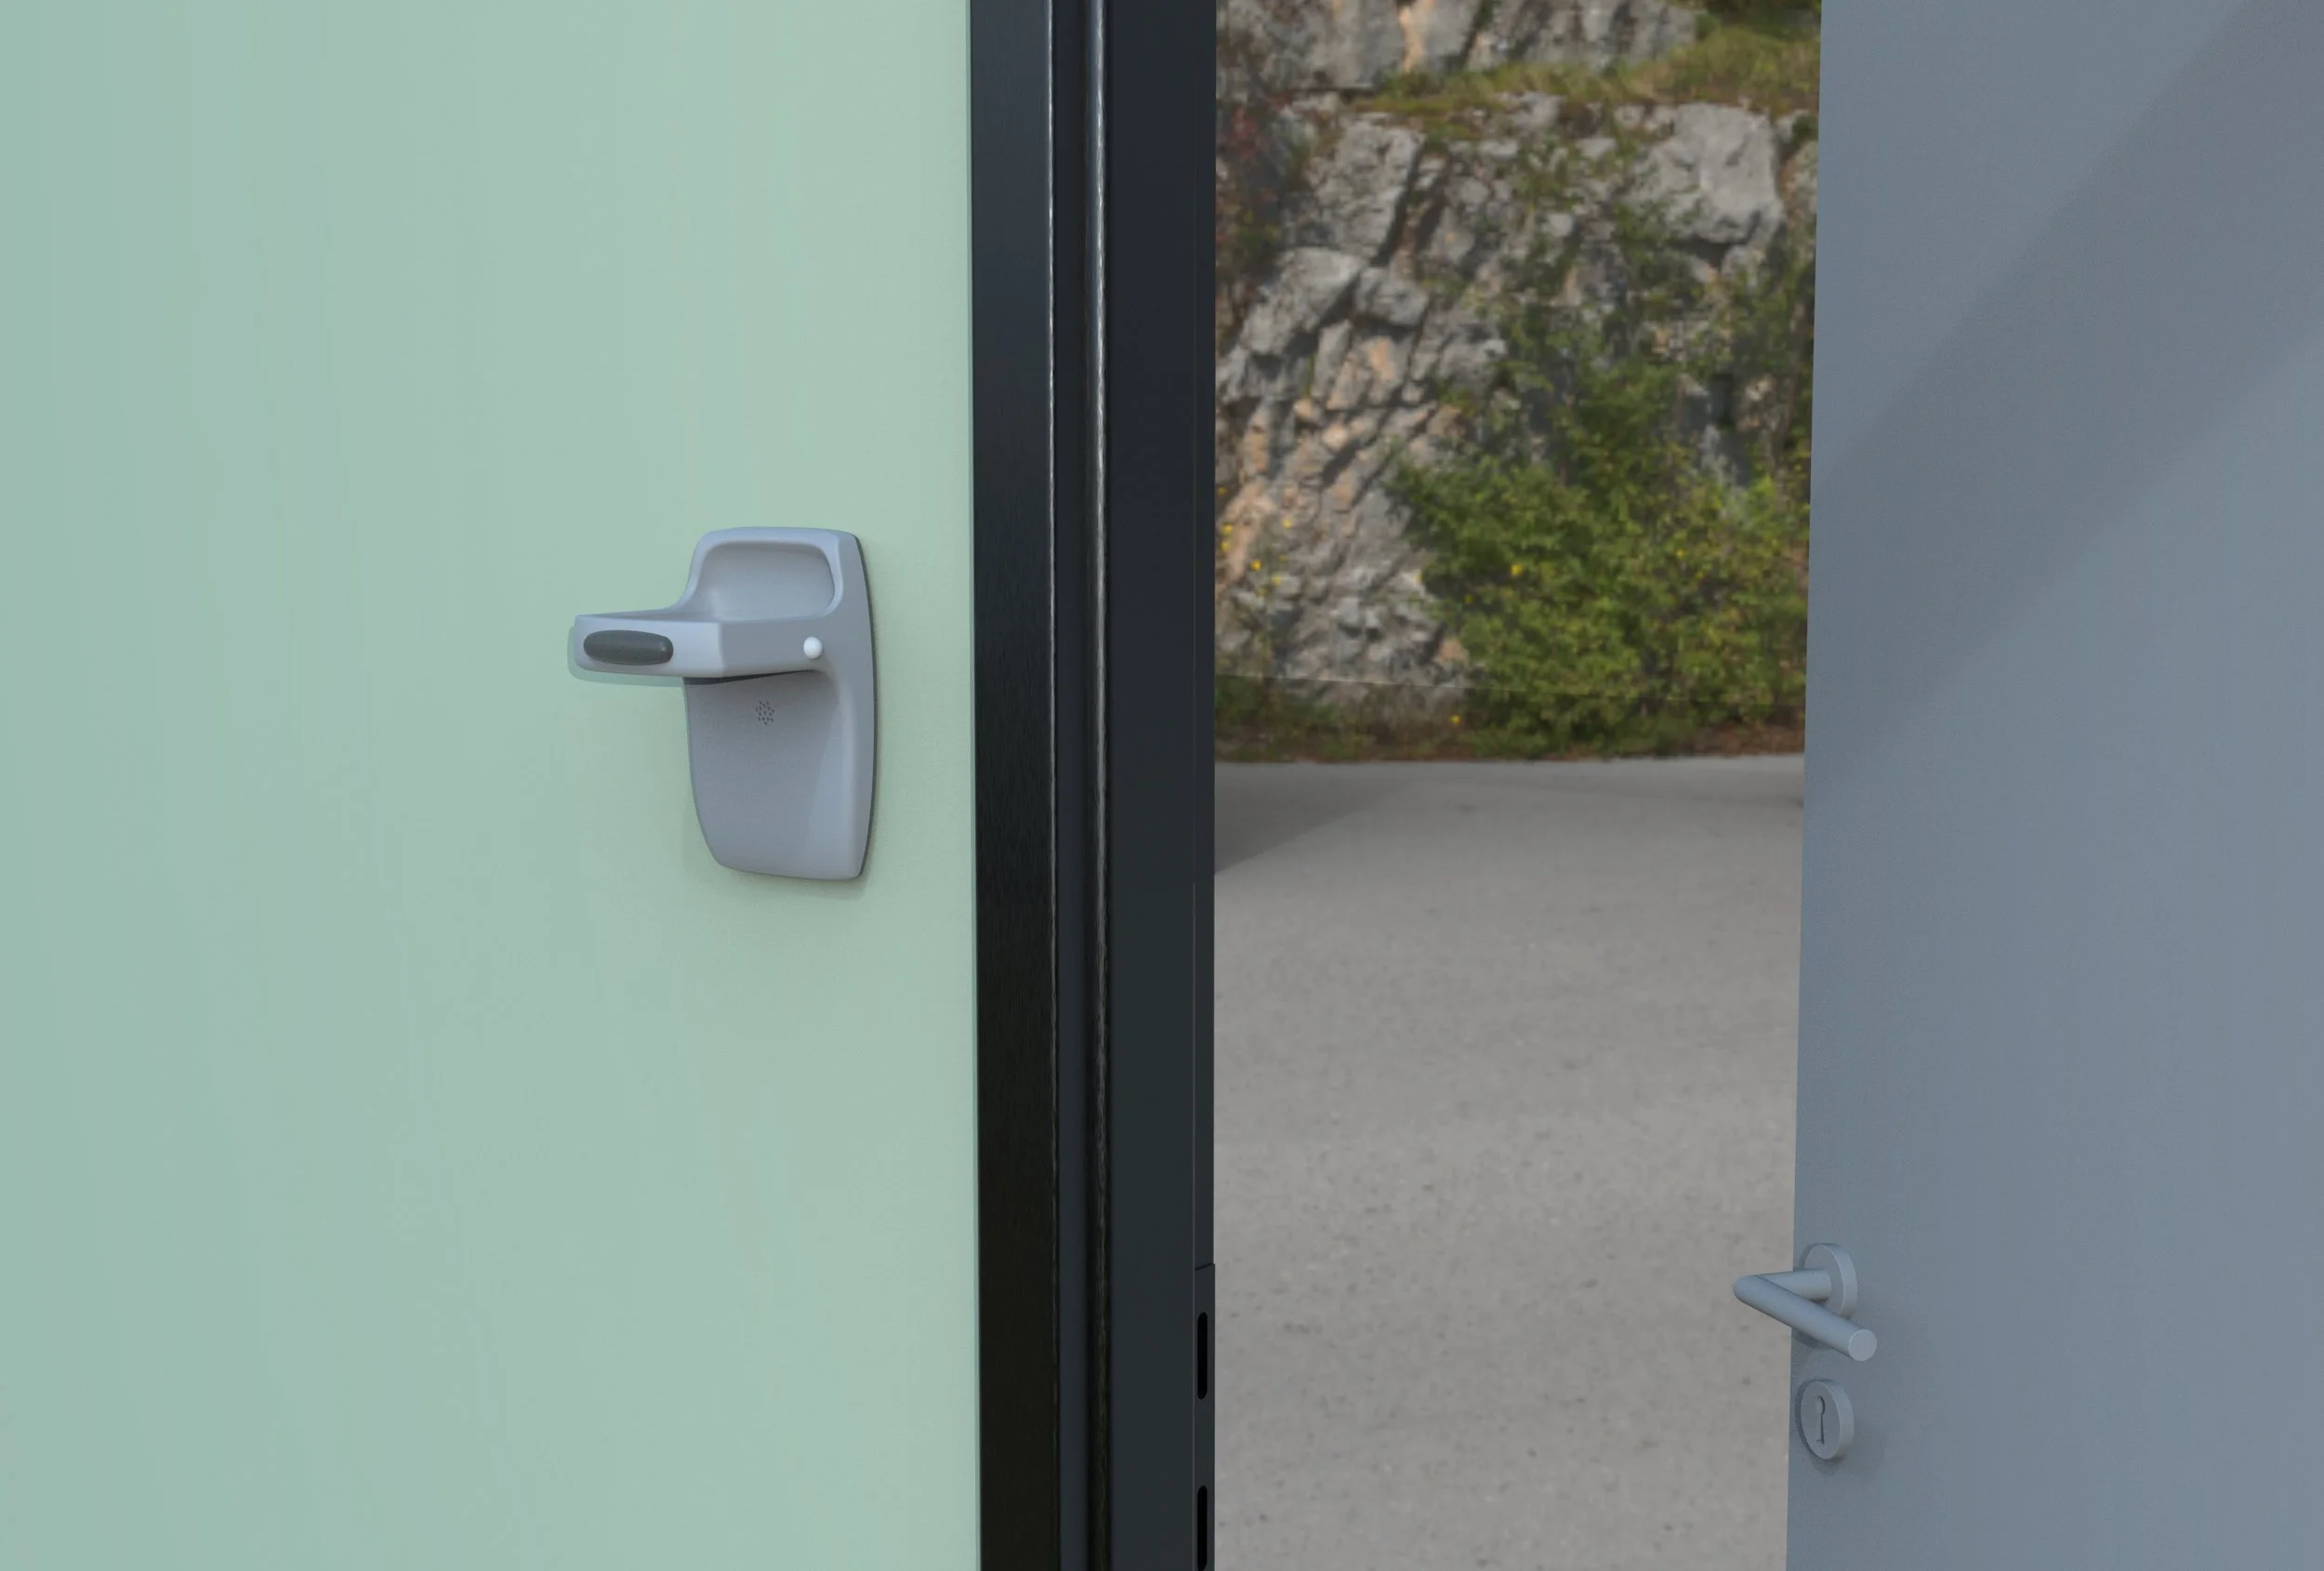
Final Renders

working prototype